Conversation List
How to Take a Photo of Video Footage from within the SimpliSafe® Mobile App
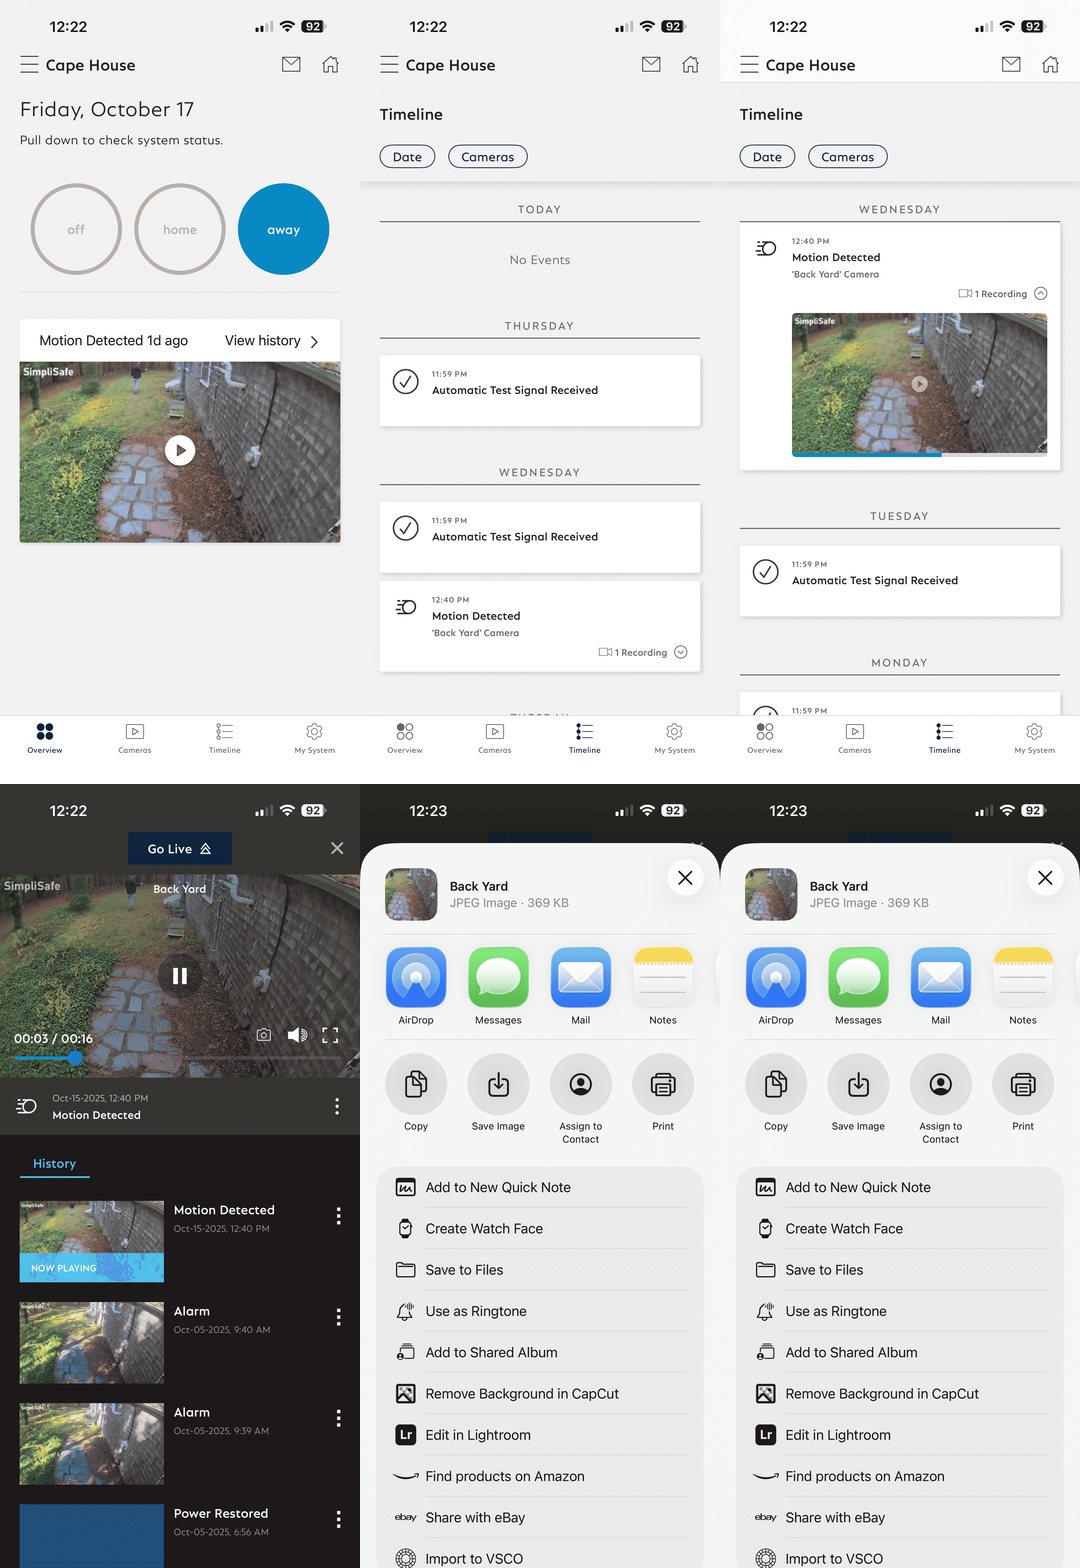
Photo capture within the SimpliSafe® Mobile App allows you to easily take a photo or screenshot of a video recording from your system timeline. You can also use the filters at the top of the timeline to filter by Date or by a specific camera to better locate the footage you wish to view.
To Use Photo Capture
Open the SimpliSafe® Mobile App on your phone or tablet
Choose Timeline from the bottom navigation bar
Tap on any motion event from your historical timeline
Press the camera icon on the video control overlay of the video
Choose Save Image to save the snapshot to your device
Note, you may need to allow SimpliSafe® permission to your photos prior to being able to save the image locally.
Help Center Article
•
Cameras
Unable to Set Up a Camera Because it is Already Associated With Another Account
Why does this error happen?
This error usually occurs because this camera is already associated with another account. To deter theft, we do not allow a camera to be added to an account without being fully removed from the original account.
This tends to occur when a camera is purchased second-hand. The previous owner may have forgotten to remove the camera from their account. Unfortunately, SimpliSafe is unable to override this. The previous owner must remove the camera from their account.
How can I resolve this?
If you are able to contact the previous owner and ask them to remove the camera from their account, you should be able to resolve this matter rather quickly. The previous owner would need to visit the settings page of the camera in question, scroll to the bottom, and press the button for “Remove Camera”.
Help Center Article
•
Cameras
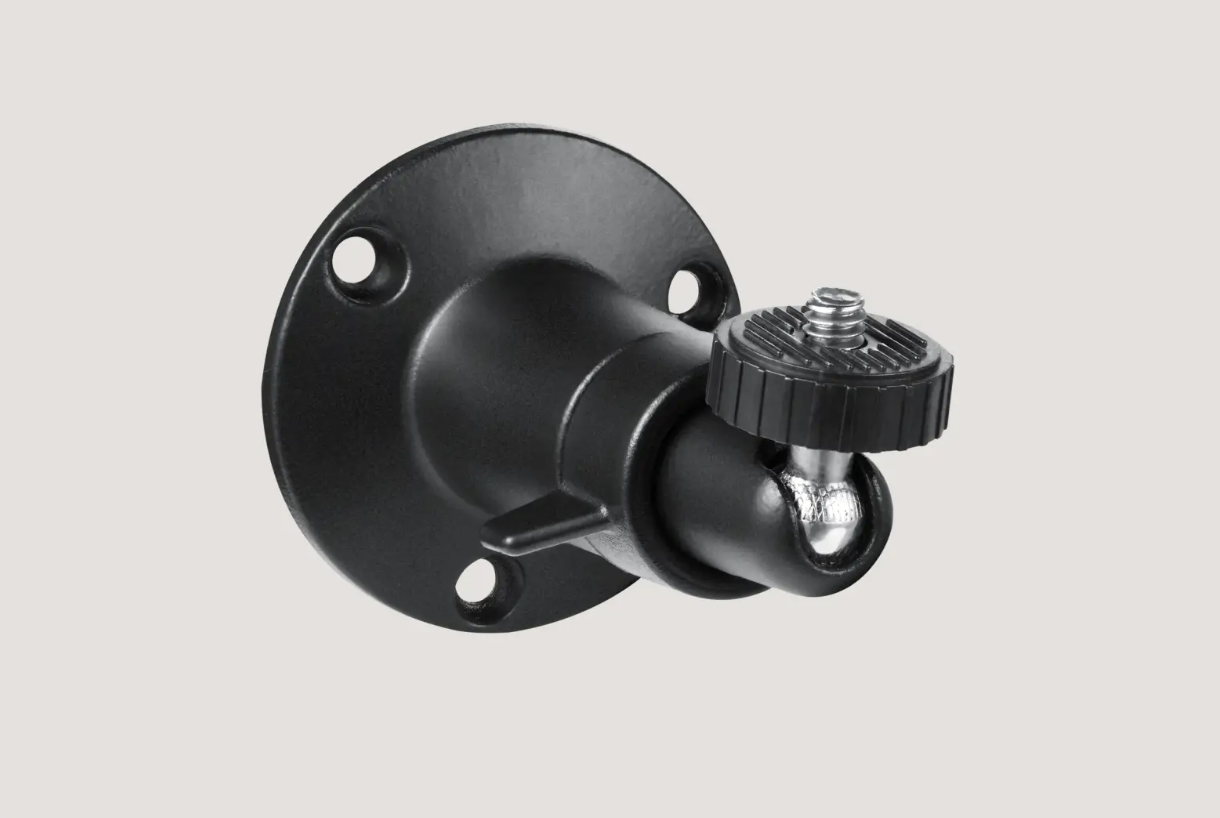
Outdoor Camera Permanent Mount Overview and Installation Guide
The Outdoor Camera Permanent Mount is a great way to install your camera anywhere with an extra-sturdy screw-in mount. This mount is perfect for walls and overhangs, bringing you peace of mind that your camera is harder to tamper with.
The following article will walk you through the installation process of the Outdoor Camera Mount.
Need to purchase an Outdoor Camera Permanent Mount? You can find it available for purchase on our website.
Before Getting Started
We recommend installing the Outdoor Camera Mount with a power drill, instead of a Phillips head screwdriver. You’ll need a 7/64" drill bit for pilot holes or 3/16" for the anchors. If you are installing the Outdoor Camera Mount onto brick, stone, or stucco, you may also need wall anchors (not included in the box).
Placement Tips for the Outdoor Camera Mount
Ensure that the Outdoor Camera is placed no lower than 6 feet from the ground, but no more than 8 feet high
We recommend mounting your Outdoor Camera at 7-8 feet for best performance
The Outdoor Camera should be angled down slightly, roughly a 30-degree angle
If the Outdoor Camera is mounted upside down, the motion sensitivity is halved from ~30 feet to just about ~15 feet
The Outdoor Camera is most sensitive to side-to-side motion, so the camera should be positioned towards areas where people will walk across its field of view, rather than walking towards the camera.
You’ll also want to identify factors that could dramatically change in temperature or interference regarding the Outdoor Camera’s heat signature detection. For example, driveways that can get very hot in the summer, or a flag moving in the wind and causing a cool shadow.
Outdoor Camera Mount Installation Guide
If you are installing into brick, stone, or stucco - you may need to pre-drill holes with your 3/16” drill bit. Once the holes have been drilled, hammer in the wall anchors to support the installation of the screws.
Attach the mount to the wall or overhang with the included screws
Secure the Outdoor Camera to the threaded screw on the mount by rotating the camera clockwise. Continue to rotate the camera onto the threaded screw until it cannot rotate anymore. This will ensure that it’s fully threaded onto the screw and secured to the mount.
Tighten the lock nut against the Outdoor Camera to prevent the camera from unscrewing. Rotate the lock nut counterclockwise until it’s tight against the Outdoor Camera.
Rotate the mount wing nut counterclockwise to loosen the torque on the mount, allowing the camera to move freely
Adjust the camera to the position you want it to be in to provide coverage for your home or business
For optimal performance, we recommend installing the camera 6-8 feet off the ground and angle it 30 degrees down. In this orientation, the camera can detect up to 30 feet of motion.
If mounting the camera upside down (such as on an overhang) the camera will be able to detect up to 15 feet of motion.
Once you are happy with the position of the camera, rotate the wing nut clockwise and tighten it firmly. You’ll want to tighten it as much as possible, to ensure that the camera will not lose its orientation over time.
Hold onto the camera while doing this to ensure the camera maintains its orientation.
That’s it! Your Outdoor Camera Mount has been installed!
Troubleshooting the Outdoor Camera Mount
The most common issues stem from the lock nuts and wing nuts not being adequately tightened. You’ll want to rotate these to ensure they are tight, and cannot be tightened further. That will prevent the camera from rotating on the screw, or prevent drooping of the camera over time.
Shop Compatible Products
Help Center Article
•
Cameras
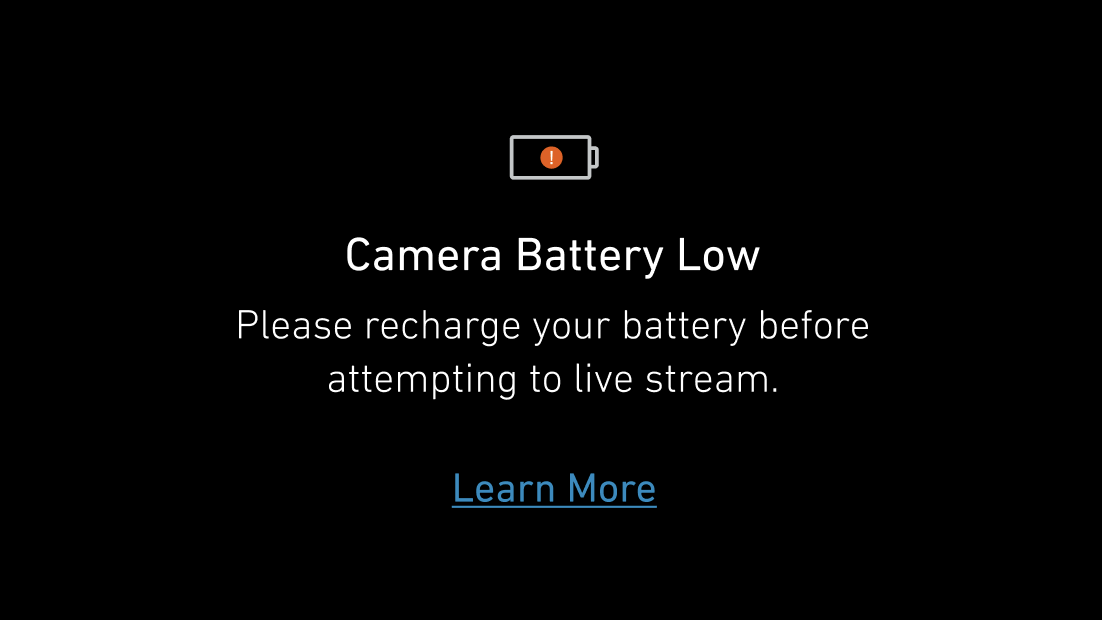
Error: Camera Battery Low
What It Means
If you see a low battery warning on your Wireless Outdoor Security Camera, Outdoor Security Camera Series 2, or Smart Alarm Wireless Indoor Security Camera, that means that you need to charge its battery so it can continue recording video and live streaming.
How To Charge The Outdoor Camera’s Battery
To remove this error on the Outdoor Camera, take the following steps to charge its battery:
Unmount the Outdoor Camera and twist off the cap to reveal the battery
Remove the battery from the camera and plug it into your wall outlet using the charging cable the Outdoor Camera was shipped with and a USB power adapter with 5V, 1.5A+ output
A list of adapters that fit this requirement are:
The SimpliCam® Wired Indoor Security Camera’s adapter
The Smart Alarm Wireless Indoor Security Camera’s adapter
Most iPhone (Apple) adapters
Most Android adapters
It takes about 6 hours for the battery to fully charge. You’ll know the battery is fully charged once all 3 lights are illuminated and no longer blinking.
Insert the battery back into the Outdoor Camera with the 3 gold circles on the battery facing up and the battery tab facing outwards
Twist the cap back on the camera clockwise until you hear it click
Refresh the SimpliSafe® Mobile App by dragging the Overview screen down
You can learn more about preserving the battery life of the Outdoor Camera in this article.
How To Charge The Smart Alarm Wireless Indoor Security Camera’s Battery
To remove this error on the Smart Alarm Wireless Indoor Security Camera, charge its battery by plugging it into a power source for 6 hours using a 5V, 7.5W USB power adapter that provides 1.5A of current. When the LED on the camera turns a solid white, that indicates that the battery is fully charged.
Once the battery is charged, refresh the SimpliSafe® Mobile App by dragging the Overview screen down.
If you would like to keep your Smart Alarm Wireless Indoor Security Camera constantly plugged into a power source, you can do so by either using any compatible power adapter, or you can purchase the Indoor Camera Power Adaptor from our online store or through select retailers.
Still Having Trouble?
If you still see this error message after charging your camera’s battery, you should reset the camera by following the steps in our Help Center below:
Help Center Article
•
Cameras
Where to Place the Outdoor Camera Series 2
The Outdoor Camera Series 2 is designed for outdoor usage in both residential and business environments. Finding the right spot for your Outdoor Camera is crucial to capturing motion events, and ensuring that SimpliSafe® Active Guard Outdoor Protection can provide agent intervention, when subscribed to Pro and Pro Plus residential and business monitoring plans.
Best Practices for Mounting your Outdoor Camera Series 2
For optimal performance, mount it at 6 ½ feet
If mounting above 6 ½ feet, utilize the permanent mount to secure your camera
Mount the camera in a normal orientation, with the SimpliSafe® logo right side up
Angle the camera at 30 degrees facing down
Motion detection for the Outdoor Camera Series 2 works best when individuals pass through the field of view side-to-side - not vertically!
Our Recommendations for Outdoor Camera Series 2 Placement
The Outdoor Camera Series 2 is designed for outdoor usage.
If you require indoor coverage, please purchase a Smart Alarm Indoor Camera and enable Intruder Intervention for agent intervention during a burglary/intrusion alarms
Ensure that the field of view is free from trees/bushes blocking it, which could sway and trigger false motion events
Avoid placing your camera towards high trafficked areas (such as a busy sidewalk or street), and peering into another persons property (e.g. pointing the camera towards a neighbors backyard)
If you are using SimpliSafe® Active Guard Outdoor Protection, ensure that the location where you are placing your camera is within reach of an outdoor-rated power outlet
Related Articles
Help Center Article
•
Outdoor Cameras
Why Do I See Orbs Or Bubbles When My Camera Is Using Night Vision?
What is it?
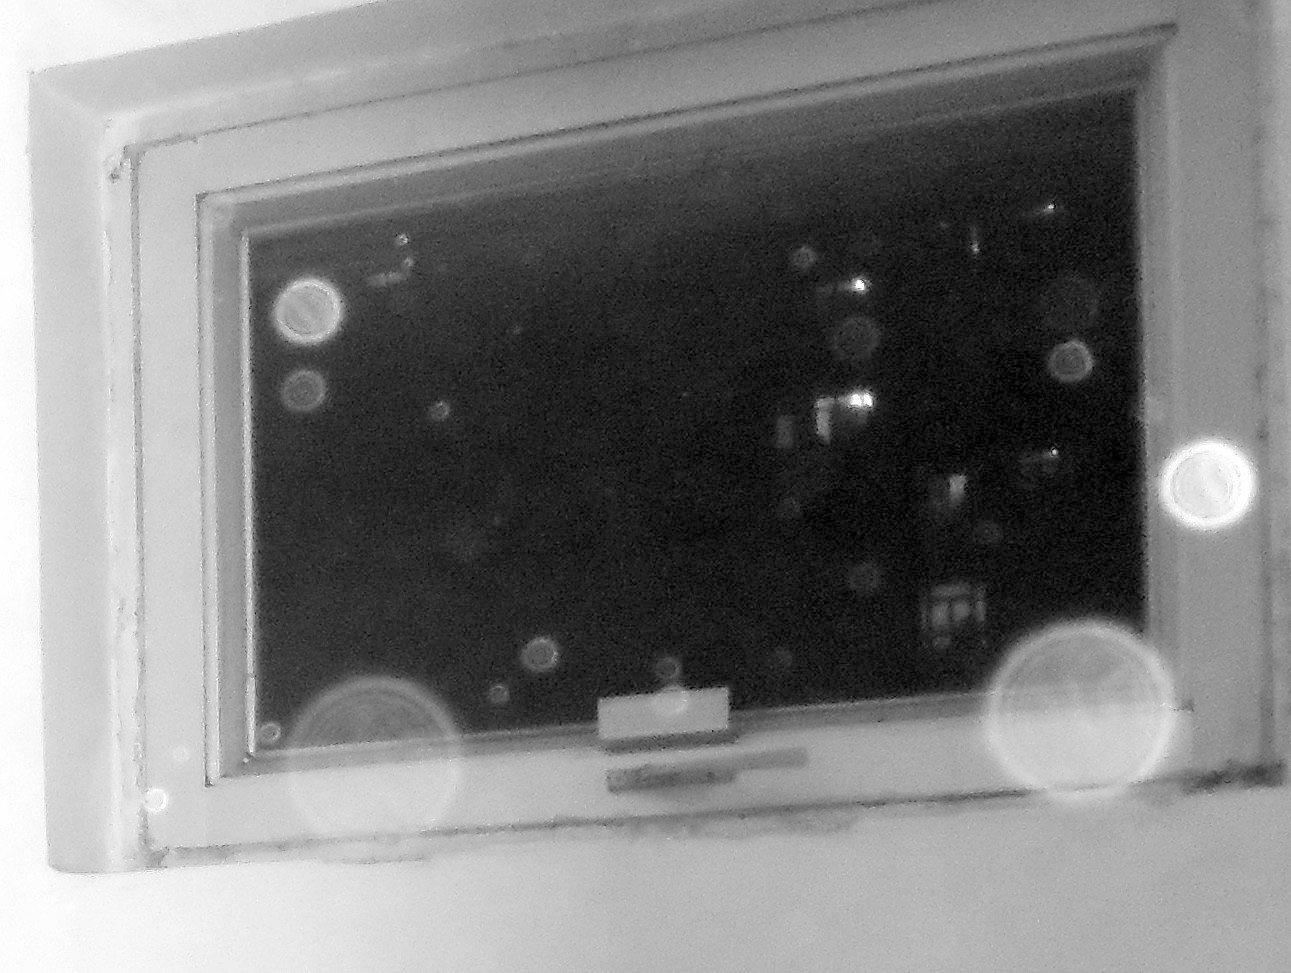
When in lowlight settings, your camera may pick up ghost-like "orbs" while recording. Don't worry—there's nothing supernatural going on. These orbs are called backscatter, or near-camera reflection. Backscatter happens when dust, water droplets, or other particles are present on or very close to the lens, causing light to reflect through the unfocused images.
Additionally, a camera facing out a window, using Night Vision, or with a persistent status light can result in lower image quality overall.
If the "orbs" appear to be moving, it is likely dust particles in the air floating by closely to the camera lens. This is a perfectly normal occurrence and there is no way to completely eliminate it. However, you can get rid of stationary or persistent particles by carefully cleaning your lens.
Location Issues
Other times, this interference may be due to issues with the location of the camera. If your camera is near or directed toward a bright light, such as a street light or flood light, this can also cause backscatter to occur in the recording or stream. In this case, you can move or adjust the position of your camera away from the bright lights to improve its view and reduce interference.
If the issue persists, try swapping the camera with another in a different location if you have more than one. Otherwise, please contact support and we'll be happy help!
Doorbell Backscatter
If dust or other particles in the air frequently trigger your Doorbell, you can adjust its motion sensitivity. However, it does have built-in Day and Night Modes based on the light level outside, which will set the motion sensitivity to a lower setting when there is low light (and therefore a greater possibility of detecting those pesky airborne particles).
Help Center Article
•
Cameras
Outdoor Camera is not Live Streaming
The Outdoor Camera utilizes both Radio Frequency (RF) and Wi-Fi to communicate with your Base Station and SimpliSafe® System.
If your Outdoor Camera is not live streaming, there may be an underlying connection issue that needs to be addressed. It’s important to have a good connection between the Outdoor Camera and your Base Station. Making sure the Base Station is in a good location which can prevent live-streaming issues.
Still Need Help?
If you ruled out the issues above and your Outdoor Camera still won’t record or livestream, we recommend resetting the camera.
Help Center Article
•
Cameras