Conversation List
How to Find the Serial Number for Your SimpliSafe® Device or Camera
During troubleshooting or for account verification purposes, you may be required to identify the serial number for a product within your system. You can easily find the serial number for your devices or cameras within the SimpliSafe® Mobile App.
Locating the Serial Number for your Base Station in the SimpliSafe® App
Open the SimpliSafe® Mobile App on your phone or tablet
Tap on the three-bar menu (hamburger menu) in the upper left corner of the app screen
Choose Help & Support
At the top of the menu you’ll see an Account Number
This is the serial number for your Base Station
Locating the Serial Number for your Devices or Cameras in the SimpliSafe® App
Open the SimpliSafe® Mobile App on your phone or tablet
Choose My System from the bottom navigation bar
Tap on the Device or Camera you wish to manage
Scroll down to Basic Info
Your device or camera’s Serial Number will be listed here
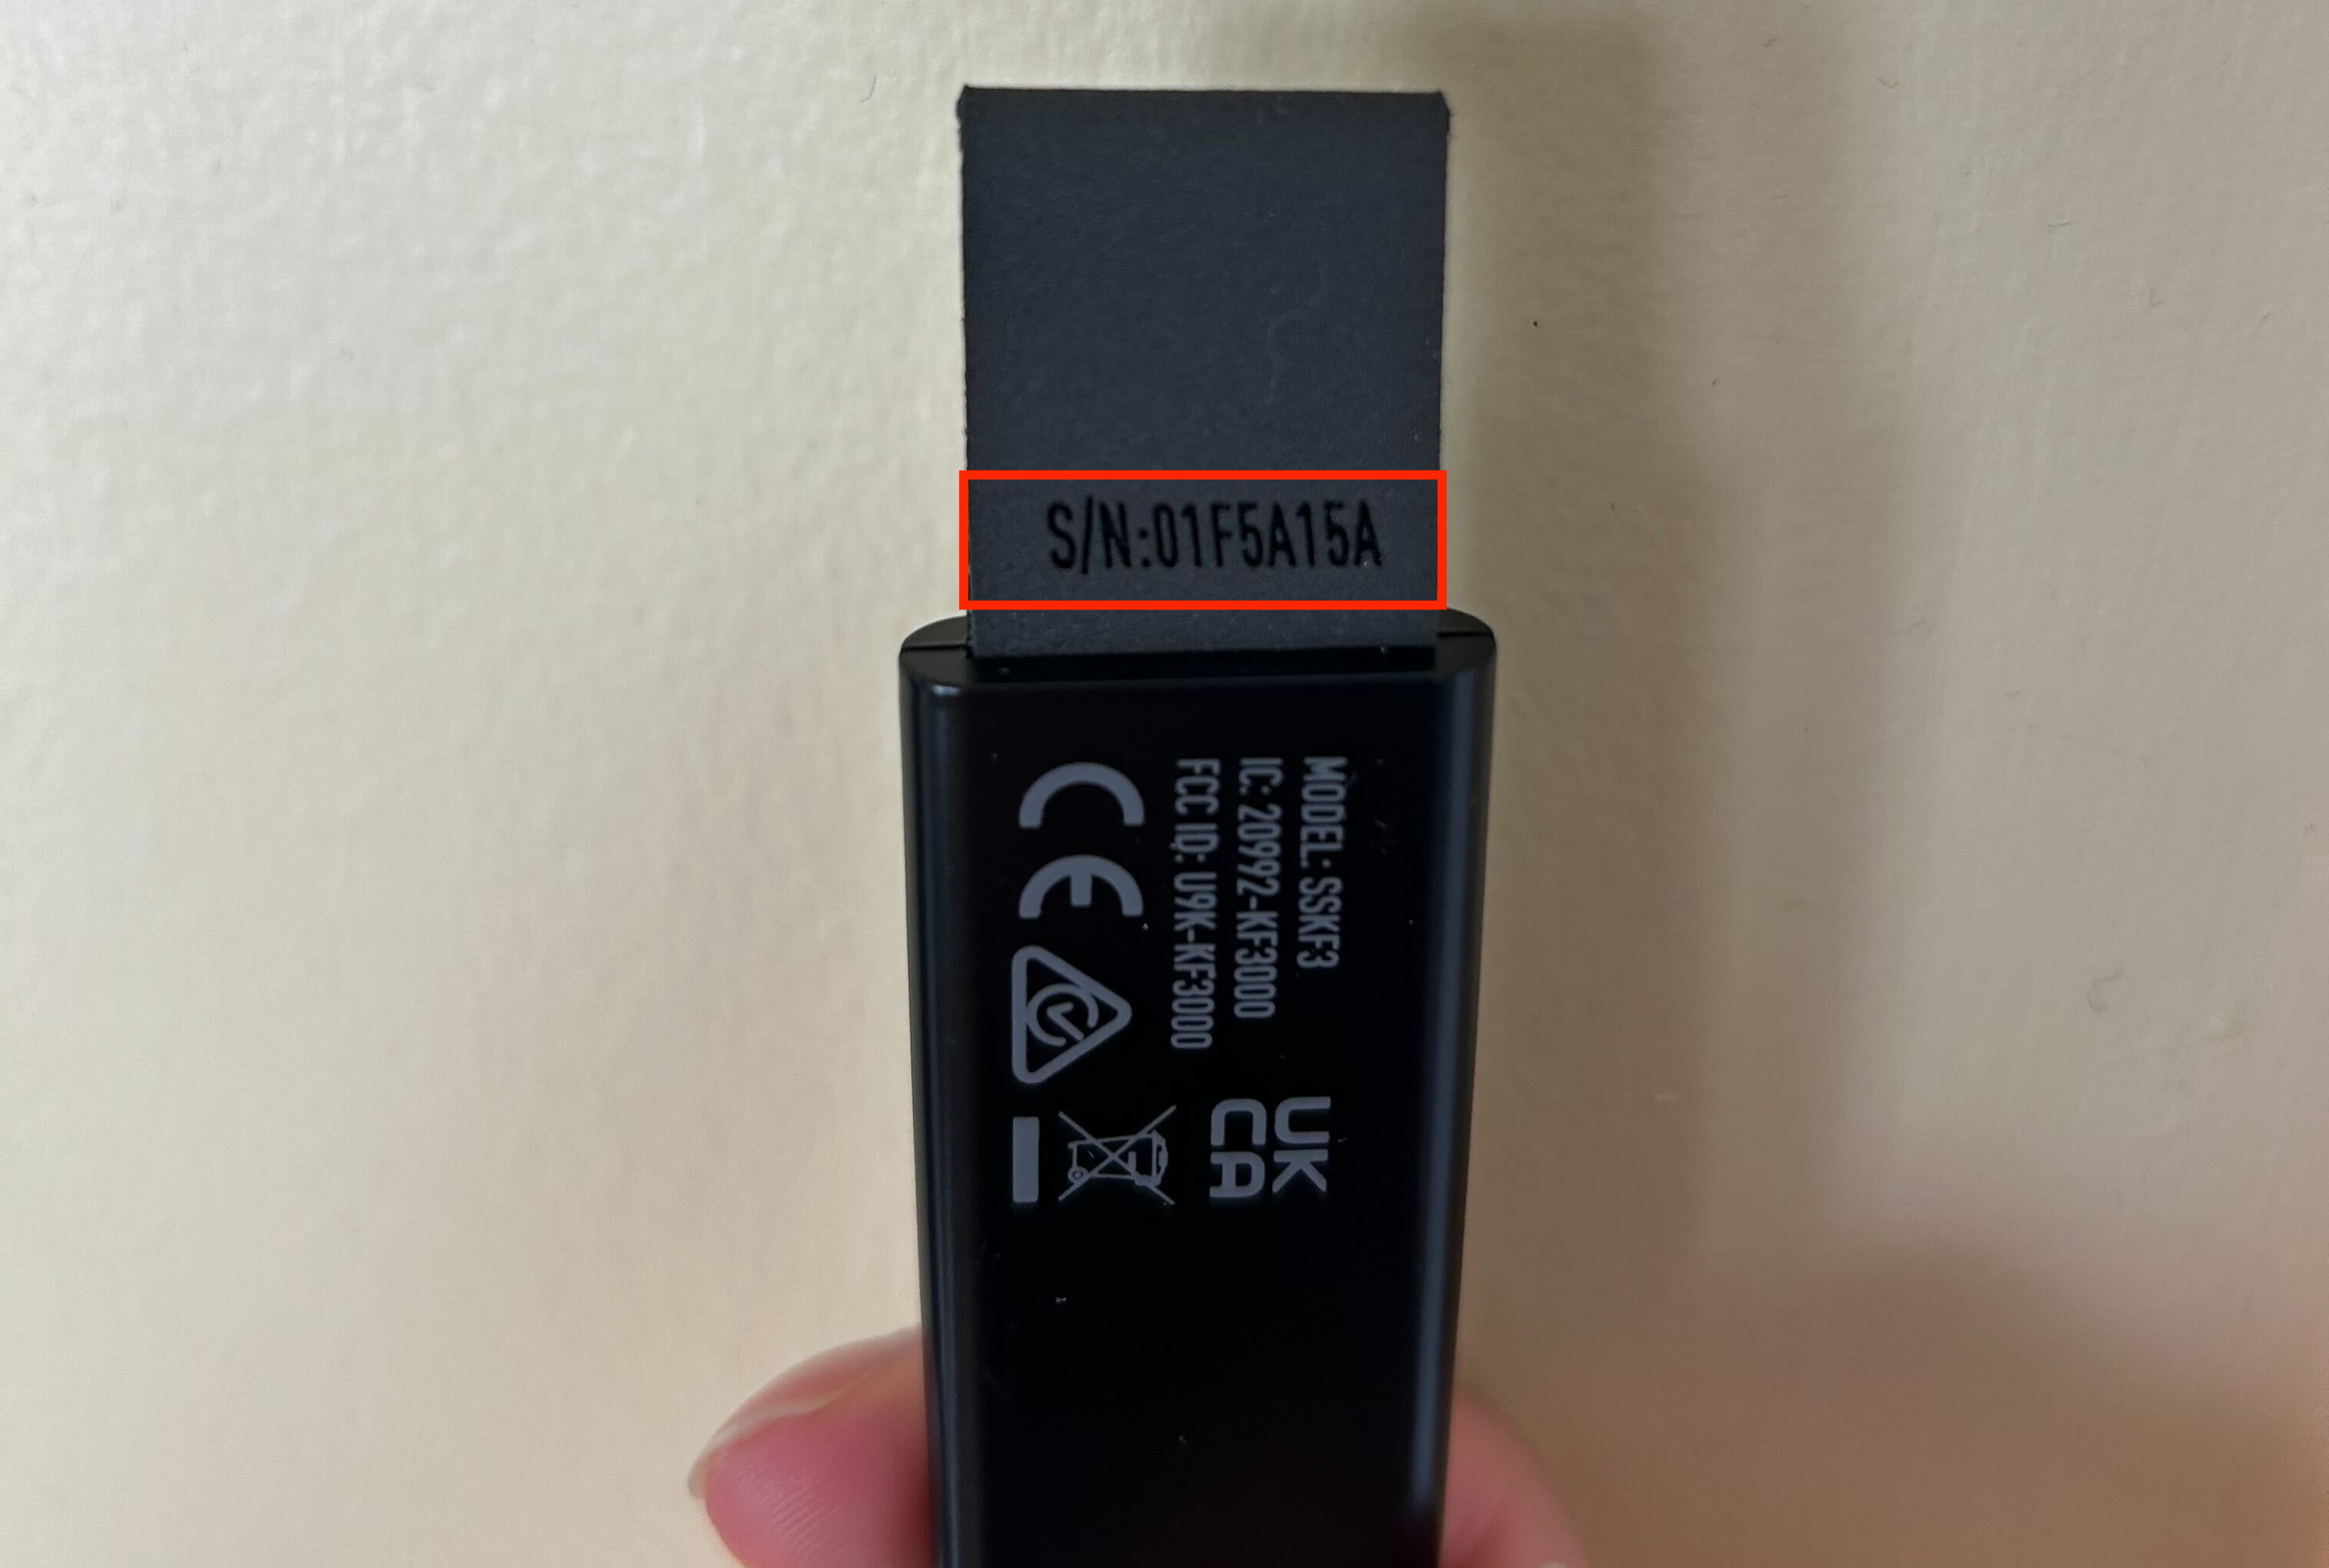
There may be a point where you need to find the serial number on the physical device itself. The rest of the article will guide you through finding the serial number for each product. Click to expand the collapsible section for the product type you wish to learn more about.
Help Center Article
•
Product Support
How To Replace Smoke Detector Battery
The Smoke Detector takes a single Panasonic CR-123A Lithium 3V battery and has a life expectancy between 3-5 years depending on usage.
To change your Smoke Detector battery, twist it off its bracket and open the back panel. Then, replace the lithium battery and put the device back in place.
Help Center Article
•
Smoke Detectors
Smoke Detector Installation Guide
Overview
The Smoke Detector alerts you at the first signs of smoke. When smoke is detected, the Smoke Detector will trigger a system-wide siren, whether or not your system is armed.
You should place Smoke Detectors near sleeping areas and make sure that one is on every floor within your home. To avoid false alarms, avoid placing the Smoke detector near a furnace, stove, fireplace, kitchen, garage, or any bathroom with a shower.
We also recommend cleaning your Smoke Detector once a month, to avoid false alarms and debris build up.
Need to purchase a Smoke Detector? You can find it available for purchase on our website.
Before Getting Started
Before setting up your Smoke Detector, you will need to install your Base Station.
What’s in the Box
Smoke Detector and its mounting plate
Screws and drywall anchors
You will also need a Phillips Head screwdriver and a ¼” drill bit to complete the installation.
Watch the video below for a hands-on experience from our team of experts for the installation process
Troubleshooting
Related Articles
Help Center Article
•
Smoke Detectors
Smoke Detector LED Status Light Colours
The Smoke Detector has several light states that reflect the status of the device and change with the presence of smoke within your home. This guide will highlight the various indicators and their meanings.
IndicatorMeaningRed flashing light every 5–6 minutes and no soundsNormal.Red flashing light every 10 seconds and no soundsNormal after a test was conducted. Usual flashing behavior should resume after 5 minutes.Red flashing light and shrieking soundSmoke detected.Move to fresh air as soon as possible.Yellow steady light and chirping every 1 minuteTamper Switch Error. Remove the detector from the bracket and test the Tamper Switch by pressing it with your finger. Reattach the Detector. If the issue persists please contact support for help.Yellow flashing light and chirping every 1 minuteLow battery. Remove the detector from the bracket. Press and hold the grey button under the words "DO NOT PAINT" and slide the front panel off. Replace the batteries. Replace the front panel and put the detector back on the bracket.Yellow flashing light and chirping every 20–30 secondsMalfunction. Please contact support for help troubleshooting the issue.No lights and no soundsDetector is not receiving power. Ensure the battery tab is pulled from the device and fresh batteries are inserted. If you continue to experience issues, please contact supportfor troubleshooting help.Help Center Article
•
Smoke Detectors
Testing the Smoke Detector
Test Mode is a great way to test the connection between your Base Station and other sensors. We recommend periodically placing your system into Test Mode to ensure that your sensors are still communicating with the Base Station without any errors.
Placing Your System Into Test Mode
Disarm your system by pressing OFF on the Keypad
Press the Menu button on your Keypad
Enter your Primary PIN
Scroll until Test Mode is highlighted
Use the arrow keys and tap to the right to enter Test Mode
You’ll know you are in Test Mode when you see a circle on the Keypad appear with the text, “Test each device by pressing its button”.
Note: If you subscribe to monitoring, you will receive a robo call from the monitoring center asking you to confirm you placed your system into Test Mode. If you do not answer – no worries! A voicemail will be left to alert you to the system test, and it will not result in a request for dispatch.
Testing the Smoke Detector
Press the test button on the front of the Smoke Detector for 1 second. The detector will begin to chirp loudly 3-4 times. Please be sure to protect your ears when testing, as the chirp can be rather loud!
The Base Station will also announce “Smoke Detector” to confirm the test was successful.
Note: If the Smoke Detector detects particulate consistent with smoke when your system is in Test Mode, the monitoring center will act as if it’s an emergency and respond accordingly for the alarm event.
Troubleshooting the Smoke Detector
If you are having trouble testing your Smoke Detector, the first thing we’d recommend is ensuring that you are only pressing the test button for no more than 1 second. If you press it for longer than that, it could cancel the test or cause the Base Station to not respond audibly.
As a next step, you’ll want to confirm that the Smoke Detector battery is functioning. The Smoke Detector takes a single CR-123A Lithium 3V battery and has a life expectancy between 3-5 years depending on placement and usage.
Finally, you’ll want to ensure that your Base Station is centrally located within your home or business, and free from any neighboring wireless devices. We recommend having the Base Station elevated at least 3 feet off the ground on a non-dense surface (ideally glass or wood). We also recommend avoiding placing the Base Station within a cabinet or enclosed structure - as this can weaken the signal of it to other devices.
Help Center Article
•
Smoke Detectors
How Does the Smoke Detector Respond During an Alarm
When the Smoke Detector detects particulate consistent with smoke, it will sound the alarm to notify you of the potential hazard.
After the alarm has sounded two things will happen at once, depending on your monitoring plan. App users will receive a Push Notification, and Emergency Contacts will also a phone call from the monitoring centre.
For the phone call placed to the Emergency Contacts, they will be able to cancel the alarm over the phone with your Safe Word, or place a request for dispatch from your local fire department. If you do not answer the phone, our monitoring team will try all other Emergency Contacts, as well as look for video verification in order to dispatch Fire Services.
We encourage you to save the monitoring centre's numbers to your phone:
Securitas will contact you from: 0330 184 0444
You can contact Securitas on: 0303 330 0369
Test Mode Automated Call: 01908 644505
Once saved to your phone, you’ll also want to allow us access to bypass Do Not Disturb and Silent Profiles. This allows for Critical Alarm Notifications to get through to you, regardless of your phone’s volume or profile status.
Help Center Article
•
Smoke Detectors
What is the Constant Yellow Light on the Smoke Detector?
The Smoke Detector features a Tamper Switch, to make sure that the device is properly secured into its mounting bracket.
It’s a small button on the back of the unit that is normally held down by part of the mounting bracket. When it is not held down properly, you will get a warning signal:
Smoke Detector: Solid yellow, chirps every minute
When placing your Smoke Detector back into its mounting bracket, make sure to twist it fully until you hear it snap into place. The yellow light warning should stop immediately.
If you still see that yellow light, it is possible that the mounting bracket itself may be screwed into your wall or ceiling too tightly, causing the plastic to warp slightly. It may help to unmount the unit and slightly loosen the screws. Then try mounting the detector again.
If you are still seeing the yellow light on the Tamper Switch after taking these steps, please contact our support team for further assistance.
Help Center Article
•
Smoke Detectors