

Conversation List
How To Check The Firmware Version of SimpliSafe® Devices
At SimpliSafe®, we are always working on our devices by releasing firmware and software updates for system-wide and device-specific improvements. We are always updating our customers on the latest firmware releases in the Device and System Firmware Updates article so you can be informed about the latest and greatest updates that are coming your way.
If you are ever curious about the firmware that your system and cameras are running, take the steps below.
Checking the Base Station’s Firmware
You can view which firmware version your Base Station is running using either the SimpliSafe® Mobile App or Keypad.
Using the SimpliSafe® Mobile App
Open the SimpliSafe® Mobile App on your smartphone or tablet
Select My System from the navigation bar at the bottom of the screen
Choose Base Station Settings
Next to Firmware, you will see which version your system is running
Using the Keypad
Press the Menu button on your Keypad
Enter your Master PIN
Select System Settings
Scroll down to Diagnostics
Press the right arrow until you see Base Station
Next to Version, you will see what firmware your system is running
Checking a Camera’s Firmware
You can view your camera’s firmware in the SimpliSafe® Mobile App
Open the SimpliSafe® Mobile App on your smartphone or tablet
Select My System from the navigation bar at the bottom of the screen
Choose Camera Settings
Select the camera you want to check
Scroll down to the bottom of the screen until you see Basic Info
Next to Software Version, you will see what firmware your camera is running
Related Articles
Help Center Article
•
Base Station
Why Does my Base Station Have a Red Light?
The Base Station can pulse red for two different reasons. Depending on the length of the pulse or the timing between it, it can mean different things.
Slow Pulse, with 8-10 seconds between each pulse
This indicates that there is a minor system error, such as radio interference. You can check the Keypad for more details. To resolve the red light, you will want to address the system error that’s occurring.
Continuous Pulse for 1-2 minutes, followed by Solid Red Light
If you are seeing a continuous pulse for 1-2 minutes, this indicates that there was a recent alarm. After 1-2 minutes the Base Station will turn to a solid red light to alert you to the recent alarm. You can check the Keypad or the SimpliSafe® Mobile App for more details.
Clearing the Keypad Warning and Red Light
You can clear the Keypad Warning and Red Light for your Base Station by following these steps below:
Using your Keypad, press OFF to disarm your system
Then, press the screen of your Keypad towards the warning symbol
An error should appear, select clear to clear the warning message
Once done, this should clear the error message displayed on the Keypad and reset the LED on your Base Station
If the red light persists, power cycle the Base Station by following the steps in this video:
Help Center Article
•
Base Station
Base Station and System Settings
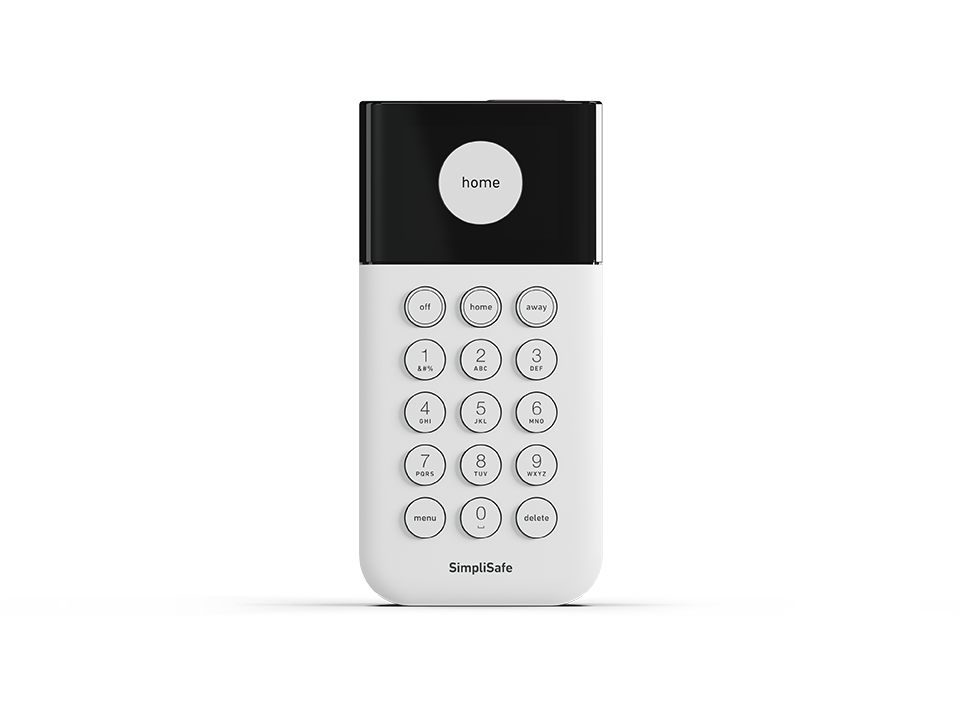
Does your Keypad look like the one pictured to the left? Then you're in the right place! You've got the Gen 3 SimpliSafe® system. If you purchased a system in 2017 or earlier, you have the Original SimpliSafe. In that case, see our Original SimpliSafe® Overview. If you're not certain which system you have, visit the Which Version of the SimpliSafe® System Do I Have article.
You can access System Settings via the SimpliSafe® Mobile App, the Keypad’s menu, or SimpliSafe® Online Account. These settings control your system’s volume, alarm delays, and Wi-Fi setup.
To change the settings for specific devices, please visit our Device and Sensor Settings article.
Status Lights
Setting
Description
Location
Options
Default
Base Station Light
Changes if the LED light on your Base Station will illuminate to indicate system statuses, warning, and similar events.
Mobile App: My System > Base Station Settings > Status Lights > Base Station Light
Keypad: Menu > System Settings > Base Station LightOn
Off
On
Wall Power Light
A blue light on the back of the Base Station that remains lit while it is receiving power from the power adapter
Mobile App: My System > Base Station Settings > Status Lights > Wall Power Light
Keypad: Menu > System Settings > Wall Power Light
On
Off
On
A warning light that indicates an issue with the system, or a component
Mobile App: My System > Base Station Settings > Status Lights > Trouble Light
Keypad: Menu > System Settings > Trouble Light
On
Off
On
Audio Alerts
Setting
Description
Location
Options
Default
Sets the Base Station chime volume for when an Entry Sensor opens while the system is disarmed or when the sensor is set to “Disabled.”
Mobile App: My System > Base Station Settings > Audio Alerts > Entry Sensor Chime or Name Announcement
Keypad: Menu > System Settings > Chime Volume
Off
Low
Medium
High
Medium
Voice Prompts
Sets the volume that the Base Station will announce instructions, errors, etc.
Mobile App: My System > Base Station Settings > Audio Alerts > Voice Prompts
Keypad: Menu > System Settings > Voice Prompts
Off
Low
Medium
High
Medium
A warning tone that indicates an issue with the system, or a component.
Mobile App: My System > Base Station Settings > Audio Alerts > Trouble Signal
Keypad: Menu > System Settings > Trouble SignalOff
Low
Medium
High
Medium
Alarm Siren
Setting
Description
Location
Options
Default
Sets the volume of the Base Station siren in the event that an alarm is triggered.
Mobile App: My System > Base Station Settings > Alarm Siren > Alarm Siren Volume
Keypad: Menu > System Settings > Siren Volume
Off
Low
Medium
High
High
Sets the length of time that your Base Station (and Extra Sirens if you have them) will sound in the event of an alarm
Mobile App: My System > Base Station Settings > Alarm Siren > Alarm Siren Duration
Keypad: Menu > System Settings > Siren DurationBetween 30 seconds - 8 minutes
4 minutes
Exit and Entry Delays
Setting
Description
Location
Options
Default
The amount of time before the system becomes armed in Home Mode when you press the “Home” button on your Keypad or in the Mobile App
Mobile App: My System > Base Station Settings > Exit and Entry Delays > Exit Delay (Home)
Keypad: Menu > System Settings > Exit Delay, HomeBetween 0 seconds - 4 minutes and 15 seconds
No delay (0 seconds)
The amount of time before the system becomes armed in Away Mode when you press the “Away” button on your Keypad or in the Mobile App
Mobile App: My System > Base Station Settings > Exit and Entry Delays > Exit Delay (Away)
Keypad: Menu > System Settings > Exit Delay, Away
Between 45 seconds - 4 minutes and 15 seconds
60 seconds
The amount of time before your system’s siren sounds when an active sensor is tripped in Home Mode.
Mobile App: My System > Base Station Settings > Exit and Entry Delays > Entry Delay (Home)
Keypad: Menu > System Settings > Entry Delay, Home
Between 0 seconds - 4 minutes and 15 seconds
30 seconds
The amount of time before your system’s siren sounds when an active sensor is tripped in Away Mode.
Mobile App: My System > Base Station Settings > Exit and Entry Delays > Entry Delay (Away)
Keypad: Menu > System Settings > Entry Delay, Away
Between 30 seconds - 4 minutes and 15 seconds
30 seconds
Wi-Fi Network
Setting
Description
Location
Options
Default
Wi-Fi Network
Choose the Wi-Fi network that your system is connected to. Learn more about connecting your system to Wi-Fi.
Mobile App: My System > Base Station Settings > Wi-Fi Network
Keypad: Menu > System Settings > WiFi Network
N/A
N/A
Help Center Article
•
Base Station
How To Replace Base Station Batteries
Does your Keypad look like the one pictured to the left? Then you're in the right place! You've got the Gen 3 SimpliSafe® system. If you purchased a system in 2017 or earlier, you have the Original SimpliSafe. In that case, visit our How to Replace the Original SimpliSafe® System's Batteries article. If you're not certain which system you have, see the Which Version of the SimpliSafe® System Do I Have article.
You will likely never need to replace your Base Station's batteries as they are rechargeable and meant to last. The Base Station takes four 1.2V, 1300mAh nickel-metal hydride (NiMH) rechargeable batteries.
Regular alkaline batteries should never be inserted into the Base Station, as they may damage the device.
Replacing The Base Station Batteries
Once you have acquired the necessary NiMH rechargeable batteries, you can follow the steps below to replace them:
Ensure your system is disarmed
Unplug your Base Station from power by removing the power cable from the bottom of it
Use a Philips head screwdriver to remove the security screw, underneath where the power cable was
Twist the cover off the bottom of the Base Station to expose the batteries
Remove the old batteries
Insert the new NiMH rechargeable batteries
NEVER insert regular alkaline batteries into the Base Station as they may damage the device.
Screw the battery cover back onto the bottom of the Base Station
Plug your Base Station back into power.
Help Center Article
•
Base Station
Where Should I Place My Base Station?
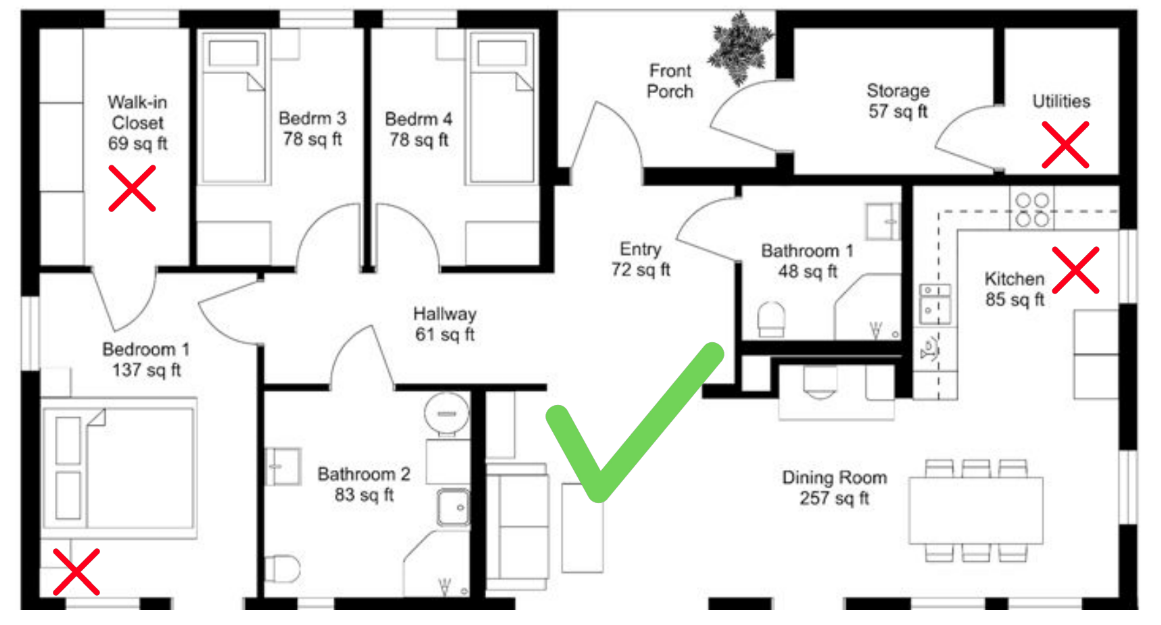
The Base Station should be placed in a centrally-located area within your home or business, and in an open space. It is recommended that the Base Station is elevated at least 3 feet off the ground on a non-dense surface (ideally glass or wood).
The following floorplan illustrates the recommended placement for a Base Station within this layout.
Placing your Base Station in a cabinet, closet, or around dense materials (such as granite, concrete, or metal) can weaken its signal to other SimpliSafe devices. This can lead to communication errors between the Base Station and your SimpliSafe products, and cause the other devices (sensors, cameras, etc.) to become unresponsive or go offline. If you are having trouble with your sensors, see this article for additional troubleshooting.
Installing your Base Station next to devices that output a wireless signal, such as a router or TV, is also not recommended. This can cause wireless interference and decrease the overall signal strength of the Base Station.
Help Center Article
•
Base Station
How to Find the Serial Number for Your SimpliSafe® Device or Camera
During troubleshooting or for account verification purposes, you may be required to identify the serial number for a product within your system. You can easily find the serial number for your devices or cameras within the SimpliSafe® Mobile App.
Locating the Serial Number for your Base Station in the SimpliSafe® App
Open the SimpliSafe® Mobile App on your phone or tablet
Tap on the three-bar menu (hamburger menu) in the upper left corner of the app screen
Choose Help & Support
At the top of the menu you’ll see an Account Number
This is the serial number for your Base Station
Locating the Serial Number for your Devices or Cameras in the SimpliSafe® App
Open the SimpliSafe® Mobile App on your phone or tablet
Choose My System from the bottom navigation bar
Tap on the Device or Camera you wish to manage
Scroll down to Basic Info
Your device or camera’s Serial Number will be listed here
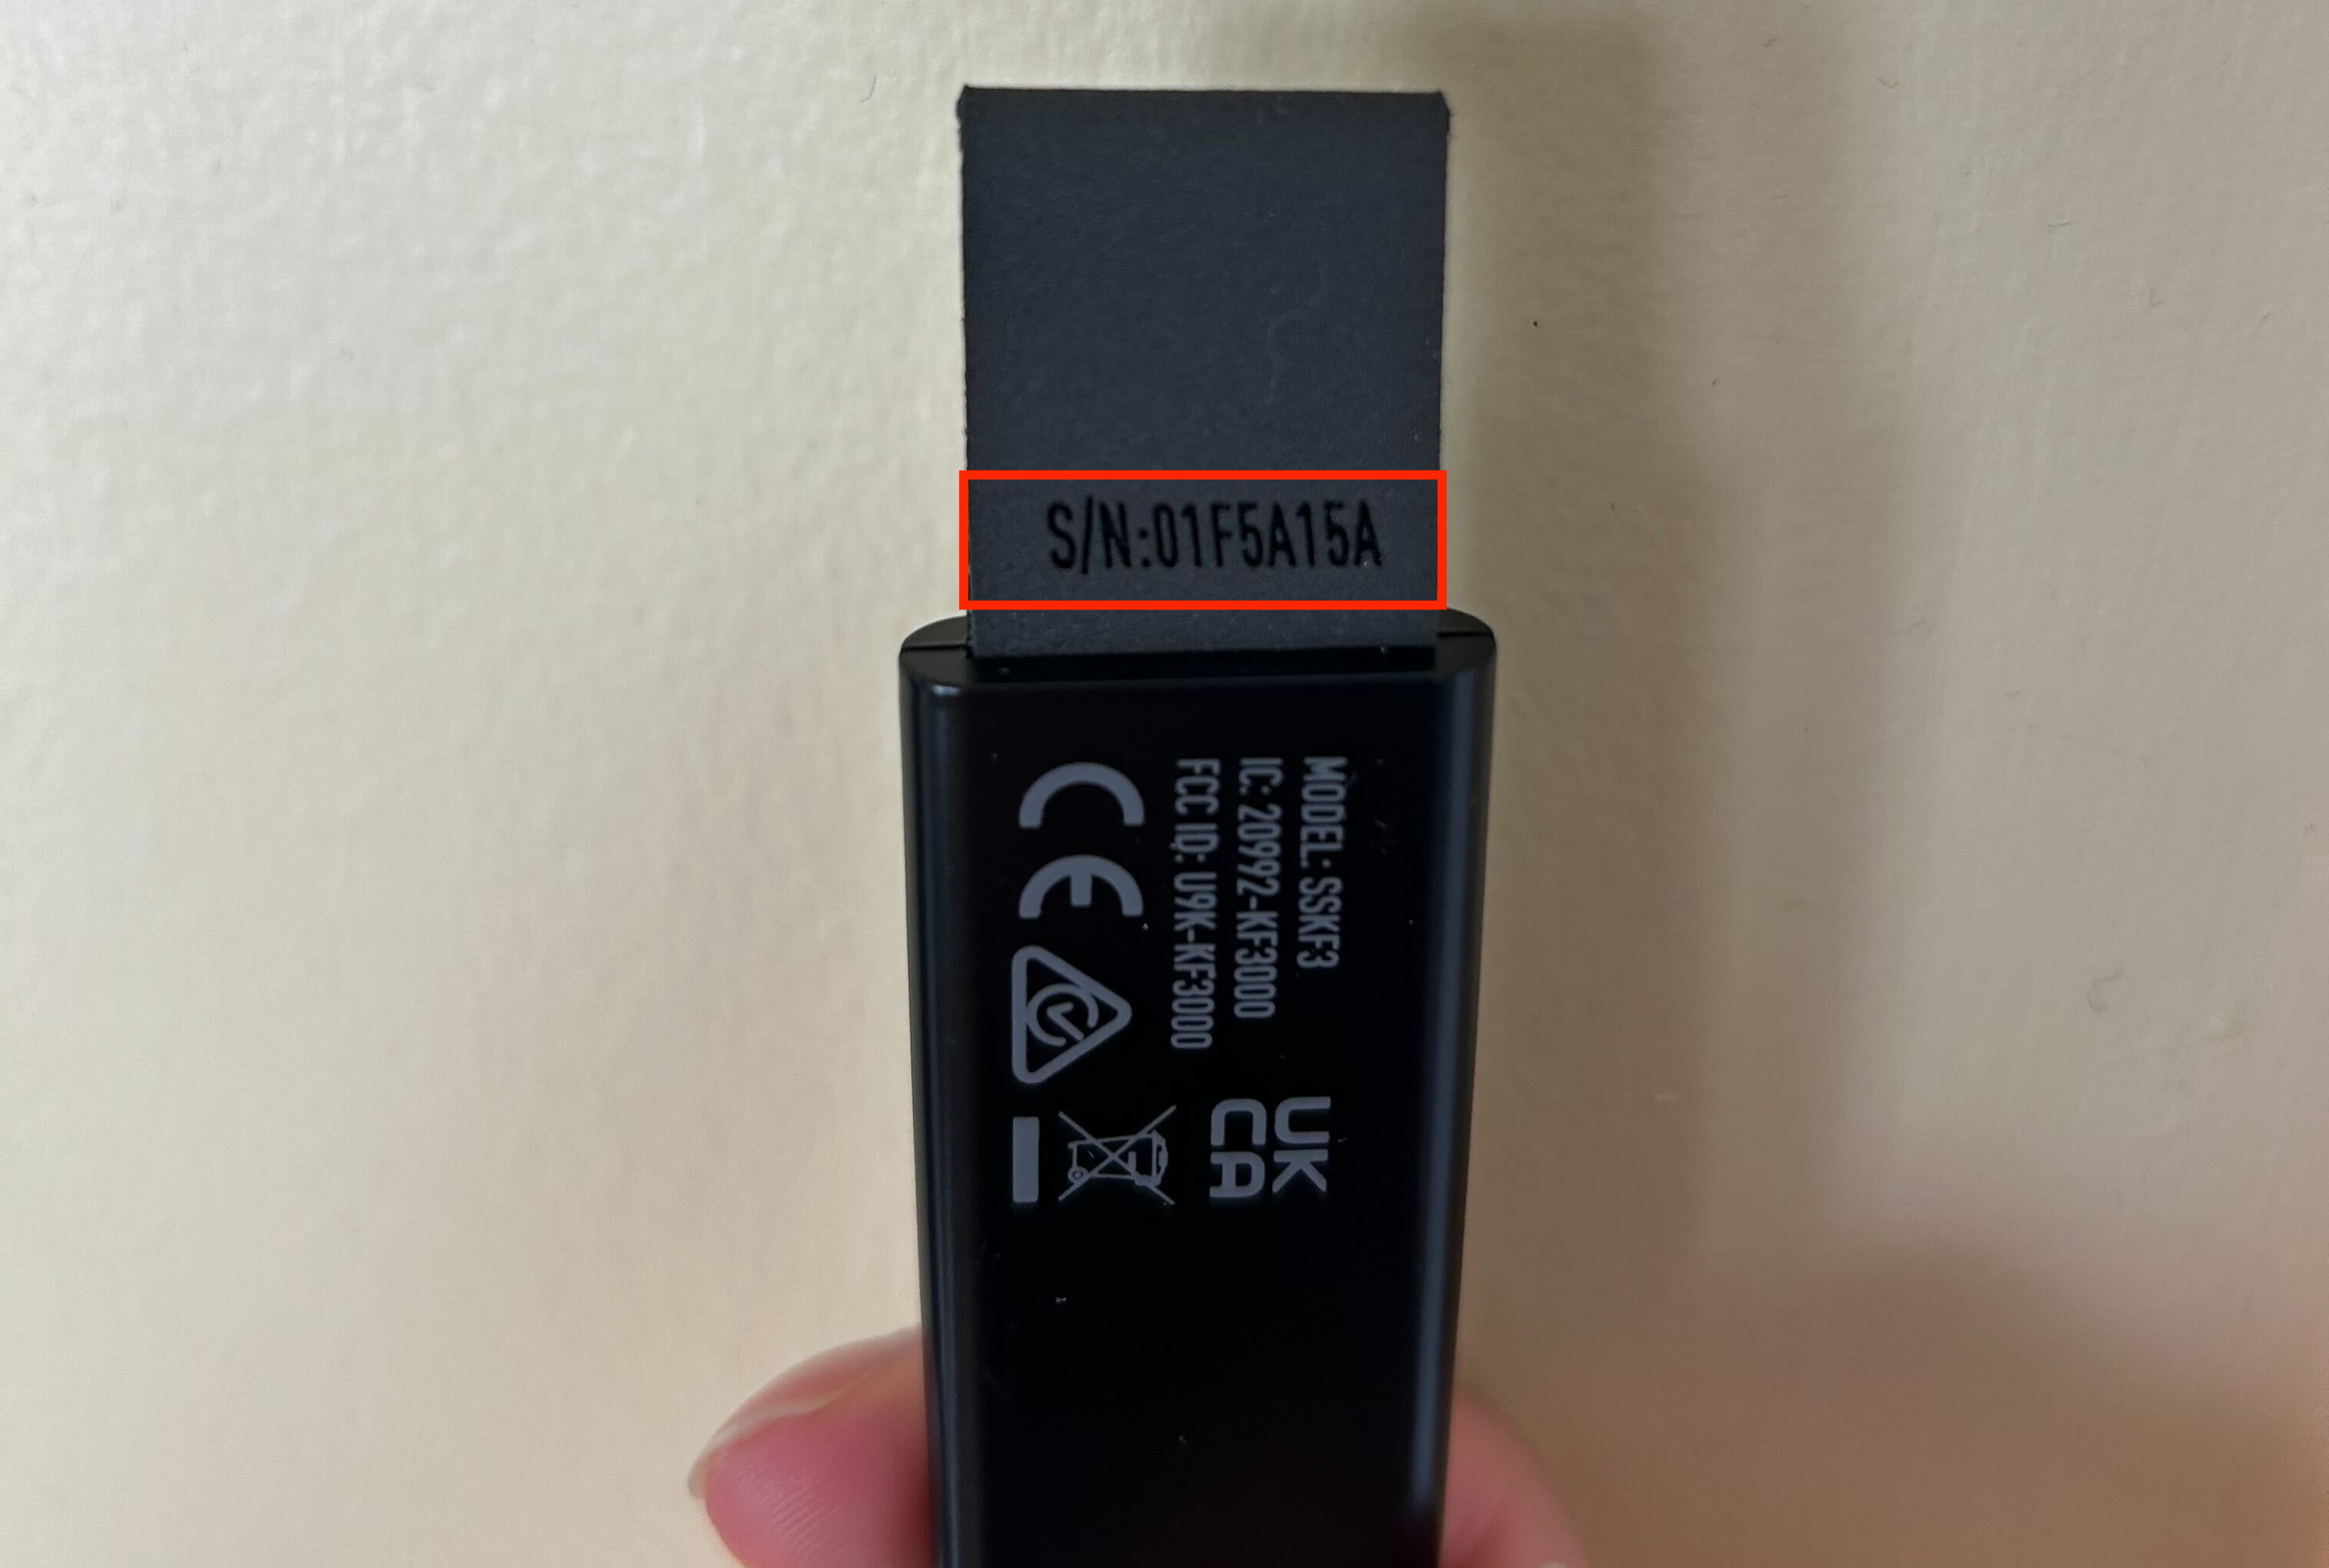
There may be a point where you need to find the serial number on the physical device itself. The rest of the article will guide you through finding the serial number for each product. Click to expand the collapsible section for the product type you wish to learn more about.
Help Center Article
•
Product Support
What is the Trouble Signal (three-tone warning sound), and how do I resolve it?
With the Base Station’s 2.10 firmware update, we’ve introduced a way to make sure your system is in good shape with Trouble Signals. Trouble Signals are a three-tone warning sound that will emit from your Base Station every 1 minute, accompanied by its flashing yellow Trouble Light. When this is present, you’ll see a notification appear on your Keypad, informing you that an issue is occurring with your system.
These changes are part of the UL-985 Standard for Household Safety and may be required in your area - depending on local laws and regulations.
If you are hearing the Trouble Signal or seeing the Trouble Light, your system could be having issues with one of the following:
Components are either Not Responding or marked as Offline within the SimpliSafe® Mobile App
Smoke, CO, and Smoke & CO Detectors have a malfunction and/or low sensitivity is being reported
Smoke, CO, and Smoke & CO Detectors have a tamper switch that is not held down
A No Link To Dispatcher error may be reported by your Keypad. Use the steps outlined in this article to resolve the issue
RF Interference may be detected. Use the steps outlined in this article to resolve the issue
These warnings cannot be dismissed until the issue itself is resolved
You can, however, modify or disable the Trouble Signal and Trouble Light in your system settings at any time.
If you require further assistance, please don’t hesitate to reach out to our support team directly.
To Modify the Trouble Signal
Using the SimpliSafe® Mobile App
Open the SimpliSafe® Mobile App on your smartphone or tablet
Select My System from the bottom navigation menu
Select Base Station Settings
Choose Audio Alerts
Under Trouble Signal, select your desired volume
Press Save in the upper right corner to save this change
Using the Keypad
Press the Menu button on your Keypad
Enter your Master PIN
Select System Settings
Choose Trouble Signal, and then your desired volume
To Modify the Trouble Light
Using the SimpliSafe® Mobile App
Open the SimpliSafe® Mobile App on your smartphone or tablet
Select My System from the bottom navigation menu
Select Base Station Settings
Choose Status Lights
Toggle the Trouble Light on or off
Press Save in the upper right corner to save this change
Using the Keypad
Press the Menu button on your Keypad
Enter your Master PIN
Select System Settings
Choose Trouble Light, and then toggle the setting on or off
Help Center Article
•
Base Station





_Serial_N.png "Smart Lock (Original) Serial Number.png")