

Conversation List
Testing the Keypad
Test Mode is a great way to test the connection between your Base Station and other SimpliSafe® products. We recommend periodically placing your system into Test Mode to ensure that your devices are still communicating with the Base Station without any errors.
Testing the Keypad
Step 1: Place Your System Into Test Mode
Disarm your system by pressing the Off button on the Keypad
Press the Menu button on your Keypad
Enter your Primary PIN
Scroll until Test Mode is highlighted
Use the right arrow key to enter Test Mode
You’ll know you are in Test Mode when you see a circle on the Keypad appear with the text, “Test each device by pressing its button.”
Note: If you subscribe to monitoring, you will receive an automated call from the monitoring center asking you to confirm you placed your system into Test Mode. If you do not answer, no worries! A voicemail will be left to alert you to the system test, and it will not result in a request for dispatch.
Step 2: Test the Keypad
Once you have successfully put your system into Test Mode and the screen on the Keypad says “Test each device by pressing its button,” you can test the Keypad.
To test the Keypad you can press any button on it such as Off, Home, or Away. If the test was successful the Base Station will say, “Keypad.”
You can also test the Panic Button built into the Keypad by pressing and holding the red button at the top of the Keypad for 2 seconds. This will result in the Base Station stating, “Keypad,” but will not result in a request for dispatch.
Once you are done testing your Keypad, press the left arrow key on the Keypad’s screen to exit Test Mode.
Troubleshooting the Keypad
If you are testing your Keypad and do not hear the Base Station announce, “Keypad”, the first thing you’ll want to do is confirm you can hear the Base Station from the location you’re testing in. You can adjust the Base Station’s volume under the Base Station Settings menu, by selecting Voice Prompts.
As a next step, you’ll want to confirm that the Keypad batteries are functioning. The Keypad takes four (4) AA Alkaline batteries and has a life expectancy between 8-12 months depending on placement and usage.
If you are still unable to hear the Base Station announce, “Keypad” it’s possible that there could be an issue with the location of the Base Station, or there is Radio Frequency (RF) interference at play.
Other electronic devices within your home may communicate on similar frequencies, resulting in wireless interference between your SimpliSafe® devices. Because of this, we recommend keeping your Base Station and Keypad at least 3-5 feet away from the following devices:
Wi-Fi Routers
Large TVs
Weather Stations
Large Appliances (especially in the kitchen and laundry rooms)
Baby monitors
Remote Controlled Garage Door Openers
LED Lights or Christmas Lights
This above list is to give you an idea of what devices may cause interference within your home, and is in no means an exhaustive list of all devices. There may be other devices that output RF or Wi-Fi signals that could impede the connection between your Base Station and SimpliSafe® devices.
Help Center Article
•
Keypad
Error: Keypad Out of Range
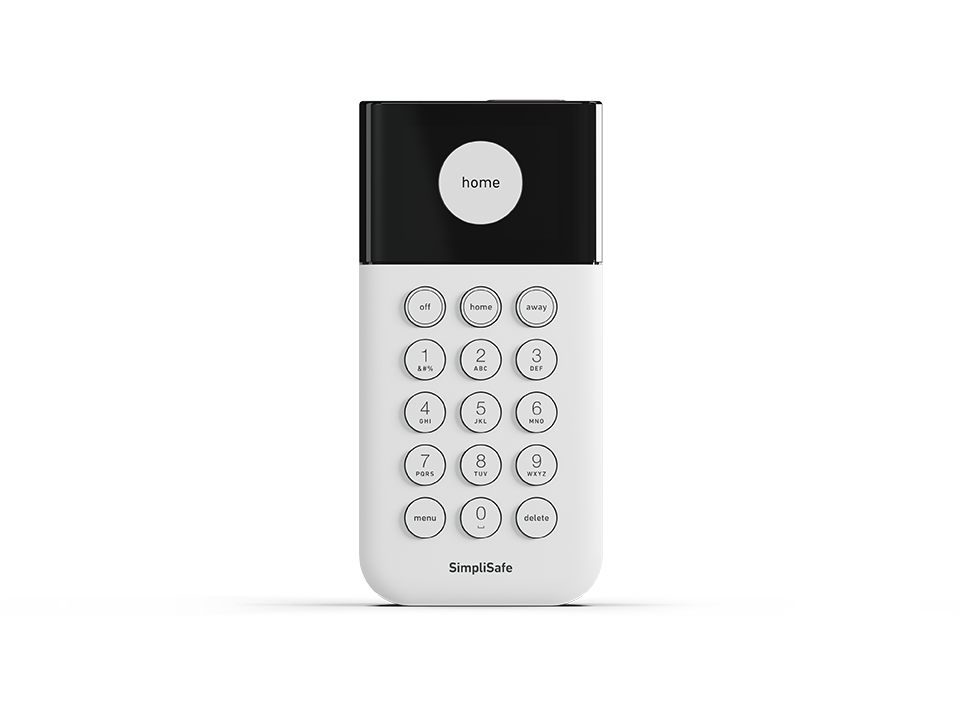
Does your Keypad look like the one pictured to the left? Then you're in the right place! You've got the Gen 3 SimpliSafe® system. If you purchased a system in 2017 or earlier, you have the Original SimpliSafe®. If you have the Original SimpliSafe®, please contact our support team to troubleshoot this error.
The error “Keypad Out of Range” is a message that appears on your Keypad whenever the device is not communicating with the Base Station. There are two primary reasons why this error would happen: either you have received a new Keypad and it is not paired to the Base Station, or there is interference between the Base Station and Keypad.
New Keypad That is not Paired With the Base Station Troubleshooting
If you received a new Keypad and are having trouble pairing it with the Base Station, we recommend using the emergency pairing steps below to get things connected again.
Unplug the Base Station from power by removing the cable from the base of the tower. This will expose a screw
Using a Phillips-head screwdriver, remove the battery compartment from the bottom of the Base Station
Please keep the batteries of the Base Station inserted for the following steps
Locate the Emergency Pairing Button on the bottom of the Base Station, opposite from where the power cord is inserted.
You’ll press this in step 5
Power cycle the Keypad by removing and reinstalling one battery from the back of the Keypad
As soon as the Keypad screen reads “Searching for Base Station” press and release the Emergency Pairing Button
If successful, the Base Station will announce “Keypad, Added”
If the Keypad does not add after pressing the Emergency pairing Button, install a fresh set of AA Duracell batteries within the Keypad and attempt steps 1-5 again
Intermittent Error Troubleshooting
If the issue is intermittent, it’s likely that the distance or placement of the Base Station and Keypad may be the culprit. Below are a few steps you can take to troubleshoot this further.
Distance:
We typically recommend that the Base Station and Keypad are within 10 feet of each other, if possible. They can work at a greater distance, assuming that the placement of the Base Station and Keypad are clear of interference.
Placement:
The first step you’ll want to take is to rule out interference between the Keypad and Base Station.
If there are concrete, brick, or metal walls in between the Keypad and Base Station, this may impede the signal causing the “Keypad Out of Range” error.
The placement of your Base Station is crucial to clear communication with other system devices.
Avoid keeping the Base Station in enclosed cabinets, or within an entertainment center with other electronic devices
Ensure the Base Station is elevated at least 3 feet off the ground
Avoid placing your Base Station on dense surfaces when possible, such as granite, concrete or metal
Finally, the Base Station and Keypad use Radio Frequency (RF) waves to communicate. Other electronic devices may communicate on similar frequencies, resulting in wireless interference between your SimpliSafe® devices. Because of this, we recommend keeping your Base Station and Keypad at least 3-5 feet away from the following devices:
Wi-Fi Routers
Large TVs
Weather Stations
Large Appliances (especially in the kitchen and laundry rooms)
Baby monitors
This above list is to give you an idea of what devices may cause interference within your home, and is in no means an exhaustive list of all devices. There may be other devices that output RF or WiFi signals that could impede the connection between your Base Station and SimpliSafe® devices.
Testing Your System After Making Changes
After making changes, lets power cycle both devices with the following steps:
Power cycle the Keypad by removing a battery, waiting 60 seconds and then reinserting the battery
Power cycle the Base Station by removing a battery
Make sure your system is set to OFF before taking these steps
Unplug the Base Station power cord from the bottom of the Base Station
Using a Phillips-head screwdriver, remove the screw holding the battery cover in place and remove the battery cover
Remove a single battery from the Base Station and wait at least 60 seconds before reinserting it
Reassemble the Base Station by installing the screw, battery cover, and power cord.
Test your Keypad by arming and disarming your system multiple times to make sure that it’s working reliably. If your Keypad is not responding to arming or disarming attempts, further modification to the location of your Keypad and Base Station may be necessary.
Once you are able to successfully arm and disarm your system regularly, it is recommended that you place your system into Test Mode to test your sensors and components to ensure they still have a strong connection to the Base Station.
To place your system into Test Mode:
Press the Menu button on your Keypad
Enter your Primary PIN
Use the arrow keys to scroll until Test Mode is highlighted
Use the arrow key to select Test Mode
You’ll know you are in Test Mode when you see a circle appear on your Keypad with the text “Test each device by pressing its button”.
Note: If you have monitoring, all Primary Contacts will receive an automated call from our monitoring center asking you to confirm you have placed your system into Test Mode. If you do not answer it, the call will go to voicemail to let you know of the user initiated test, with no further action needed from you.
Help Center Article
•
Keypad
Base Station and System Settings
Does your Keypad look like the one pictured to the left? Then you're in the right place! You've got the Gen 3 SimpliSafe® system. If you purchased a system in 2017 or earlier, you have the Original SimpliSafe. In that case, see our Original SimpliSafe® Overview. If you're not certain which system you have, visit the Which Version of the SimpliSafe® System Do I Have article.
You can access System Settings via the SimpliSafe® Mobile App, the Keypad’s menu, or SimpliSafe® Online Account. These settings control your system’s volume, alarm delays, and Wi-Fi setup.
To change the settings for specific devices, please visit our Device and Sensor Settings article.
Status Lights
Setting
Description
Location
Options
Default
Base Station Light
Changes if the LED light on your Base Station will illuminate to indicate system statuses, warning, and similar events.
Mobile App: My System > Base Station Settings > Status Lights > Base Station Light
Keypad: Menu > System Settings > Base Station LightOn
Off
On
Wall Power Light
A blue light on the back of the Base Station that remains lit while it is receiving power from the power adapter
Mobile App: My System > Base Station Settings > Status Lights > Wall Power Light
Keypad: Menu > System Settings > Wall Power Light
On
Off
On
A warning light that indicates an issue with the system, or a component
Mobile App: My System > Base Station Settings > Status Lights > Trouble Light
Keypad: Menu > System Settings > Trouble Light
On
Off
On
Audio Alerts
Setting
Description
Location
Options
Default
Sets the Base Station chime volume for when an Entry Sensor opens while the system is disarmed or when the sensor is set to “Disabled.”
Mobile App: My System > Base Station Settings > Audio Alerts > Entry Sensor Chime or Name Announcement
Keypad: Menu > System Settings > Chime Volume
Off
Low
Medium
High
Medium
Voice Prompts
Sets the volume that the Base Station will announce instructions, errors, etc.
Mobile App: My System > Base Station Settings > Audio Alerts > Voice Prompts
Keypad: Menu > System Settings > Voice Prompts
Off
Low
Medium
High
Medium
A warning tone that indicates an issue with the system, or a component.
Mobile App: My System > Base Station Settings > Audio Alerts > Trouble Signal
Keypad: Menu > System Settings > Trouble SignalOff
Low
Medium
High
Medium
Alarm Siren
Setting
Description
Location
Options
Default
Sets the volume of the Base Station siren in the event that an alarm is triggered.
Mobile App: My System > Base Station Settings > Alarm Siren > Alarm Siren Volume
Keypad: Menu > System Settings > Siren Volume
Off
Low
Medium
High
High
Sets the length of time that your Base Station (and Extra Sirens if you have them) will sound in the event of an alarm
Mobile App: My System > Base Station Settings > Alarm Siren > Alarm Siren Duration
Keypad: Menu > System Settings > Siren DurationBetween 30 seconds - 8 minutes
4 minutes
Exit and Entry Delays
Setting
Description
Location
Options
Default
The amount of time before the system becomes armed in Home Mode when you press the “Home” button on your Keypad or in the Mobile App
Mobile App: My System > Base Station Settings > Exit and Entry Delays > Exit Delay (Home)
Keypad: Menu > System Settings > Exit Delay, HomeBetween 0 seconds - 4 minutes and 15 seconds
No delay (0 seconds)
The amount of time before the system becomes armed in Away Mode when you press the “Away” button on your Keypad or in the Mobile App
Mobile App: My System > Base Station Settings > Exit and Entry Delays > Exit Delay (Away)
Keypad: Menu > System Settings > Exit Delay, Away
Between 45 seconds - 4 minutes and 15 seconds
60 seconds
The amount of time before your system’s siren sounds when an active sensor is tripped in Home Mode.
Mobile App: My System > Base Station Settings > Exit and Entry Delays > Entry Delay (Home)
Keypad: Menu > System Settings > Entry Delay, Home
Between 0 seconds - 4 minutes and 15 seconds
30 seconds
The amount of time before your system’s siren sounds when an active sensor is tripped in Away Mode.
Mobile App: My System > Base Station Settings > Exit and Entry Delays > Entry Delay (Away)
Keypad: Menu > System Settings > Entry Delay, Away
Between 30 seconds - 4 minutes and 15 seconds
30 seconds
Wi-Fi Network
Setting
Description
Location
Options
Default
Wi-Fi Network
Choose the Wi-Fi network that your system is connected to. Learn more about connecting your system to Wi-Fi.
Mobile App: My System > Base Station Settings > Wi-Fi Network
Keypad: Menu > System Settings > WiFi Network
N/A
N/A
Help Center Article
•
Base Station
Keypad Not Powering On After A Power Cycle
The Keypad takes 4 Duracell AA batteries, which have a life expectancy of 8-12 months depending on your usage and placement of the Keypad. Your system should alert you that the Keypad has low batteries, so you’ll have ample time to change them out. In the event that you notice that your Keypad isn’t powering on, you can try a few quick steps to get the device up and running again.
Before the Keypad can power back on, it’s important to drain all the passive power from the Keypad. To do this:
Slide the Keypad up and off its bracket and remove the battery panel on the back of it
Remove all 4 batteries from the Keypad
Wait at least 3 minutes, this should allow the Keypad to fully power off
Insert 4 new Duracell AA batteries into the Keypad. We recommend that the batteries are less than 8 months old
Make sure that the batteries are installed correctly, with the negative (flat) side of the battery touching the springs

If the Keypad still does not light up, use a known pair of working AA batteries, such as the ones in a remote control. If the Keypad lights up and powers on with these batteries, you’ll want to replace the batteries in your Keypad with a new set.
Help Center Article
•
Keypad
How to Find the Serial Number for Your SimpliSafe® Device or Camera
During troubleshooting or for account verification purposes, you may be required to identify the serial number for a product within your system. You can easily find the serial number for your devices or cameras within the SimpliSafe® Mobile App.
Locating the Serial Number for your Base Station in the SimpliSafe® App
Open the SimpliSafe® Mobile App on your phone or tablet
Tap on the three-bar menu (hamburger menu) in the upper left corner of the app screen
Choose Help & Support
At the top of the menu you’ll see an Account Number
This is the serial number for your Base Station
Locating the Serial Number for your Devices or Cameras in the SimpliSafe® App
Open the SimpliSafe® Mobile App on your phone or tablet
Choose My System from the bottom navigation bar
Tap on the Device or Camera you wish to manage
Scroll down to Basic Info
Your device or camera’s Serial Number will be listed here
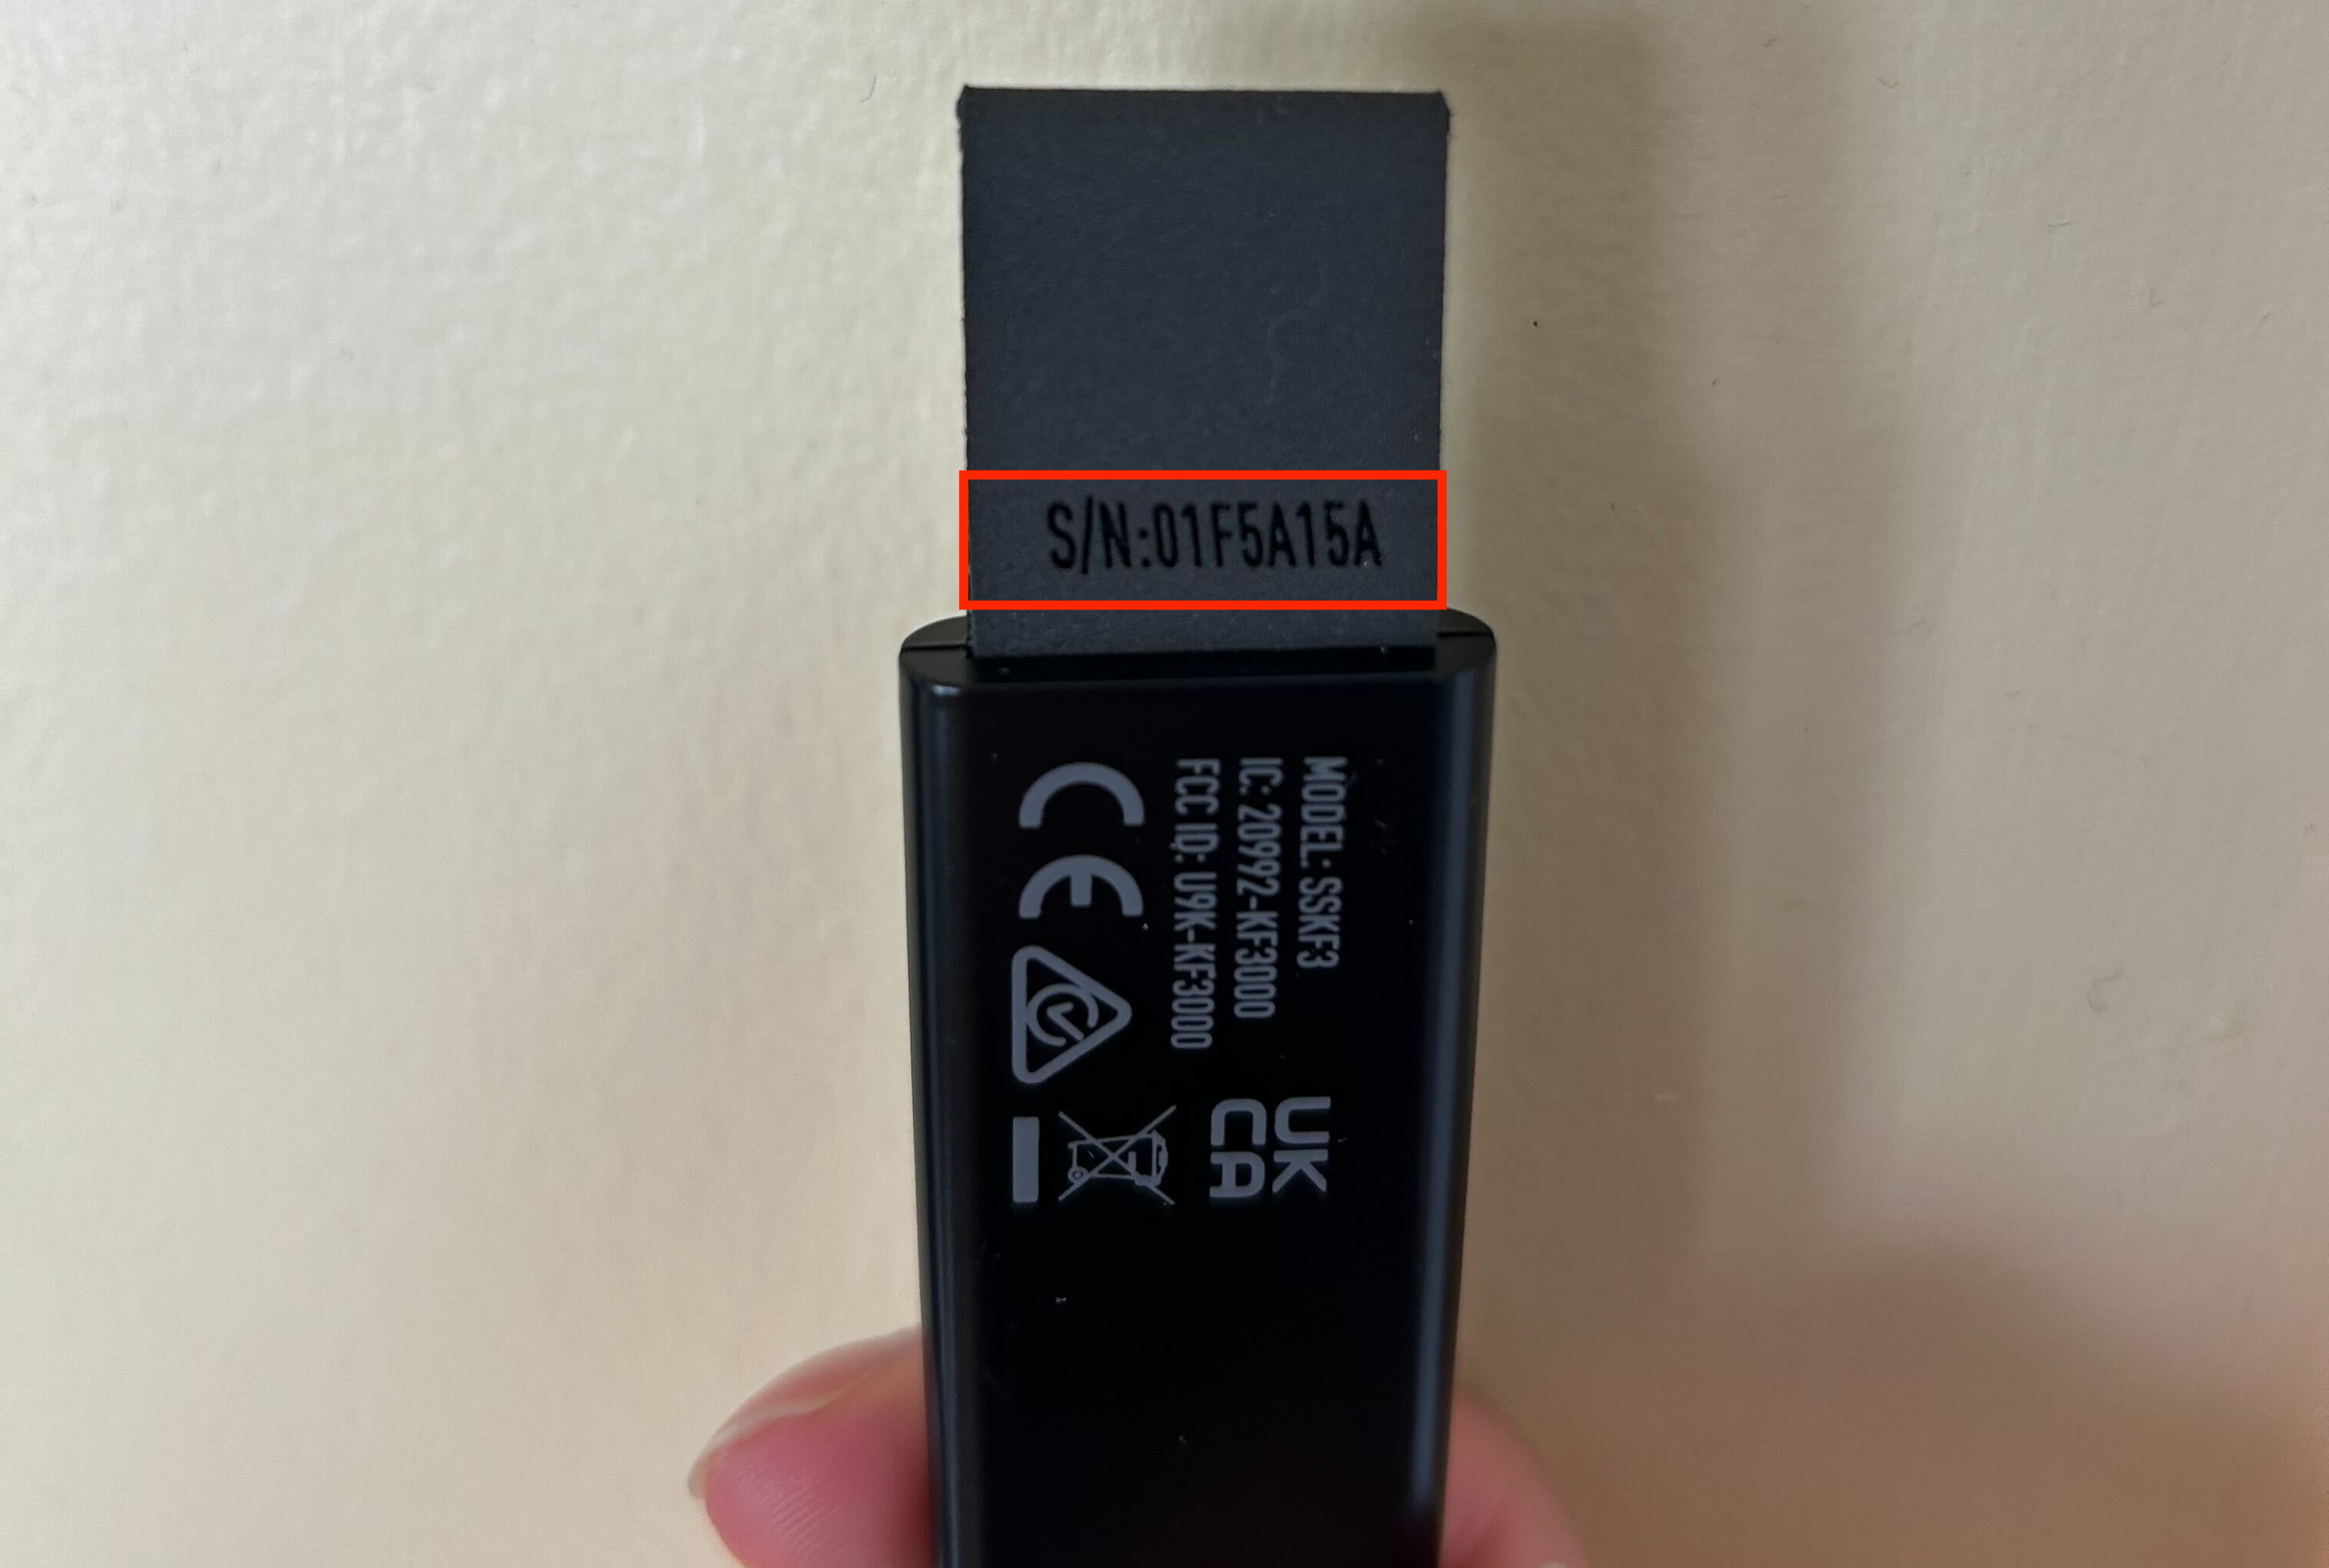
There may be a point where you need to find the serial number on the physical device itself. The rest of the article will guide you through finding the serial number for each product. Click to expand the collapsible section for the product type you wish to learn more about.
Help Center Article
•
Product Support
What Is The Red Button On The Top Of The Keypad?

The red button on the top of the Keypad is designed to be a Panic Button for your system. When subscribed to select monitoring plans, if you press and hold the button for 2 seconds, it will alert the monitoring center of an emergency, who will then request dispatch to your location.
If you wish to disable this feature, simply follow the instructions below:
Press the menu button on your Keypad
Enter your Master PIN
Select Devices
Scroll to and select the Keypad that you would like to disable the Panic Button on
Select Panic Alarm
Set to Disabled
Help Center Article
•
Keypad
How To Replace Keypad Batteries
The Keypad takes four (4) AA Alkaline batteries and has a life expectancy between 8-12 months depending on placement and usage.
We recommend using standard AA batteries, and not rechargeable ones to ensure that your Keypad is adequately powered.
To change your Keypad batteries, slide the device off its bracket and remove the batteries. Wait at least 3 minutes, then insert the new batteries into the back of your Keypad.
Keypad’s batteries are dying too quickly
If you find that the batteries in your Keypad are dying faster than the 8-12 month life expectancy, it can help to enable power savings mode. Turning on power saving mode will turn off the proximity sensor in the Keypad that tells the device to light up when someone gets close to it.
To enable power saving mode:
Press the Menu button on the Keypad
Enter your Master PIN
Select Devices
Select your Keypad
Choose Power Savings
Use the Keypad’s arrow to toggle the setting on
Help Center Article
•
Keypad




_Serial_N.png "Smart Lock (Original) Serial Number.png")