

Conversation List
Outdoor Camera Motion Detection Troubleshooting
If you’re getting too many motion alerts when your camera is set to People Only mode, we recommend trying the following tricks:
Change your camera’s motion detection setting to All Motion
Turn your camera’s sensitivity down to Medium or Low
If you have Activity Zones set up, adjust them to also block off the zones around the image that the camera is detecting, as seen in the GIF below
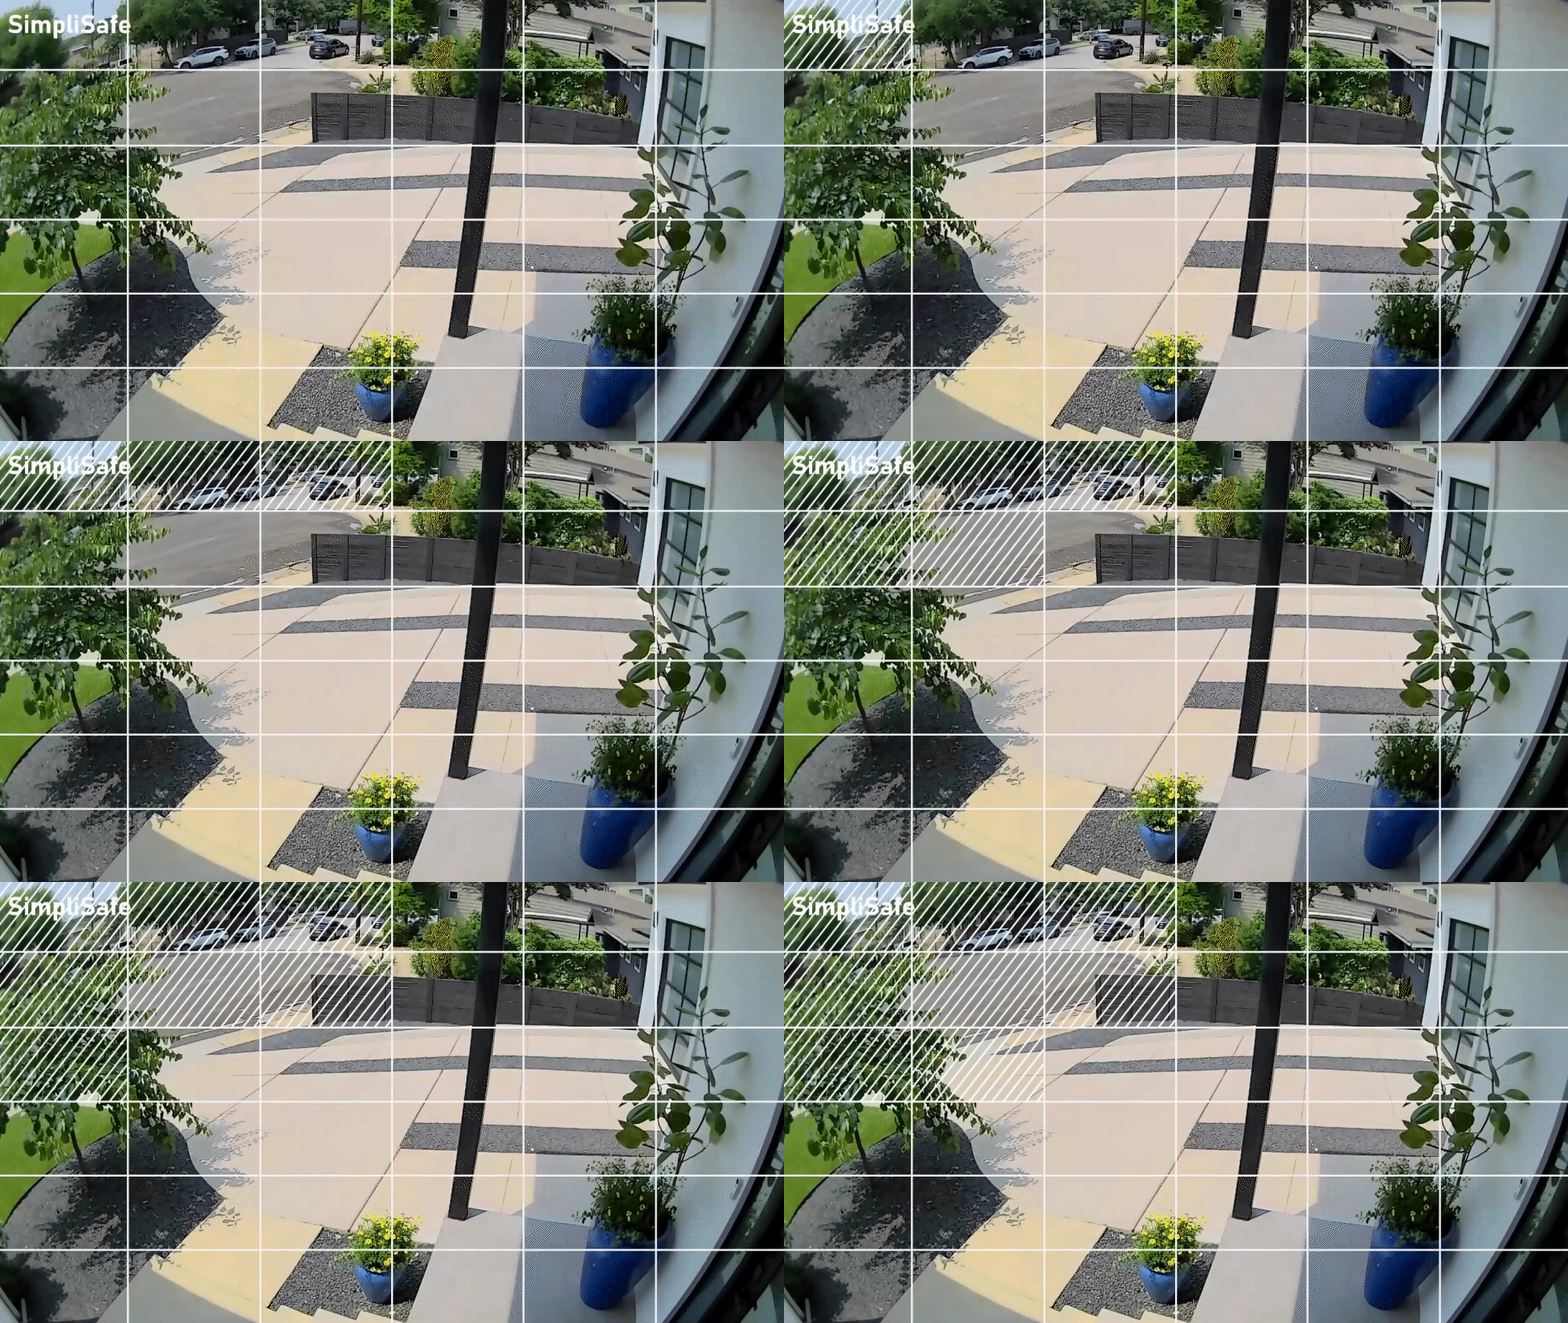
How to Change Your Camera’s Settings
You can change your camera’s motion detection settings using either the SimpliSafe® Mobile App or Web App by taking the steps below.
SimpliSafe® Mobile App
Open the SimpliSafe® Mobile App on your phone or tablet
Choose My System from the bottom navigation bar
Select Camera Settings from the list of available menu options
Select the camera you want to update
Adjust your camera’s motion detection settings as needed
When you are done, select Save in the top right corner to save your selections
SimpliSafe® Online Account
Log into your SimpliSafe® account using the browser of your choice on a computer
If you manage multiple properties, choose the location you wish to update from the list by clicking on the Base Station Serial Number or Property Address
Select Devices from the navigation bar on the left side of the screen
Select the camera you want to update
A pop up menu will appear on the right hand side of the screen
Adjust your camera’s motion detection settings as needed
When you are done, click Save Changes on on the bottom of the pop up to save your selections
Help Center Article
•
Outdoor Cameras
How to Find the MAC Address of a SimpliSafe® Device
In some instances you may need to add the MAC Address of a SimpliSafe® product to your network’s allow list or firewall in order for it to connect to Wi-Fi. A MAC Address is a unique, 12-character alphanumeric attribute that is used to identify individual electronic devices on a network.
Only the Base Station and the Cameras will provide a MAC Address, as they connect to Wi-Fi. Other SimpliSafe® products connect to the Base Station using Radio Frequency (RF).
Note: If you have MAC Address filtering enabled on your network, you may need to temporarily disable it while setting up your camera, to allow it to connect. You’ll be able to determine the MAC Address to add to your allow list once the device is connected.
Base Station
For the Base Station, you will need to use your Keypad to locate its MAC Address.
Press Menu on your Keypad
Enter your Master PIN
Using the Keypad’s arrow keys, select System Settings
Then choose Diagnostics
Press the Keypad screen to the right to toggle to the Wi-Fi screen, where the MAC Address will be listed
Cameras
You can locate the MAC Address of a SimpliSafe® Camera using the SimpliSafe® Mobile App.
Open the SimpliSafe® Mobile App on your phone or tablet
Choose My System from the bottom navigation bar
Select Camera Settings from the list of available menu options
Tap on the Camera you wish to manage
Scroll to the bottom of this screen. Your Cameras MAC Address will be listed in the MAC Address field.
Help Center Article
•
Cameras
Can't Initiate Live Stream From Within the SimpliSafe® App
If you are unable to initiate a live stream from within the SimpliSafe® Mobile App or Online Account, there are a few steps you can take to try and get things running again.
Using the Connection Check Tool
The Connection Check Tool for Cameras is a great way to better understand your signal strength and upload speed from the router to where your camera is located.
To use the Connection Check Tool:
Open the SimpliSafe® Mobile App on your phone or tablet
Choose My System from the bottom navigation bar
Select Camera Settings
Choose your camera from the list of available cameras
Under “Connection” select “Connection Check”
Tap “Start Connection Check” to find your camera’s connection strength
What do my Results Mean?
A good signal strength and/or upload speed means that there is a strong connection between your camera and Wi-Fi network.
A fair or poor upload speed means that you’ll want to reduce your camera’s video resolution. You can do this within the Camera Settings page for your camera in the SimpliSafe® Mobile App.
Open the SimpliSafe® Mobile App on your phone or tablet
Choose My System from the bottom navigation bar
Select Camera Settings
Choose your camera from the list of available cameras
Tap on Video Quality
Choose a lower resolution
Select SAVE in the upper right corner to save your selections
It may also be necessary to upload your Internet package with your Internet Service Provider (ISP) to improve upload speeds. We recommend reaching out to your ISP to learn more about their offerings.
A fair or poor signal strength means your camera may be too far away from your Wi-Fi router. We recommend moving them closer, if possible. If not, you can opt to install a Wi-Fi extender to help bridge the network connectivity gap between the two. You can also move SimpliSafe® to a dedicated network or guest network to alleviate congestion. To learn more about setting up a dedicated or guest network, contact your Internet Service Provider (ISP) or consult with your router’s manual.
Still Need Help?
Don't hesitate to contact our support team for additional troubleshooting or assistance. We're here to help!
Help Center Article
•
Cameras
Wireless Outdoor Security Camera Settings & Customizations
The Wireless Outdoor Security Camera has a variety of settings that can be customized, such as Motion Detection, Night Vision, Video Quality, and more! You can adjust these settings at any time using the SimpliSafe® Mobile App.
Using the SimpliSafe® Mobile App
Open the SimpliSafe® Mobile App on your phone or tablet
Choose My System from the bottom navigation bar
Select Camera Settings
Choose your Wireless Outdoor Security Camera from the list of available cameras
Camera Behavior
You can customize your Outdoor Camera by changing the motion detection to coincide with your system’s arming state. For example, if you don’t want your system to record when the system is set to OFF but you do want it to record when it’s set to AWAY, you can now control these settings.
To change these settings, tap into either OFF, HOME, or AWAY and make the adjustments to Motion Detection and Motion Notifications. Then, choose SAVE in the upper right corner of the app to save your selections.
Motion Detection
Motion Detection settings control how your camera will respond to motion events, such as someone walking in its view or a car driving by. In this menu, you can use the slider to adjust sensitivity, as well as change the Motion Type to detect All Motion or People Only. You’ll also be able to filter motion detection further by creating Activity Zones, which allow you to exclude certain areas from motion events. This is great if you live near a busy sidewalk or street!
Video Quality
Video Quality manages what quality your streams and recordings will be at. For the Wireless Outdoor Security Camera you can adjust this to 1080p, 720p, or 480p. The higher the stream, the more bandwidth it will use on your network. So if you’re having trouble streaming at 1080p, you can try lowering the quality as a troubleshooting step on your end.
Flip Image 180
This option is available should you mount your Outdoor Camera upside down, such as on an eave. When mounting your camera upside down, you will actively decrease the distance that it picks up motion in half. Specifically, an upside down Outdoor Camera will pick up motion within 15 feet, as opposed to 30 when in a normal orientation.
Mic & Audio
The Mic & Audio setting allows you to hear audio from your camera, and also allows you to initiate two-way communication when viewing live streams.
Siren
Your camera has a built-in siren that will relay the siren from your system in the event of an alarm so that neighbors or nearby passersby know that you may need help.
Status Light
The Status Light for your camera will show you that the camera is online and functioning, at a glance.
Help Center Article
•
Outdoor Cameras
Wireless Outdoor Security Camera Error Messages
CONNECTION ERROR
WHAT IT MEANS
If your Outdoor Camera is not responding, it’s likely due to either a low or dead battery or the camera is unable to connect to Wi-Fi. Please note that SimpliSafe® systems and cameras require 2.4GHz Wi-Fi networks.
HOW TO FIX IT
Remove the battery from the camera and charge it with the usb charging cord that came included with your camera to ensure your battery is fully charged.
Confirm that your camera is connected to the correct network and that the name and password for the network have been entered correctly. You can do this my accessing the camera's settings in the SimpliSafe® mobile app.
Try bringing the camera and your internet router closer together, as too far a distance can weaken the internet connection to the device.
Restart your router and/or mesh access points and extenders.
Try bringing the camera and Base Station closer together, as too far of a distance between them can weaken the Outdoor Camera’s connection to your system and cause this error.
If this error persists, you may need to contact your Internet Service Provider to inquire about service availability and interruptions, and about upgrading your internet package and/or router.
Learn more about improving your upload speed and improving Wi-Fi signal strength. Please note that SimpliSafe® systems and cameras require 2.4GHz Wi-Fi networks.
WE’VE DETECTED AN ISSUE WITH THIS CAMERA
WHAT IT MEANS
A hardware issue was detected on your camera.
HOW TO FIX IT
Contact Customer Support for assistance resolving this issue.
UNABLE TO CONNECT TO SIMPLISAFE®
WHAT IT MEANS
SimpliSafe® is experiencing an issue, but there’s nothing wrong with your system.
HOW TO FIX IT
The issue should be resolved shortly, so please try again later. If you continue to experience the issue, please contact Customer Support.
Update Software
WHAT IT MEANS
The Wireless Outdoor Security Camera requires a Gen 3 Base Station with the latest firmware updates to run smoothly.
HOW TO FIX IT
Before setting up the camera, you will need to update the Base Station firmware via the Keypad.
If you have an Original SimpliSafe® system, upgrade to our latest generation today and receive a 50% discount on all your new devices. Upgrade here!
Unable to Stream to Your Device
WHAT IT MEANS
Some Android devices are unable to support the video playback on our Outdoor camera due to their hardware configuration.
HOW TO FIX IT
While we review the issue internally, please attempt to update your mobile devices operating system to the latest version. If that does not resolve the issue, please try using a newer Android device or the SimpliSafe® Online Account.
Help Center Article
•
Outdoor Cameras
Wireless Outdoor Security Camera Overview and Installation Guide
Overview
With the Wireless Outdoor Security Camera, enjoy advanced security from the outside, with 1080p HD video and a 140-degree ultra-wide field of view. Plus digital zoom and full-color vision at night - so nothing slips by undetected.
Before Getting Started
Before you get started, let’s make sure you have everything you need to get up and running.
In order to successfully set up the Outdoor Camera, you will need the following:
The latest generation of the SimpliSafe® Base Station and Keypad
A screwdriver for mounting on wood or vinyl surfaces
A 7/64 drill bit for mounting on brick, stucco or tile surfaces
Compatible USB adapter ( 5V, 7.5W+, 1.5A+, not included)
A 2.4GHz network connection
Note: the Outdoor Camera’s optimal temperature threshold is -4°F to 122°F
We also recommend fully charging the battery in your camera before beginning the installation process. It will take up to 6 hours for the battery to fully charge. You'll know it's charged when all 3 lights on the battery are illuminated, and not pulsing.
Watch the video below for a hands-on experience from our team of experts for the installation process
Troubleshooting
Unable to set up a camera because it is already associated with another account
Wireless Outdoor Security Camera Flashing Yellow During Setup
Compliance
Related Articles
Shop Related Products
Help Center Article
•
Outdoor Cameras
What does “Camera Connection Dropped” mean?
A "Camera Connection Dropped" error means that during a live stream, SimpliSafe® stopped receiving video from the camera. This is often the result of poor internet connectivity between the camera and the router, causing the camera to be unable to upload video for viewing as fast as it is recording.
The video that your camera has already recorded but not yet been able to stream is stored in the camera's own internal memory. However, the camera’s memory is limited and may eventually be insufficient to hold the video backlog. If the camera's memory becomes full before it can upload the recordings, the video stream will end.
For more information on how to strengthen your camera's connection, please refer to the How to Improve Wi-Fi Signal Strength and How to Improve Upload Speed articles in the Help Center.
Help Center Article
•
Cameras