Conversation List
How to Find the Serial Number for Your SimpliSafe® Device or Camera
During troubleshooting or for account verification purposes, you may be required to identify the serial number for a product within your system. You can easily find the serial number for your devices or cameras within the SimpliSafe® Mobile App.
Locating the Serial Number for your Base Station in the SimpliSafe® App
Open the SimpliSafe® Mobile App on your phone or tablet
Tap on the three-bar menu (hamburger menu) in the upper left corner of the app screen
Choose Help & Support
At the top of the menu you’ll see an Account Number
This is the serial number for your Base Station
Locating the Serial Number for your Devices or Cameras in the SimpliSafe® App
Open the SimpliSafe® Mobile App on your phone or tablet
Choose My System from the bottom navigation bar
Tap on the Device or Camera you wish to manage
Scroll down to Basic Info
Your device or camera’s Serial Number will be listed here
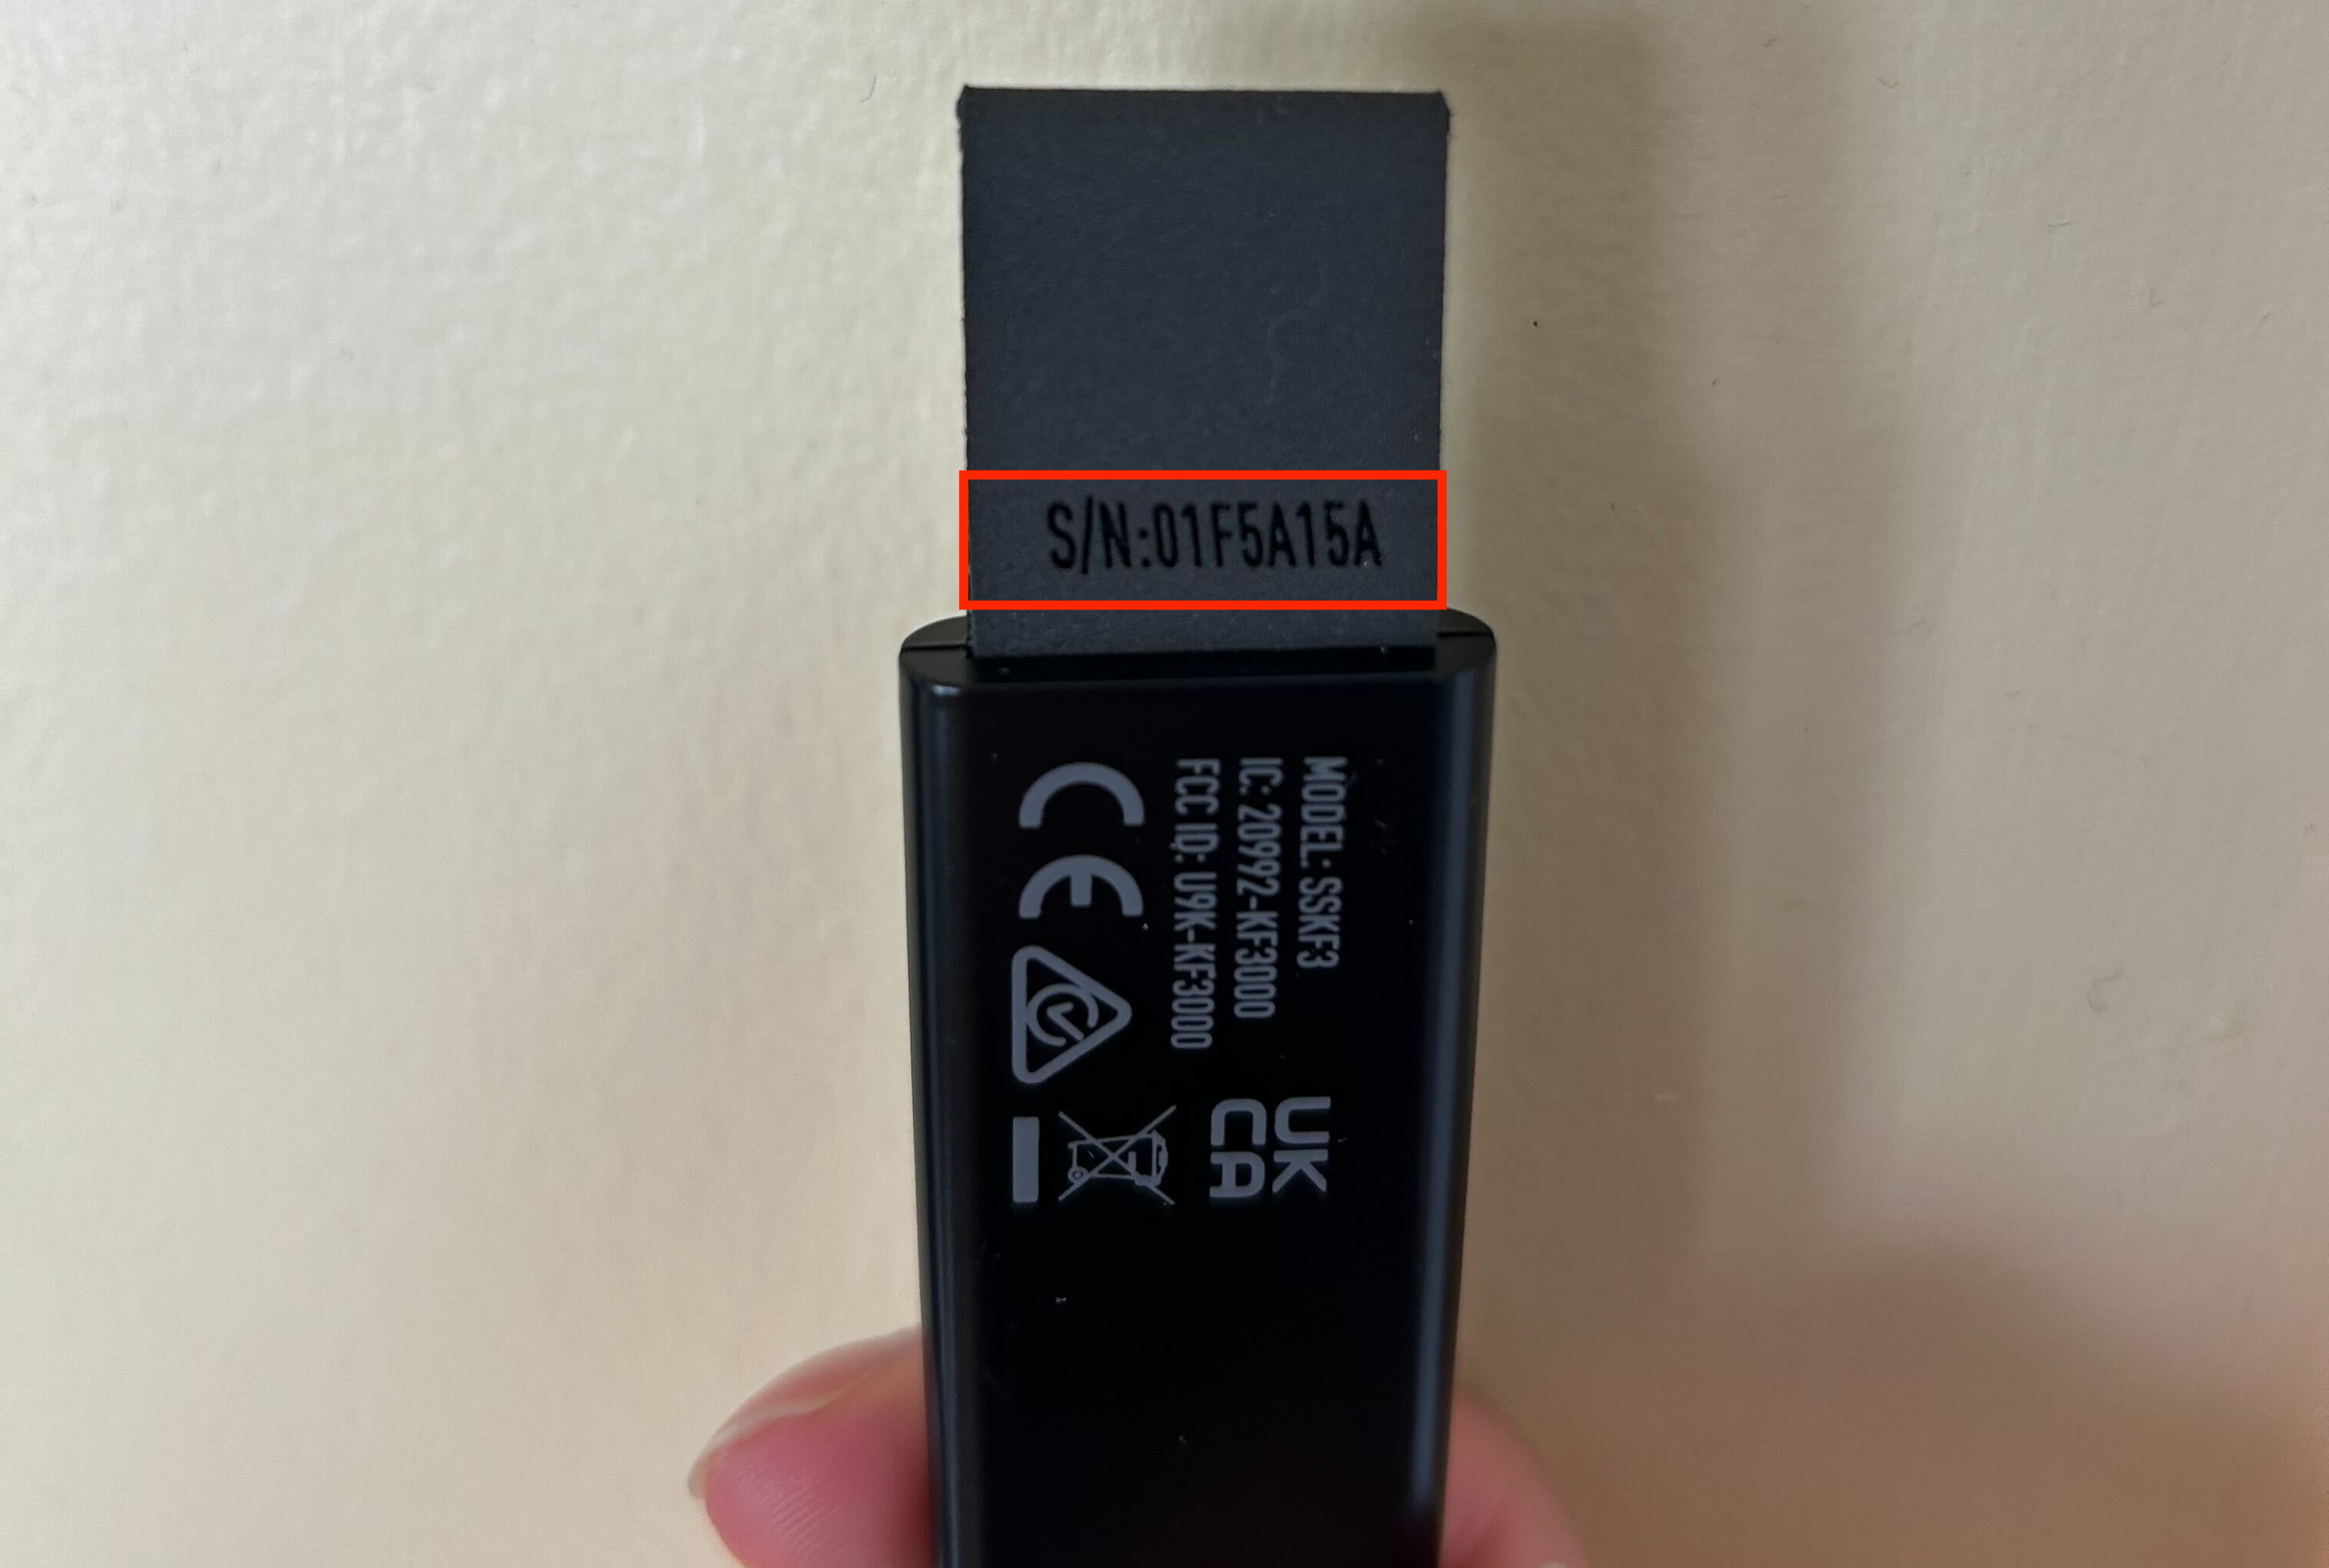
There may be a point where you need to find the serial number on the physical device itself. The rest of the article will guide you through finding the serial number for each product. Click to expand the collapsible section for the product type you wish to learn more about.
Help Center Article
•
Product Support
Outdoor Camera Power Cable Specifications
The Outdoor Camera Power Cable is a great way to keep your Outdoor Camera powered at all times. The Outdoor Camera Power Cable is 25 feet long and is IP65 water-resistant cable. The Outdoor Camera Power Cable comes with cable clips that can be applied to a clean surface with the built-in adhesives, or permanently attached to that surface using screws. We recommend a 5/64” drill bit to adhere the cable clips to a surface when not using the adhesive option.
When the Outdoor Camera is plugged in with the power cable, you’ll see faster live streams and enjoy pre-roll recordings with Performance Mode.
Need to purchase an Outdoor Camera Power Cable? You can find it available for purchase on our website.
Help Center Article
•
Cameras
Performance Mode for Cameras
When connected to a continuous power source, the Outdoor Camera and Smart Alarm Wireless Indoor Security Camera can enter performance mode.
When performance mode is enabled for a camera, the camera will remain awake allowing for faster live streams versus battery power. This feature is available to the Outdoor Camera and Smart Alarm Indoor Camera when running firmware version 1.20 or higher, and occurs automatically when the camera is plugged into a power source and it has at least 90% charge. If your camera battery ever drops below 70%, your camera will automatically exit performance mode to conserve battery.
Performance mode also allows the cameras to begin recording* while it determines whether or not the observed motion event was a person or another object (such as a passing car, a tree blowing in the wind, or an indoor pet). This allows for more complete recordings of motion events delivered to your timeline in the SimpliSafe® Mobile App.
*Requires a monitoring plan with recordings.
Help Center Article
•
Cameras
How to Reorder Cameras in the SimpliSafe® App
An exciting feature of the SimpliSafe® App is the ability to reorder your list of cameras in the Cameras tab in the app. This is helpful if you want to see your cameras in alphabetical order, or organised in any specific way.

To Reorder Your Cameras in the SimpliSafe® App:
Open the SimpliSafe® App on your phone or tablet
Select Cameras from the navigation bar on the bottom of the screen
Tap on the reorder icon on the upper right corner of the screen

Press and hold a camera to drag and reorder it
Follow step 4 again for any other cameras you want to reorder
*Note: This feature is only to reorder your cameras in the SimpliSafe® app. Changing the order of your sensors is currently not supported.
Help Center Article
•
Outdoor Camera Series 2 UK
How to Download Recordings From Your Camera
Video clips from SimpliSafe® cameras can be downloaded to your mobile device using the SimpliSafe® Mobile App. Recordings are available with select monitoring plans.
Please note that if your camera name contains an apostrophe, this may limit your ability to download recordings. We recommend changing your camera’s name to exclude the use of an apostrophe before attempting to download any recordings.
How to Download
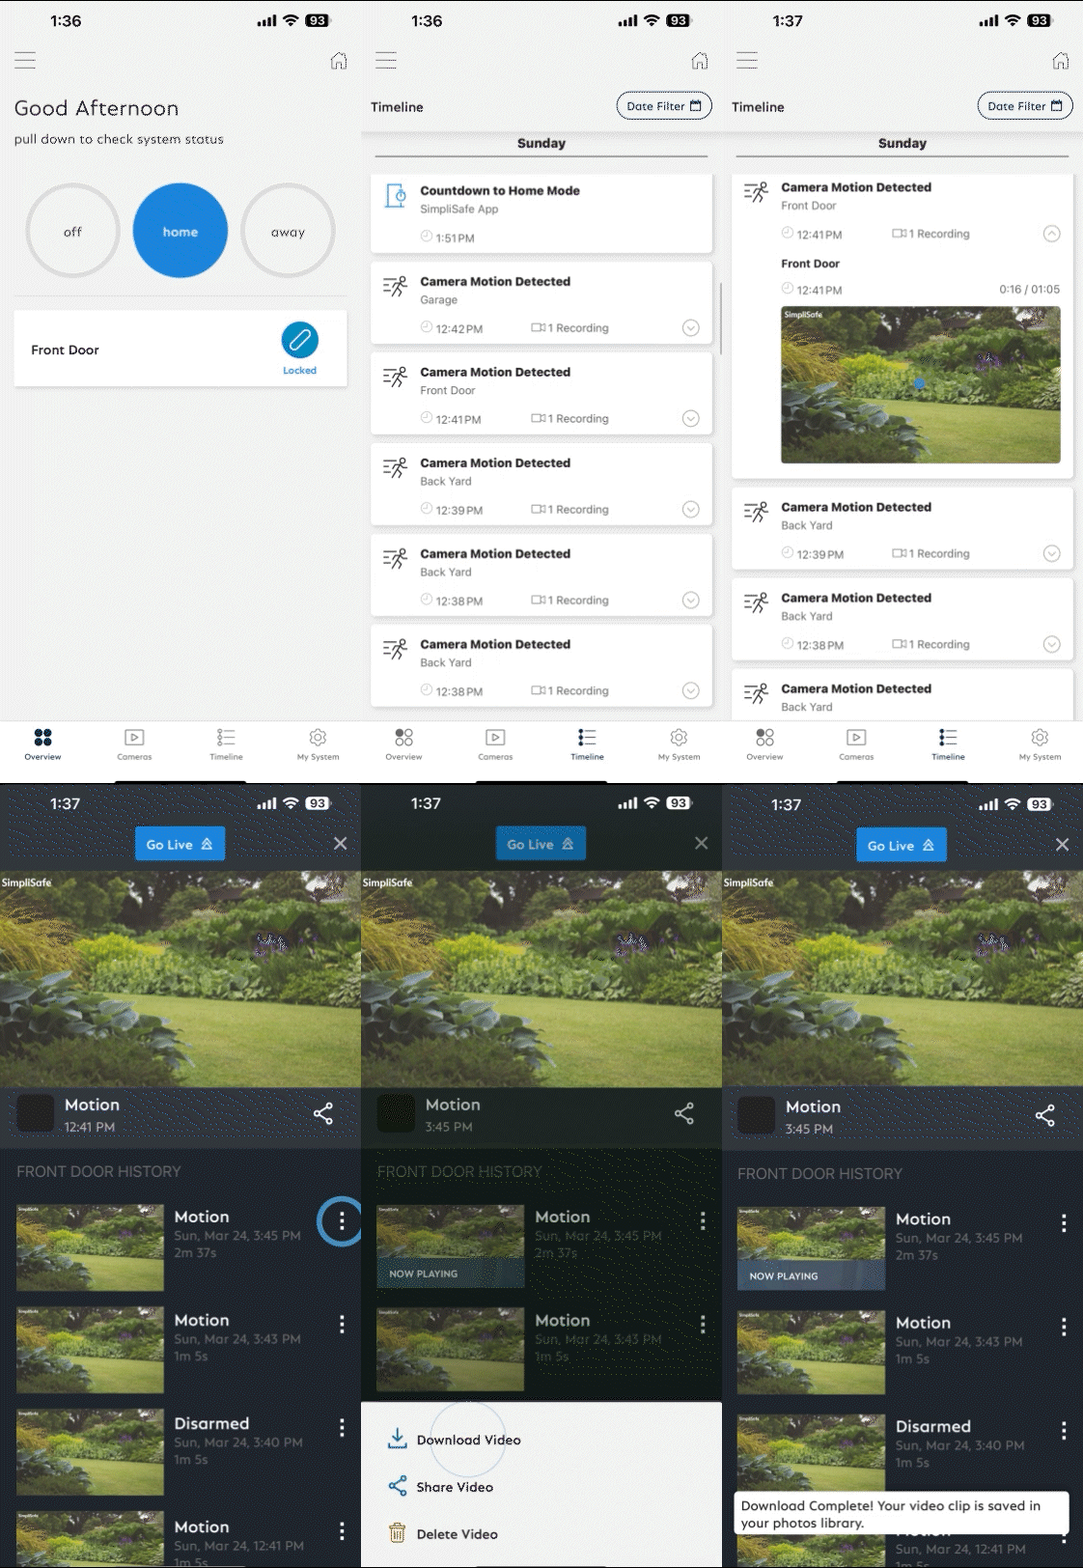
In the SimpliSafe® App, tap on Timeline from the bottom navigation bar
Swipe up and down through the Timeline and find the event whose clip you wish to download
Tap on the event and then tap on the video preview within the event
Tap the three-dot icon next to the recording and then choose Download Video
The clip will be saved to your phone
To access saved videos, go to your phone’s camera roll
How to Download Recordings Using the SimpliSafe® Online Account
Log into the SimpliSafe® Online Account using the browser of your choice
Select Timeline from the navigation menu on the left side of the screen
If you do not see the navigation menu, click the three-bar icon on the top left corner of the screen to reveal it
Scroll through the Timeline and find the event with the video clip you wish to download
Tap on the event and then tap on the video on the right side of the screen
Tap the download icon on the bottom right side of the video player
The clip will be saved to your computer
To access saved videos, go to your downloaded files in your computer
Is a Timestamp Included?
When you download a video from your timeline, the date and time that the recording was filmed is found at the end of the file name.
To find the timestamp, take the following steps:
Open your camera roll
Select the recording you downloaded
Tap the i icon on the bottom of the screen to display the video’s file name
This step may vary depending on your mobile device
At the end of the file name, you will see the date and time the recording was filmed
Note: the time stamp will be written in numbers, displayed as MM/DD/YYY_HH/MM/SS. So for a recording filmed on August 21, 2024 at 2:31:21 PM, the timestamp will be displayed as: 08212024_023121PM.


Help Center Article
•
Cameras
Outdoor Camera Motion Detection Troubleshooting
If you’re getting too many motion alerts when your camera is set to People Only mode, we recommend trying the following tricks:
Change your camera’s motion detection setting to All Motion
Turn your camera’s sensitivity down to Medium or Low
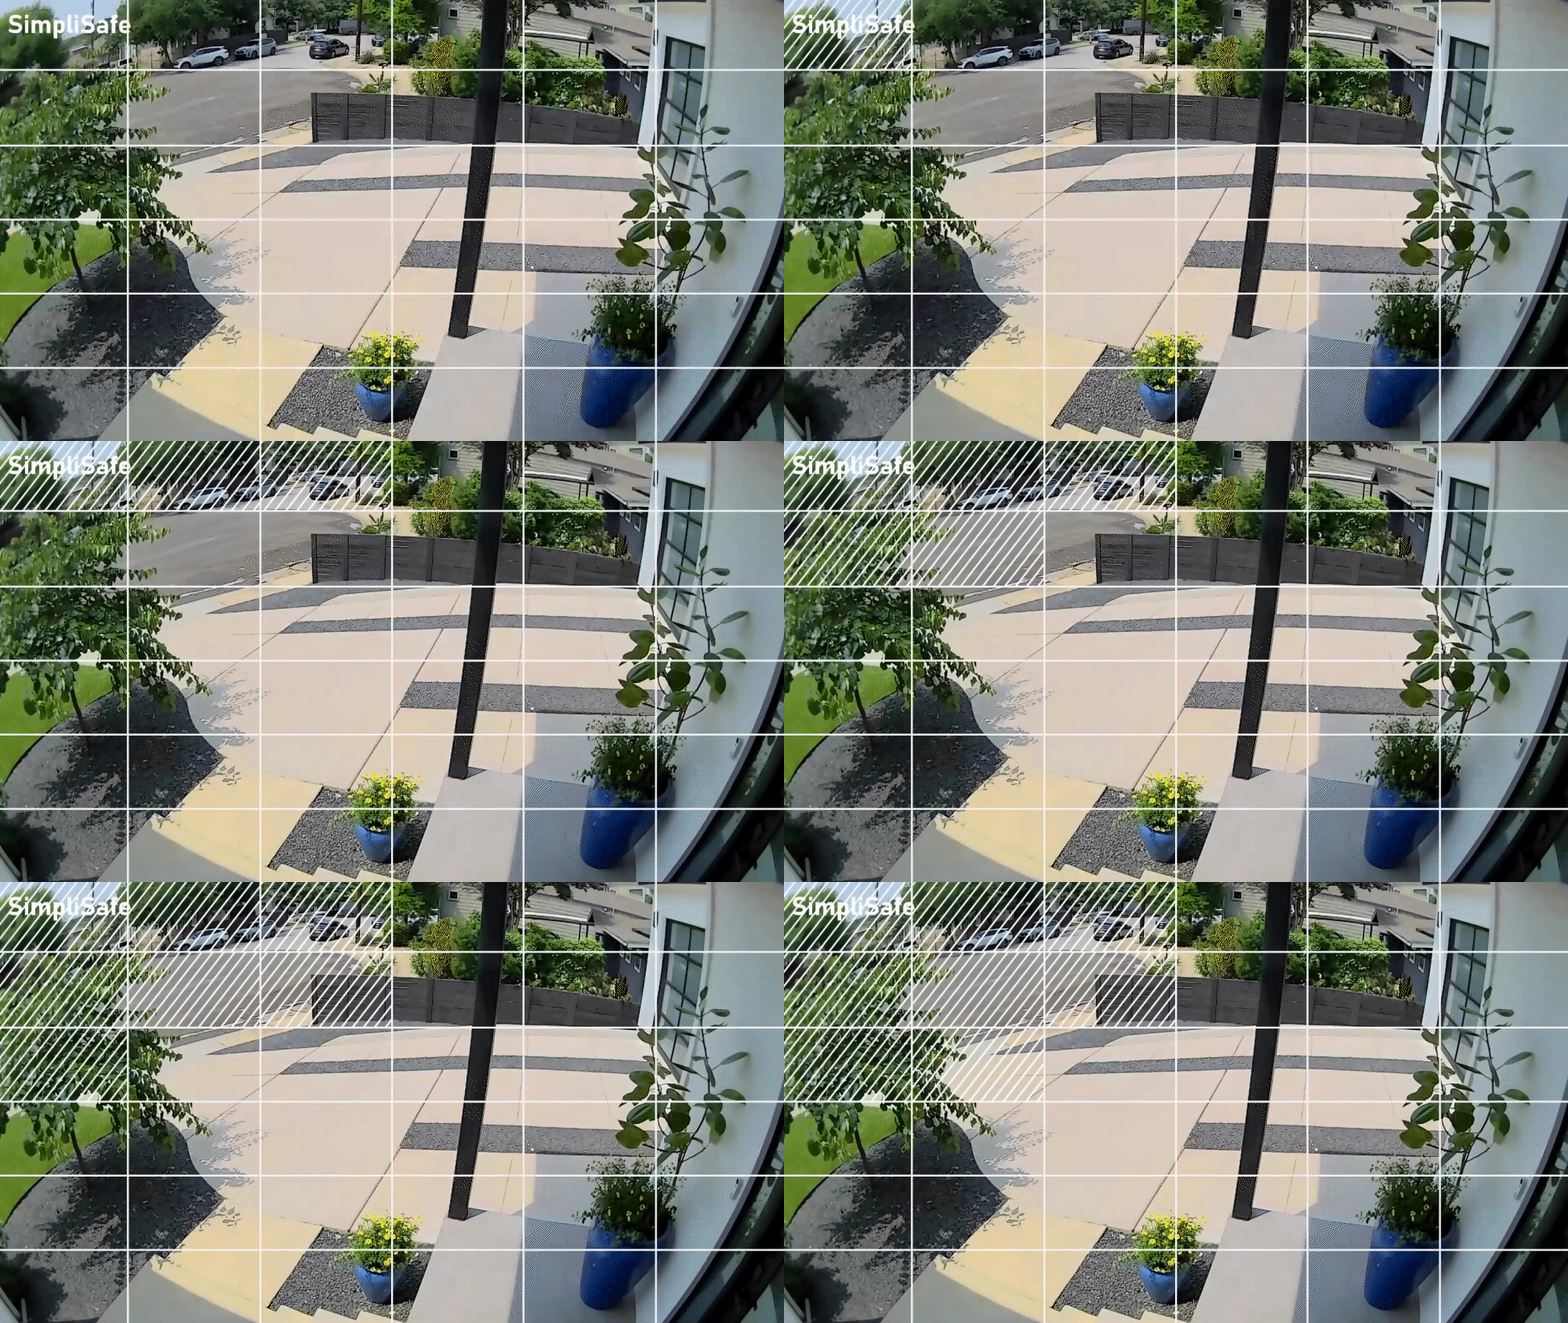
If you have Activity Zones set up, adjust them to also block off the zones around the image that the camera is detecting, as seen in the GIF below
How to Change Your Camera’s Settings
You can change your camera’s motion detection settings using either the SimpliSafe® Mobile App or Web App by taking the steps below.
SimpliSafe® Mobile App
Open the SimpliSafe® Mobile App on your phone or tablet
Select the Cameras tab from the navigation bar at the bottom of the screen
Tap on the gear icon to open up Camera Settings in the top right corner of the app
Select the camera you want to update
Adjust your camera’s motion detection settings as needed
When you are done, select Save in the top right corner to save your selections
SimpliSafe® Web App
Log into your SimpliSafe® account using the Web App on a computer
If you manage multiple properties, choose the location you wish to update from the list by clicking on the Base Station Serial Number or Property Address
Select Devices from the navigation bar on the left side of the screen
Select the camera you want to update
A pop up menu will appear on the right hand side of the screen
Adjust your camera’s motion detection settings as needed
When you are done, click Save Changes on on the bottom of the pop up to save your selections
If you run into any additional issues with your Wireless Outdoor Security Camera's motion detection, the following guided flow can walk you through some steps and best practices for using your camera.
Help Center Article
•
Outdoor Cameras
How to Find the MAC Address of a SimpliSafe® Device
In some instances, you may need to add the MAC Address of a SimpliSafe® product to your network’s allow list or firewall in order for it to connect to Wi-Fi. A MAC Address is a unique, 12-character alphanumeric attribute that is used to identify individual electronic devices on a network.
Only the Base Station and the Cameras will provide a MAC Address, as they connect to Wi-Fi. Other SimpliSafe® products connect to the Base Station using Radio Frequency (RF).
Note: If you have MAC Address filtering enabled on your network, you may need to temporarily disable it while setting up your camera, to allow it to connect. You’ll be able to determine the MAC Address to add to your allow list once the device is connected.
Base Station
For the Base Station, you will need to use your Keypad to locate its MAC Address.
Press Menu on your Keypad
Enter your Primary PIN
Using the arrow keys, select System Settings
Then choose Diagnostics
Use the right arrow and toggle to the Wi-Fi screen, where the MAC Address will be listed
Cameras
You can locate the MAC Address of a SimpliSafe® Camera using the SimpliSafe® Mobile App.
Open the SimpliSafe® Mobile App on your phone or tablet
Choose My System from the bottom navigation bar
Select Camera Settings
Tap on the Camera you wish to find the MAC Address for
Scroll to the bottom of this screen. Your Cameras MAC Address will be listed in the MAC Address field.
Help Center Article
•
Cameras