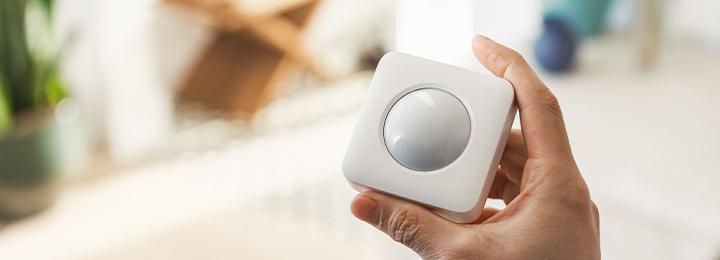
Motion Sensor Gen 2

Conversation List
Filter by
How do Motion Sensors Respond During an Alarm
When the system is in an armed state (Home or Away Mode) and a Motion Sensor detects motion within your home or business, the entry countdown will begin. The entry countdown by default is 30 seconds, however, this can be adjusted at any time within the SimpliSafe® App.
If the system is disarmed within 30-60 seconds of the initial alarm signal, this will be considered a false alarm by our monitoring centre. That means you will not receive a phone call and emergency services will not be requested to your location.
If the system is not disarmed before the time elapses, an alarm will sound. Depending on your monitoring service plan, two things will happen at once.
Your Emergency Contacts for your system will receive a phone call from our monitoring centre to verify the status of your home.
If the alarm is not canceled within the grace period, the Emergency Contacts will receive a call from our monitoring centre. During this call you will be required to provide your Safe Word to the agent you speak with. Please note that providing the wrong safe word, or no safe word can result in a request for dispatch. You won’t be told you got it wrong to protect anyone who may be under duress. Additionally, missing the phone calls to your Emergency Contacts can also result in a request for guard services to the location that your system is registered to.
We encourage you to save the monitoring centre numbers to your phone. The numbers in which Securitas call you from:
Securitas will contact you from: 0330 184 0444
You can contact Securitas on: 0303 330 0369
Test Mode Automated Call: 01908 644505
Once saved to your phone, you’ll also want to allow us access to bypass Do Not Disturb and Silent Profiles. This allows for Critical Alarm Notifications to get through to you, regardless of your phone’s volume or profile status.
Help Center Article
•
Motion Sensors
Motion Sensor Gen 2 False Alarms
False Alarm Causes
Our Motion Sensors have been designed to avoid false alarms. However, if you’ve experienced one, there are a few potential issues that may cause them:
Direct sunlight hitting the sensor can trigger a false alarm.
Heating vents located in the room. If they are located within the sensor’s field of vision, they may cause false alarms.
Curtains moving in front of a warm radiator in the sensor's field of view
Pets that are able to get too close to the sensor. Pets under 60 pounds generally don’t trigger Motion Sensors, but if they get close enough to the sensor (within a few feet), smaller dogs or cats may still be able to trigger it.
We also recommend avoiding pointing the Motion Sensor at a couch or bed that the dog or cat may jump onto.
A bolt of lightning creating a sudden burst of light and heat.
Open windows that allow the Motion Sensor to pick up on outdoor motion.
A small insect crawling right in front of it.
Force that vibrates or moves the sensor, like a strong gust of wind.
Avoiding False Alarm Triggers
Environmental triggers are rare, but they can cause false alarms. Sunlight, lighting, or outdoor motion through your window can be avoided by placing your Motion Sensor in a corner where it will not be directly hit by sunlight throughout the day.
If you suspect that heating vents may be responsible for false alarms, position your sensor in a part of the room where it will not see the hot or cold air vent. As long as the change in the room’s ambient temperature is gradual, the sensor should not trigger.
For homes with pets, it’s crucial that you enable Pet Mode within the SimpliSafe® Mobile App. You can turn this setting on at any time by taking these steps:
Open the SimpliSafe® Mobile App and navigate to the “My System” gear on the bottom of the screen.
Select “Device Settings”.
Select the Motion Sensor Gen 2 you would like to customise.
Under “Motion Sensitivity”, Select “Pet Mode”.
Toggle Pet Mode on.
Tap “send to base” on the bottom of the screen when you are done.
Canceling a False Alarm
If an Entry, Motion, or Glassbreak-triggered alarm is disarmed within 30 seconds of the initial alarm signal, our Monitoring Centre will consider this a false alarm. That means you will not receive a phone call and a request for emergency services will not be issued.
After 30 seconds, the Monitoring Centre will attempt to reach your Emergency Contacts to inform them of the alarm and determine whether or not emergency services will be requested. They'll ask for your safeword if you wish to cancel the request for dispatch. Otherwise, the Monitoring Centre will request guard dispatch to the location of your system.
Please note, giving the wrong safeword will result in an immediate request for guard dispatch and you won't be told you got it wrong to protect anyone who may be under duress. Missing the phone calls to your emergency contacts can also result in a request for guard dispatch. See our What Happens During the Event of an Alarm? article for more information on what happens during an alarm.
Help Center Article
•
Motion Sensor Gen 2
Testing the Motion Sensor Gen 2
Test Mode is a great way to test the connection between your Base Station and other sensors. We recommend periodically placing your system into Test Mode to ensure that your sensors are still communicating with the Base Station without any errors.
Placing Your System Into Test Mode
Disarm your system by pressing OFF on the Keypad
Press the Menu button on your Keypad
Enter your Primary PIN
Scroll until Test Mode is highlighted
Use the arrow and tap to the right to enter Test Mode
You’ll know you are in Test Mode when you see a circle on the Keypad appear with the text, “Test each device by pressing its button”.
Note: If you subscribe to monitoring, you will receive a robo call from the monitoring centre asking you to confirm you placed your system into Test Mode. If you do not answer – no worries! A voicemail will be left to alert you to the system test, and it will not result in a request for dispatch.
Testing the Motion Sensor Gen 2
To test the Motion Sensor Gen 2, first, press the button on the top of the Motion Sensor Gen 2. You’ll hear the Base Station announce, “Motion Sensor” confirming that the test was successful.
To test the motion aspect of the Motion Sensor Gen 2, press the button on the top of the Motion Sensor Gen 2 and then leave the room for at least 15 seconds. This will allow the Motion Sensor to scan the room during that time. After the time has lapsed, re-enter the room. You’ll hear the Base Station announce, “Motion Sensor” from your motion within the room.
Troubleshooting the Motion Sensor Gen 2
The first thing you’ll want to identify is if the placement of your Motion Sensor Gen 2 is correct for the room and mounting position. We recommend mounting it 6 feet off the ground in a corner of the room so that you get the full field of view for motion detection. However, you may also place the Motion Sensor Gen 2 on the edge of a flat surface.
You’ll also want to check the Motion Sensitivity settings within the SimpliSafe® Mobile App. Here, you can toggle on or off Pet Mode, which will lessen the sensitivity of the sensor to allow your pets to roam freely within your home.
You can adjust this setting at anytime by using these steps:
Open the SimpliSafe® App on your phone or tablet
Choose My System from the bottom navigation bar
Select Device Settings
Tap on your Motion Sensor Gen 2
Under Motion Sensitivity, select Pet Mode
Toggle this On or Off
Be sure to save your selection by choosing Save or Send to Base from the bottom of the app
If you are testing your Motion Sensor and do not hear the Base Station announce, “Motion Sensor”, the next thing you’ll want to do is confirm you can hear the Base Station from the location you’re testing in. You can adjust the Base Station’s volume under the Base Station Settings menu, by selecting Voice Prompts.
As a next step, you’ll want to confirm that the Motion Sensor Gen 2 battery is functioning. The Motion Sensor Gen 2 takes a single CR-123A Lithium 3V battery and has a life expectancy of up to 4 years depending on placement and usage.
If you are still unable to hear the Base Station announce, “Motion Sensor” it’s possible that there could be an issue with the location of the Base Station, or there is Radio Frequency (RF) interference at play.
Other electronic devices within your home may communicate on similar frequencies, resulting in wireless interference between your SimpliSafe® devices. Because of this, we recommend keeping your Base Station and Motion Sensor at least 3-5 feet away from the following devices:
Wi-Fi Routers
Large TVs
Weather Stations
Large Appliances (especially in the kitchen and laundry rooms)
Baby monitors
Remote Controlled Garage Door Openers
LED Lights or Christmas Lights
This above list is to give you an idea of what devices may cause interference within your home, and is in no means an exhaustive list of all devices. There may be other devices that output RF or Wi-Fi signals that could impede the connection between your Base Station and SimpliSafe® devices.
Help Center Article
•
Motion Sensor Gen 2
Low Battery Warning for Motion Sensor Gen 2
The Motion Sensor Gen 2 takes a single CR-123A Lithium 3V battery and has a life expectancy of up to 4 years depending on placement and usage.
If you are receiving this error shortly after installing your Motion Sensor Gen 2, this may be related to a firmware issue rather than a low battery within the device.
To troubleshoot this, we recommend confirming that you are running at least version 2.15.8 of the Base Station firmware. You can check what version you’re on by going to:
Open the SimpliSafe® Mobile App on your phone or tablet
Navigate to My System on the bottom navigation bar
Select Base Station Settings
Next to firmware, confirm the version is at a minimum 2.15.8
If the Base Station is on a firmware version lower than 2.15.8 you’ll need to update your system. You can check for updates using the Keypad or on the Overview tab of the SimpliSafe® Mobile App.
Using the Simplisafe® Mobile App:
Open the Simplisafe® Mobile App on your phone or tablet
You should see a tile on the Overview tab detailing there's an "Update available"
You may also manually check for updates using the following steps:
Choose My System from the bottom navigation bar
Select Base Station Settings
If an update is available, it will say so to the right of “Firmware”
Using the Keypad:
Press the Menu Button
Enter your Primary PIN
Scroll to System Settings
Select Check for Updates
Once your system is up to date, you’ll need to power cycle the Motion Sensor Gen 2 by removing a battery from it. To do this, slide the Motion Sensor up and off its’ bracket, then remove the battery for 30 seconds. Then, place the battery back into the device and slide the Motion Sensor back onto its’ bracket.
Next, open the SimpliSafe® Mobile App on your phone or tablet. Navigate to the Overview tab (the home screen) and pull down from the top of the page to refresh the app. This should clear out the low battery warning from the app. If you are still seeing the Low Battery Warning error within the SimpliSafe® Mobile App, you’ll want to remove and reinstall your Motion Sensor Gen 2.
To remove your Motion Sensor Gen 2:
Open the SimpliSafe® Mobile App on your phone or tablet
Choose My System from the bottom navigation bar
Select Device Settings
Tap on the sensor you wish to remove
Choose ‘Remove Device’
Once you have removed your sensor, you can add it back using our Installation Guide.
Still Receiving a Low Battery Warning After These Steps?
If the low battery warning persists after taking those steps, you’ll want to change the battery within the device. The Motion Sensor Gen 2 takes a single CR-123A Lithium 3V battery. To change your Motion Sensor Gen 2 battery, slide the sensor up and off its bracket. Then, replace the battery and slide it back onto its bracket.
Please note that the low battery warning may take up to 24 hours to clear within the SimpliSafe® Mobile App after changing the batteries. To expedite this, you can remove the sensor from your system using the steps above and add it back using our installation guide.
Help Center Article
•
Motion Sensor Gen 2
Motion Sensor Gen 2 Offline
NOTICE: To ensure optimal performance of your sensor, we recommend updating your Base Station firmware to 2.21.4.6. You can manually run an update by using the SimpliSafe® Mobile App and navigating to My System > Base Station Settings > Firmware and tapping on Update Available. If you're experiencing this issue and are already on 2.21.4.6, please follow the troubleshooting steps in this article.
If your Motion Sensor Gen 2 is showing as offline on the SimpliSafe® Mobile App, this is an indicator that the battery within the device needs to be replaced.
The Motion Sensor Gen 2 takes a single (1) CR-123A Lithium 3V battery and has a life expectancy of up to 4 years depending on placement and usage.
To replace the battery, slide the sensor up and off its’ bracket. Then replace the lithium battery and slide the sensor back onto its’ bracket.
Please note that the error may take up to 24 hours to clear from the SimpliSafe® Mobile App after taking these steps. If you want to bypass that timeframe, there are two steps you can take to remove the error from the SimpliSafe® App.
First, place your system into Test Mode and test the sensor to reestablish a connection.
To place your system into Test Mode:
Using your Keypad go to Menu > Enter your Primary PIN > Test Mode
Press and release the button on the Motion Sensor. The Base Station should announce “Motion Sensor” and the timeline on the SimpliSafe® App should show “Motion Sensor Test”.
If the Test Mode step does not work, it’s possible that your sensor has been offline for too long. The best step would be to remove the sensor from the SimpliSafe® App and then add it back to your system.
To remove your Motion Sensor Gen 2:
Open the SimpliSafe® mobile app on your phone or tablet
Choose My System from the bottom navigation bar
Select Device Settings
Tap on the sensor you wish to remove
Choose ‘Remove Device’
Once you have removed your sensor, you can add it back using our Installation Guide.
Help Center Article
•
Motion Sensor Gen 2
Enabling Secret Alerts for your SimpliSafe® Sensors
What are Secret Alerts?
Secret Alerts* are private notifications sent to you by specific sensors you designate to be on a special “alert-only” setting. Sensors on this setting won’t trigger a system alarm or chime to the Base Station, but send a discreet notification directly to you instead. All of your SimpliSafe® cameras will also film a short recording so you have footage of what tripped the sensor.
Requirements
A supported monitoring subscription:
Pro Premium
At least one of the following SimpliSafe® Sensors
Entry Sensor
Motion Sensor
Glass Break Sensor
How do I Enable Secret Alerts?
On iOS (Apple) Devices:
Open the SimpliSafe® Mobile App on your phone or tablet
Select My System from the bottom navigation bar
Choose Device Settings
Then tap the sensor you wish to customise
Choose Off, Home, or Away from under ‘Alarm Mode’
Next, choose ‘Secret Alert’ and then ‘Send to Base’ to save this setting
Repeat for each mode, as necessary
On Android Devices:
Open the SimpliSafe® Mobile App on your phone or tablet
Select My System from the bottom navigation bar
Choose Device Settings
Then tap the sensor you wish to customise
Choose Off, Home, or Away from under ‘Alarm Mode’
Next, choose ‘Secret Alert’ and then ‘OK’
Once you are done, tap ‘SAVE’ on the top right corner of the screen to save this setting
Repeat for each mode, as necessary
To ensure that you are notified whenever a sensor triggers a Secret Alert, make sure that you have push notifications enabled.
Help Center Article
•
Sensors
How to Rename a SimpliSafe® Sensor
There may be a point where you need to rename a sensor for your SimpliSafe® System. Renaming a sensor can be done easily through the SimpliSafe® Mobile App, but you can also rename a sensor using your Keypad. The following will walk you through these steps for each platform so you can pick whichever one is easiest for you.
SimpliSafe® Mobile App:
Open the SimpliSafe® Mobile App on your phone or tablet
Select My System from the navigation bar at the bottom of the app screen
Choose Device Settings
Choose the sensor you would like to modify
Tap the pencil icon next to Name
iOS: Select one of the pre-selected names from the list, or scroll to the bottom and select Custom Name* to input your own name for your sensor
Android: Use the backspace button to delete the existing sensor name. Once removed, you can choose a new name from the drop down menu, or type in the empty field a Custom Name* for your sensor
Be sure to tap on Send to Base or Save to save your settings before exiting
*Note, Custom Names for the Entry Sensor are not supported by Entry Sensor Alert.
Web App:
Log in to the Web App using the browser of your choice on a computer
Select your property from the list on the Account Overview page, if applicable
Choose Devices from the left-hand navigation menu
Click on the sensor you wish to edit
A pop-up will appear to the right of your browser
Select the pencil icon next to your sensor’s name
Enter the new name you wish to use in the field
Select the check mark when done
Be sure to click on Save Changes from the bottom of the pop-up before exiting to save your selection
*Note, Custom Names for the Entry Sensor are not supported by Entry Sensor Alert. To confirm which names are available, please use the SimpliSafe® Mobile App to rename your sensor.
Keypad:
Press Menu
Enter your Primary PIN
Using the arrow keys, choose Devices and then Open to enter the Devices menu
Scroll down to select the sensor you wish to modify
Press the right arrow to choose rename
Choose one of the preset names from the list using the arrow keys, or select Other at the end of the list to enter a Custom Name*
*Note, Custom Names for Entry Sensor are not supported by Entry Sensor Alert at this time.
The Keypad uses ABC mode for typing. In this mode, you'll cycle through the corresponding characters (numbers, symbols, punctuation, letters) using the keys numbered 0-9 on your Keypad.
1 Press
1*
2
3
4
5
6
7
8
9
0
2 Presses
(Space)
a
d
g
j
m
p
t
w
(Space)
3 Presses
!
b
e
h
k
n
q
u
x
4 Presses
"
c
f
i
l
o
r
v
y
5 Presses
#
A
D
G
J
M
s
T
z
6 Presses
$
B
E
H
K
N
P
U
W
7 Presses
%
C
F
I
L
O
Q
V
X
8 Presses
&
R
Y
9 Presses
'
S
Z
10 Presses
(
*For the '1' key, more characters will appear after 10 presses and in this specific order:
) * + , - . / : ; < = > ? @ [ \ ] ^ _ ' { | } ~
Help Center Article
•
Sensors
