Conversation List
Original SimpliSafe® Keypad Installation Guide

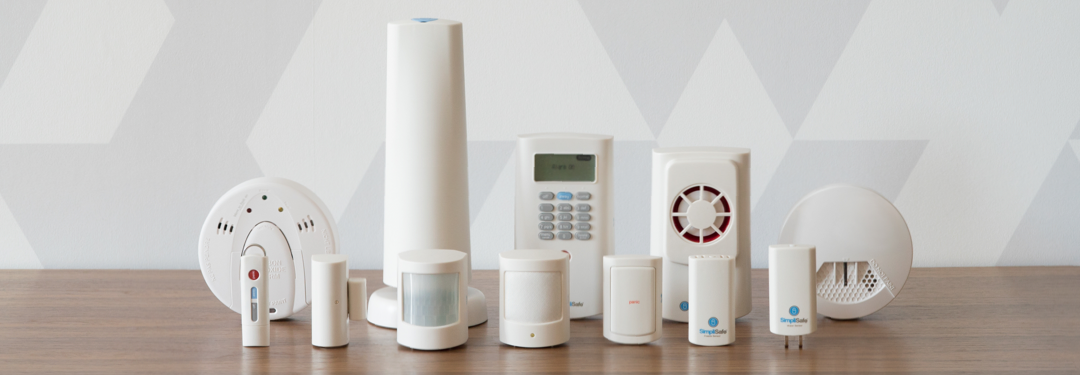
Does your Keypad look like the one pictured to the left? Then you're in the right place! You've got the Original SimpliSafe® system. If you purchased a new system in 2018 or later, you likely have the Gen 3 SimpliSafe®. You can learn more about the differences between the two systems on our Help Center.
Please note that we no longer sell Keypads for the Original SimpliSafe® system. If you are having an issue with your Original SimpliSafe® Keypad, our Support team can tell you more about our upgrade offers.
The Keypad is used to arm and disarm your system. Also, in case of an emergency Keypads have a red panic button, which will trigger the alarm if you press and hold it for more than two seconds. Customers can change their system and device settings through their Keypad’s menu as well.
To install your Keypad, pull the white battery tab out from the battery compartment of your Keypad. The Keypad screen will display, “Welcome to SimpliSafe®.” Remove the liner from the adhesive strips attached to the Keypad’s bracket, and adhere it to the wall. Press and hold the Keypad to the wall for 30 seconds to ensure that it is firmly attached to the wall. The Keypad comes with screws for installation as well if you would prefer your Keypad to be more secure. Slide the Keypad up off of its bracket, and you can screw the Keypad bracket to the wall. Once the bracket has been screwed into the wall slide the Keypad back onto its bracket. We recommend installing your Keypad close to the door(s) you use frequently to enter and exit your home.
Help Center Article
•
Original SimpliSafe
Not Receiving Push Notifications on my Smart Phone for Original SimpliSafe®
Does your Keypad look like the one pictured to the left? Then you're in the right place! You've got the Original SimpliSafe® system. If you purchased a new system in 2018 or later, you likely have the Gen 3 SimpliSafe®. If you're not certain which system you have, you can tell the difference in the Which Version of the SimpliSafe® System Do I Have? article.
This article troubleshoots not receiving system push notifications. If you are not receiving push notifications when your cameras detect motion, please see our Why am I Not Receiving Push Notifications for My Camera? article.
Push Notifications are a great way to get up-to-date information on your system's arming state, alarm status, and more. Push Notifications are only available on SimpliSafe® with an active monitoring subscription. You’ll also want to make sure that critical alarm notifications are enabled on your device so SimpliSafe® can deliver system notifications even if your phone is on silent. Finally, if you have a work profile or focus mode enabled, push notifications may not work. You’ll want to consult with your phone’s manual for further configuration details in these modes.
Ensure system push notifications are turned on
Open the SimpliSafe® mobile app on your phone or tablet
Choose My System at the bottom of the navigation bar
Select Notifications Settings
Go into each section of the app to toggle on Push Notifications, as needed
Emergency Events
Notifications when an alarm is triggered for your system
System Events
Alerts you to your system status when its armed or disarmed, and enables activity notifications for sensors set to Secret Alert
Ensure camera notifications are turned on
Open the SimpliSafe® mobile app on your phone or tablet
Choose My System at the bottom of the navigation bar
Select Camera Settings
Choose the camera you wish to enable alerts for
Tap into Motion Detection and ensure that the Motion Notifications setting is toggled to On
Enabling Push Notifications for SimpliSafe® on your Smartphone
On iOS:
Go to “Settings”
Click “Notifications”
Find the SimpliSafe® app, and make sure notifications are turned on
On Android:
Tap Apps > Settings > MORE
Tap Application Manager > DOWNLOADED
Tap on the SimpliSafe® app
Select or clear the check box next to Show Notifications to enable or disable push notifications
Steps may vary depending on your Android device. Please refer to your phone’s manual to identify where App Notifications may exist.
Make sure your phone is not on Do Not Disturb
If your phone is set to Do Not Disturb, you will not be notified of any activity regarding your SimpliSafe® system. If you do want to receive notifications for your system when your phone is set to Do Not Disturb, take the following steps.
On iOS:
Open your phone’s Settings
Select Focus
This can be found in the second cluster of settings
Click through each of the Focus Modes to check if notifications are silenced
Click through each of the Focus Modes to add the SimpliSafe® Mobile App as an Allowed Notification
On Android:
Open your phone’s Settings
Select Modes and Routines
Check to see if an existing Mode or Routine is on
Add the SimpliSafe® Mobile App to allow notifications during Do Not Disturb
These steps may vary depending on the model of your device. If you have any questions regarding the steps to take, please refer to your devices owner’s manual.
Further troubleshooting
If your notifications are set up correctly, then try closing the app and re-opening it.
If you still are not receiving notifications, try deleting the app and re-installing it.
If you are still unable to receive push notifications, please contact our support team for further assistance.
Help Center Article
•
Original SimpliSafe
Original SimpliSafe® Overview
Does your Keypad look like the one pictured to the left? Then you're in the right place! You've got the Original SimpliSafe® system. If you purchased a new system in 2018 or later, you likely have the Gen 3 SimpliSafe®. If you're not certain which system you have, you can tell the difference by visiting our Help Center.
Please note that we no longer sell Original SimpliSafe® devices. If you have an Original SimpliSafe® system, upgrade to our latest generation today and receive a 50% discount on all your new devices.
The Original SimpliSafe® is a powerful security system that will keep your home or business protected.
SimpliSafe® offers a variety of products to secure your home including Entry Sensors, Motion Sensors, Glassbreak Sensors, Smoke Detectors, Carbon Monoxide Detectors*, Water Sensors**, Temperature/Freeze Sensors, Panic Buttons, Keychain Remotes, and Auxiliary Sirens. All products are equipped with adhesive strips for installation, as well as screws in case you want them to be more secure. You can have up to 41 products synchronized to your Original SimpliSafe® system, and in ideal conditions, they can send signals up to 400 feet away from the Base Station.
The Original SimpliSafe® system has a cellular connection to our monitoring center when paired with a professional monitoring plan, and 24-hour backup batteries to ensure that you’re always protected, even if intruders cut the power.
Users can change their system and device settings through their Keypad’s menu. Residential or business Core Monitoring Plan subscribers can also control their system through the SimpliSafe® Mobile App.
If you have already purchased the Original SimpliSafe® please refer to our installation guide. Once installed, you can use your Keypad to test your system. After your system has completed test mode, you will be able to subscribe your system to professional monitoring.
We strongly recommend that you subscribe your security system to professional monitoring. SimpliSafe® has monitoring centers around the nation to guarantee customers built-in redundancy in the event of a natural disaster. These monitoring centers are open 24 hours a day 365 days a year, so you can be confident whether you are at work or going to sleep that your home is protected. You can be notified immediately via email or text message as well with push notifications, if you are subscribed to a professional residential or business monitoring plan. If you have not activated your system, please visit our How do I Activate Monitoring? article.
If you have an Original SimpliSafe® system, upgrade to our latest generation today and receive a 50% discount on all your new devices.
Help Center Article
•
Original SimpliSafe
No Link to Dispatcher Warning (Original SimpliSafe®)
Does your Keypad look like the one pictured to the left? Then you're in the right place! You've got the Original SimpliSafe® system. If you purchased a new system in 2018 or later, you likely have the Gen 3 SimpliSafe®. If you're not certain which system you have, you can see the difference on our Help Center.
If you purchased your SimpliSafe® System prior to December 2019, you may need to upgrade the cellular module within your Base Station. If the steps below do not resolve your issue, please contact our support team for further assistance.
Your Base Station is the brains of your system and requires a clear connection between your SimpliSafe® devices. In some instances, resetting the Base Station will be a step you need to take to restore communication between the Base Station and your system.
Before Getting Started
Please ensure that your system is disarmed and you have a Philips head screwdriver available.
Additionally, make sure that your Base Station is plugged into a wall outlet and has power prior to taking these steps.
How to Reset the Base Station
Unplug your Base Station from power by removing the cable from the bottom of the device
Using a phillips head screwdriver, remove the screw holding the battery cover in place, and then remove the battery cover
Remove one of the batteries from the Base Station and leave it out for 10-15 seconds
Plug the power adapter back into your Base Station and then reinsert the battery you removed
Place the battery cover back on the Base Station and use a phillips head screwdriver to put the screw back in place
Wait 1-2 minutes for the Base Station to boot back up
Watch this Video for Visuals on Resetting the Base Station
Still Need Help?
If you are still receiving the No Link to Dispatcher warning after resetting your Base Station, our support team can assist you further.
Help Center Article
•
Original SimpliSafe
Original SimpliSafe® Carbon Monoxide Detector Installation Guide
Does your Keypad look like the one pictured to the left? Then you're in the right place! You've got the Original SimpliSafe® system. If you purchased a new system in 2018 or later, you likely have the Gen 3 SimpliSafe®. For Gen 3 SimpliSafe® instructions please visit our Carbon Monoxide Detector Installation Guide article. You can learn about the differences between the Original and Gen 3 SimpliSafe® Systems on our Help Center.
**Please note that we no longer offer CO Detectors for the Original SimpliSafe system. If you are having an issue with your Original SimpliSafe CO Detector, our Support team can tell you more about upgrading your system.
Overview
Carbon Monoxide Detectors are built to detect dangerous leaks that can happen in kitchens, fireplaces, basements, and other areas in your home. Carbon Monoxide is an invisible odorless gas, and without Carbon Monoxide Detectors it could go undetected. We recommend installing Carbon Monoxide Detectors near bedrooms, as well as having one on every floor of your home.
Instructions
To install your Carbon Monoxide Detector remove the white battery activation tab hanging from the battery compartment.
Next, remove the Carbon Monoxide Detector from its mounting bracket by rotating the Carbon Monoxide Detector counterclockwise.
Install the bracket to your wall or ceiling using the included screws and wall anchors.
Once the bracket is secure grab your Carbon Monoxide Detector, position it against the bracket, and twist your Carbon Monoxide Detector clockwise until it clicks into place.
You can pull gently on your Carbon Monoxide Detector to make sure it is securely attached.
Tips
Install the CO detector, near your bedrooms and other sleeping areas.
For maximum protection place one on each level of your home.
Do not install near your furnace, stove, fireplace, kitchen or garage
NOTE: A yellow solid light indicates that the Carbon Monoxide Detector is not attached to the bracket properly, and needs to be adjusted. There should be no solid lights when the Carbon Monoxide Detector is installed properly.
Help Center Article
•
Original SimpliSafe
Warning: Sensor Not Responding (Original SimpliSafe®)
Does your Keypad look like the one pictured to the left? Then you're in the right place! You've got the Original SimpliSafe® system. If you purchased a new system in 2018 or later, you likely have the Gen 3 SimpliSafe®. You can learn about the differences between the Original SimpliSafe® and Gen 3 SimpliSafe® Systems on our Help Center.
Sensors in the SimpliSafe® Original system will issue errors when they fail to check in with the Base Station for a long period of time. This issue is generally caused by one of the following:
The battery or batteries in the device issuing the error need to be replaced.
The device is too far away from your Base Station and is unable to communicate from its current location.
Please refer to the life expectancy of batteries with the SimpliSafe® Original system and its products if you believe that your battery or batteries may need replacing. Most products should last between 3 to 5 years before needing to have their batteries replaced, although the Keypad will need to have its batteries replaced more regularly.
The easiest way to determine whether or not your sensor is too far from your Base Station is to test it. Put the Base Station into Test Mode by following these instructions:
Press “menu” on the Keypad, and enter your Master PIN.
Press “5” on the Keypad. You should see “5. Test”.
Press the “away” button to select the “5. Test” option. You should hear the Base Station announce that it is entering Test Mode. From here, you can test the device in question through standard use (open the door/window if it is an Entry Sensor, press the test button on top if it is a Motion or Glassbreak Sensor, etc.). If the Base Station is able to communicate with the sensor, you’ll hear it acknowledge the test by announcing the type of sensor being tested.
If you did not hear the Base Station acknowledge the test (but you were in earshot range and would have if it had done so), detach the sensor from its mounting bracket and bring it into the room where your Base Station is positioned. Repeat the test by triggering the sensor again. This time, if you hear the test acknowledged, you’ll know that the sensor is too far from the Base Station for it to be able to communicate reliably.
Generally, we advise that you relocate the Base Station rather than the device itself when this happens, as the Base Station should be able to communicate with all of your devices if it is located in a central part of your property. That being said, some areas may be subject to higher levels of interference - such as the kitchen, office where many electronics are plugged in, etc. If you are able to do so, try relocating the Base Station to be closer to these areas if you find yourself experiencing issues with sensors not responding, as it will often resolve the problem.
If your issue does not appear to be resolved, please contact our support team directly for further assistance.
Help Center Article
•
Original SimpliSafe
How to Remove Devices from the Original SimpliSafe® System
Does your Keypad look like the one pictured to the left? Then you're in the right place! You've got the Original SimpliSafe® system. If you purchased a new system in 2018 or later, you likely have the Gen 3 SimpliSafe®. If you're not certain which system you have, you can tell the difference on our Help Center.
You can remove devices from your system through the Keypad or, for customers subscribed to the Core residential or business monitoring plan, the SimpliSafe® Online Account.
If you have Core Monitoring, follow these steps:
Login to the SimpliSafe® Online Account using the browser of your choice and navigate to the Devices heading under Settings
Locate the device you would like to remove and select the X on the far right part of the row
Press Save Changes to confirm the change
Base Station will announce "Your Settings Have Been Synchronized" to confirm the changes were saved
If you have Standard Monitoring, or are on an Unmonitored plan, use these steps:
On your Keypad, press Menu and then enter your Primary PIN
Press the #4 and the Keypad will display "4) Remove Component"
Press the Away Key to Enter
Using the Off and Home Keys, cycle to the device you are removing
Press the Away Key to select the device and again to confirm
The Keypad will display that the device has been removed
Help Center Article
•
Original SimpliSafe