Conversation List
How To Check The Firmware Version of SimpliSafe® Devices
At SimpliSafe®, we are always working on our devices by releasing firmware and software updates for system-wide and device-specific improvements. We are always updating our customers on the latest firmware releases in the Device and System Firmware Updates article so you can be informed about the latest and greatest updates that are coming your way.
If you are ever curious about the firmware that your system and cameras are running, take the steps below.
Checking the Base Station’s Firmware
You can view which firmware version your Base Station is running using either the SimpliSafe® Mobile App or Keypad.
Using the SimpliSafe® Mobile App
Open the SimpliSafe® Mobile App on your smartphone or tablet
Select My System from the navigation bar at the bottom of the screen
Choose Base Station Settings
Next to Firmware, you will see which version your system is running
Using the Keypad
Press the Menu button on your Keypad
Enter your Master PIN
Select System Settings
Scroll down to Diagnostics
Press the right arrow until you see Base Station
Next to Version, you will see what firmware your system is running
Checking a Camera’s Firmware
You can view your camera’s firmware in the SimpliSafe® Mobile App
Open the SimpliSafe® Mobile App on your smartphone or tablet
Select My System from the navigation bar at the bottom of the screen
Choose Camera Settings
Select the camera you want to check
Scroll down to the bottom of the screen until you see Basic Info
Next to Software Version, you will see what firmware your camera is running
Related Articles
Help Center Article
•
Base Station
Outdoor Camera is Detecting Motion too Late
If your Outdoor Camera is detecting motion too late, there are usually two main factors at play: improper placement of your camera, or a poor wireless connection between it and the network.
We recommend reviewing each section below in the order they are presented to troubleshoot your camera.
Using Outdoor Camera’s Connection Check Tool
The Outdoor Camera can run a quick connection check between it and the Base Station to determine if any improvements can be made to the Wi-Fi connection.
During the test, the Outdoor Camera will check the upload speed and the signal strength to paint a better picture of what the overall connectivity looks like. If you receive a fair or poor signal in any category, the app will walk you through some steps you can take to improve upon that connection. This could be steps as simple as moving the Base Station and testing the connection again, or more involved steps such as setting up a separate network for your SimpliSafe® System.
Reviewing the Placement of Your Camera
Placement is one of the most important factors for accurate motion detection for the Outdoor Camera. For accurate motion detection, it’s important to keep our mounting instructions in mind when placing your camera.
Ensure that the Outdoor Camera is placed no lower than 6 feet from the ground, but no more than 8 feet high
The Outdoor Camera should be angled down slightly, roughly a 30° degree angle
If the Outdoor Camera is mounted upside down, the motion sensitivity is halved from ~30 feet to just about ~15 feet
The Outdoor Camera is most sensitive to side-to-side motion, so the camera should be positioned towards areas where people will walk across its field of view, rather than walking towards the camera.
You’ll also want to identify factors that could dramatically change in temperature or interference regarding the Outdoor Camera’s heat signature detection. For example, driveways that can get very hot in the summer, or a flag moving in the wind and causing a cool shadow.
We also recommend reviewing your Outdoor Camera’s Activity Zones to ensure that you are not blocking key areas of your property where motion may be occurring.
You can change your Activity Zones at any time within the SimpliSafe® Mobile App:
Open the SimpliSafe® Mobile App on your phone or tablet
Navigate to the Cameras tab
Select the gear icon for Camera Settings in the upper right corner of the app
Choose your Outdoor Camera
Click into Motion Detection
Scroll down to view Activity Zone
Tap on the squares you want to include or exclude
Once done, be sure to select Save to save your selections
Testing Your Outdoor Camera After Making Changes
Once you have made any changes to your wireless network or the placement of your Outdoor Camera, it’s recommended to test the camera to ensure the changes are working.
To test your camera, first, give it a couple of minutes to go to sleep. Be sure that the camera is not detecting any movement during this time.
Next, walk across the field of view of the camera in a side-to-side motion. After, check the app for the recording and confirm that the changes you made have solved the issue.
Still Having Trouble?
If you are still experiencing latency issues with motion being detected, placing your Outdoor Camera into Performance Mode is the next best option. This feature allows a camera plugged into a continuous power source to avoid delays in waking up and provides pre-roll to the beginning of the recording.
Need More Help?
If you wish to purchase an Outdoor Camera Power Cable or need further assistance, please don’t hesitate to contact our support team directly for further assistance.
Help Center Article
•
Cameras
Outdoor Camera is not Recording
The Outdoor Camera will record motion events to your system’s timeline, with select monitoring subscriptions. Please note that Standard Monitoring and Basic App plans will not allow for your cameras record.
If you are subscribed to a monitoring plan that supports timeline recordings and are not seeing recordings appear within the SimpliSafe® Mobile App or Online Account, this article will walk you through a few steps you can take to get things working again.
Confirming Motion Events are Enabled
The Motion Detection settings for the Outdoor Camera allows you to customize your camera to record motion events that are relevant to you and your system.
To adjust Motion Detection settings:
Open the SimpliSafe® Mobile App on your phone or tablet
Choose My System from the bottom navigation bar
Select Camera Settings
Choose your Outdoor Camera
Select Motion Detection
Ensure that Motion Events are toggled ON
Once you have made your changes, be sure to tap on Save in the upper right corner to save your selections
Repeat these steps with your other Outdoor Cameras, as needed
Motion Notifications are optional, but you’ll receive a push notification whenever motion is detected from this camera.
In the Motion Detection section, you can also customize the sensitivity of your Motion Detection.
High sensitivity detects any motion - which may cause frequent alerts and shorten the battery life!
Medium sensitivity detects general motion - it’s our recommended setting.
Low sensitivity only detects large movements over a wider range
If you need your Outdoor Camera to be more granular, you can also adjust the Motion Type by toggling between People Only and All Motion.
People Only utilizes our proprietary software to only alert you when people are detected by your camera
All Motion alerts you to every motion event - people, animals, vehicles, etc.
Reviewing the Placement of Your Camera
Placement is one of the most important factors for accurate motion detection for the Outdoor Camera. For accurate motion detection, it’s important to keep our mounting instructions in mind when placing your camera.
Ensure that the Outdoor Camera is placed no lower than 6 feet from the ground, but no more than 8 feet high
The Outdoor Camera should be angled down slightly, roughly a 30° degree angle
If the Outdoor Camera is mounted upside down, the motion sensitivity is halved from ~30 feet to just about ~15 feet
You’ll also want to identify factors that could dramatically change in temperature or interference regarding the Outdoor Camera’s heat signature detection. For example, driveways that can get very hot in the summer, or a flag moving in the wind and causing a cool shadow.
If you find that certain things are triggering the camera’s motion detection often, you can adjust the field of view of the camera to avoid them or adjust the Activity Zones to remove these areas from being monitored.
To adjust your Activity Zones:
Open the SimpliSafe® Mobile App on your phone or tablet
Select the Cameras tab from the bottom navigation bar
Tap on the gear icon in the upper right corner for Camera Settings
Choose your Outdoor Camera
Select Motion Detection
Scroll to Activity Zones
Tap the squares you want to exclude. They will be greyed out to indicate that area of the image is not being monitored for activity
Once you have made your changes, be sure to tap on Save in the upper right corner to save your selections
Repeat these steps with your other Outdoor Cameras, as needed
Once you make a change, it’s important to go back and test it to confirm that the settings are effective. Give your camera a couple of minutes to go to sleep, by ensuring there is not any movement during this time. Then, walk in front of the camera and check the app timeline for recordings or notifications of the motion event.
Confirm When the Recording Took Place
Video recordings will automatically be deleted from the timeline after 30 days, however, these can also be manually deleted from the timeline. If a recording was manually deleted, it is not recoverable as it automatically gets removed from the SimpliSafe® servers.
If you are looking for a recording that is older than 30 days, that is also not recoverable.
We recommend downloading clips from your camera to your device if you feel the clip is important to ensure backup and redundancy of any video you may need.
Was the Camera Uninstalled?
If you uninstall a camera from your system, the recordings will automatically be removed from the system’s timeline.
To retrieve these recordings, you can re-install the camera to the system. The system should automatically recognize the recordings even if the camera is not working for other reasons.
Did you Recently Lose Power?
If you lose power at your system’s location you will hear the Base Station announce the power outage. You will also have an event recorded to your timeline to register when the power outage first occurred, and when the power was restored.
The Outdoor Camera requires a Wi-Fi connection to upload recordings. Power outages that impact the Wi-Fi may prevent the camera from storing videos on the SimpliSafe® servers.
Help Center Article
•
Cameras
Solar Panel with Circular Mount Overview and Installation Guide
If your Solar Panel was purchased prior to October 2024 and has a circular mount on the backside of it, this article is for you! If your Solar Panel has a permanent mount that is separate from the Solar Panel body, please visit our Installation Guide for the Solar Panel with Permanent Mount for separate instructions.
Overview
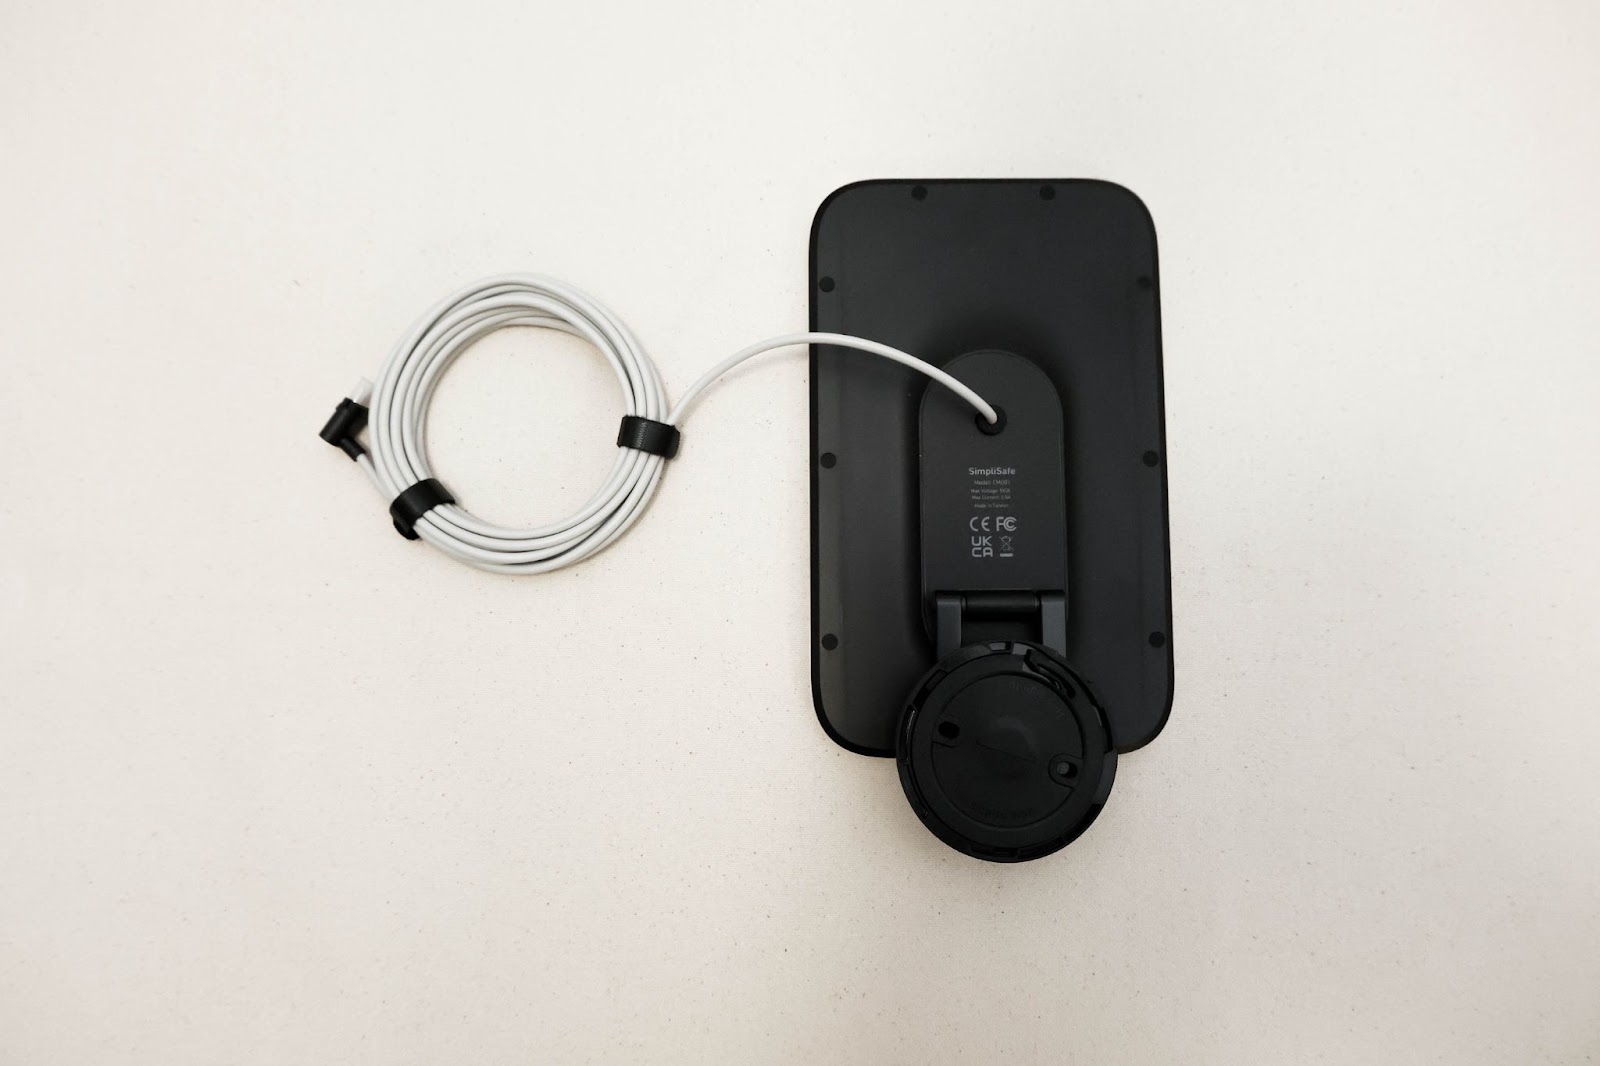
With the Outdoor Camera Solar Panel, you can power your Outdoor Camera without the need to separately recharge or replace the battery. With just 3 hours of direct sunlight per day, the water-resistant Solar panel keeps your Outdoor Camera charged at all times.
Thanks to its 13-foot power cable, the Solar Panel doesn’t need to be installed in the same place as your camera. Simply run the cable to the Outdoor Camera, and use the included cable management velcro sleeves to neatly tuck unused cable behind the Solar Panel.
NOTE: Outdoor Cameras are only compatible with SimpliSafe® Solar Panels, and not third-party solar panels.
Physically Installing Your Solar Panel
First, you’ll need to find a location within 13 feet of your Outdoor Camera. This should be a spot that receives at least 3 hours of direct sunlight per day.
Next, you’ll need the appropriate tools to install your Solar Panel.
If mounting on brick/stucco/stone surfaces:
Use a ¼” masonry drill bit to drill two pilot holes into the surface
Then, use the included anchors and screws to attach the Solar Panel to the wall
If mounting on wood or vinyl surfaces:
Screw the self-tapping screws directly into the wall using a handheld screwdriver
Wood surfaces generally do not require pre-drilled holes
After mounting the Solar Panel, use the omnidirectional mount to aim it towards the direction that will give it the most access to sunlight.
Finally, secure any excess power cord by wrapping it around the base of the Solar Panel, then using the cable management velcro straps to ensure the cord will not get tangled or caught by inclement weather or small animals.
Troubleshooting
Shop Compatible Products
Help Center Article
•
Cameras
Why Does My Camera Keep Losing Its Wi-Fi Connection?
There are two main reasons that a camera may lose its Wi-Fi connection. It may be installed too far from your Wi-Fi router, or it may not have sufficient bandwidth.
If Your Camera Will Not Connect to Wi-Fi During Initial Setup
If you are having trouble connecting your camera to Wi-Fi during a first-time setup, we recommend making sure that your home network is configured to meet our system requirements.
Your Wi-Fi network must be broadcasting 2.4GHz
SimpliSafe® cannot connect to 5GHz networks
Your SSID and password cannot exceed more than 31 characters each
Your network must be configured as WPA2 or WPA3/2 Mixed Mode
WPA3 only networks are not compatible with SimplISafe® at this time
If Your Camera Will Not Connect After Its Setup
If your camera had previously been set up but is now failing to connect to your Wi-Fi network, the Connection Check tool in the SimpliSafe® mobile app will tell you if there are any issues between your network and camera.
How to Run a Connection Check:
Open the SimpliSafe® Mobile App
Tap on the Cameras tab on the bottom of the screen
Select the gear icon in the upper right corner
Choose your camera
Select Connection Check and follow the on-screen instructions to test your signal strength and upload speeds
Using your results, you can improve your camera’s connection with the tips below.
Camera Wi-Fi Requirements:
Signal strength should be above -55dBm. A lower number means a weaker connection between your camera and Wi-Fi router
If you have a low signal strength, try troubleshooting your Wi-Fi network
Upload speeds need to be above 2Mbps
If your upload speed is below 2Mbps, you may need to contact your internet service provider to upgrade your internet package.
If your upload speed is exactly 2Mbps, you should take these steps to improve your upload speed.
Help Center Article
•
Cameras
Outdoor Security Camera Series 2 LED Status Light Colors
The status light located on the front of your Outdoor Security Camera Series 2 indicates key information about your camera. At a glance, it can tell you if the camera is recording, isn’t connected to Wi-Fi, or if agent intervention is occurring when enrolled in SimpliSafe® Active Guard Outdoor Protection. You can watch the video to see the different LEDs up close and personal, or refer to the chart below to see at a quick glance what each status light means.
LED Color
State or Speed
Description
White
Solid
The camera is booting up
White
Blinking
Your camera is ready for setup
Blue
Blinking
A motion event was triggered, or a live stream is happening from within the SimpliSafe® App
Blue
Solid
During installation: Setup was successful; Daily usage: Motion detected
Amber
Slow, Pulsing
An agent has gone live with 2-way audio (Available for Pro Plus and Pro plans only)
Amber
Blinking
An agent is streaming video from your camera (Available for Pro Plus and Pro plans only)
No Light
N/A
Either the LED has been turned off under Camera Settings, or you need to charge your camera's battery
Help Center Article
•
Outdoor Cameras
Outdoor Security Camera Series 2 Overview and Installation Guide
Overview
The Outdoor Security Camera Series 2 is a battery-operated security camera that boasts AI-powered motion detection to help identify potential threats outside your home. Its rugged design holds up to the elements, with an IP65 water-resistant and dustproof rating. The Outdoor Camera Series 2 also features 1080p HD video capture with a 140-degree field of view, all while hosting a built-in 90 dB siren to deter potential intruders when you’re subscribed to SimpliSafe® Active Guard Outdoor Protection.
Looking to purchase an Outdoor Camera Series 2? You can find it available for purchase on our website.
Requirements
A Gen 3 SimpliSafe® System
A 2.4GHz Wi-Fi connection that meets our network specifications
An Outdoor Camera Power Cable (if enrolled in SimpliSafe® Active Guard Outdoor Protection)
Optional: The Outdoor Camera Permanent Mount
Before Getting Started
Before installing your Outdoor Security Camera Series 2, you’ll want to charge the battery for your Outdoor Camera using the included USB charging cable and your own USB power adapter that outputs 7.5W minimum. It can take up to 6 hours to fully charge your battery. You’ll want to fully charge your battery even if you plan on using the outdoor power cable with SimpliSafe® Active Guard Outdoor Protection.
You should also remove the protective film on the face of the Outdoor Camera Series 2 to ensure video quality is not impacted.
What’s in the Box?
Outdoor Security Camera Series 2
Rechargeable Battery
USB Battery Charging Cable
Magnetic Mount
16 Foot Outdoor Camera Power Cable with a outdoor rated power adapter
Mounting Hardware
What You’ll Need
A USB Power Adapter (7.5W minimum) to charge the battery
Phillips Head Screwdriver
Optional: Ladder or Step Stool
Optional: Power Drill
Watch the video below for a hands-on installation experience from our team of experts.
Compliance
Related Articles
Help Center Article
•
Outdoor Cameras