Conversation List
How To Check The Firmware Version of SimpliSafe® Devices
At SimpliSafe®, we are always working on our devices by releasing firmware and software updates for system-wide and device-specific improvements. If you are ever curious about the firmware that your system and cameras are running, take the steps below.
Checking the Base Station’s firmware
You can view which firmware version your Base Station is running using either the SimpliSafe® Mobile App or Keypad.
Using the SimpliSafe® Mobile App
Open up the SimpliSafe® Mobile App on your smartphone or tablet
Select My System from the navigation bar at the bottom of the screen
Choose Base Station Settings
Next to Firmware, you will see which version your system is running
Using the Keypad
Press the Menu button on your Keypad
Enter your Master PIN
Select System Settings
Scroll down to Diagnostics
Press the right arrow until you see Base Station
Next to Version, you will see what firmware your system is running
Checking a camera’s firmware
You can view your camera’s firmware in the SimpliSafe® Mobile App
Open up the SimpliSafe® Mobile App on your smartphone or tablet
Select My System from the navigation bar at the bottom of the screen
Choose Camera Settings
Select the camera you want to check
Scroll down to the bottom of the screen until you see Basic Info
Next to Software Version, you will see what firmware your camera is running
Related Articles
Help Center Article
•
Base Station
Why does my camera keep losing its Wi-Fi connection?
There are two main reasons that a camera may lose its Wi-Fi connection. It may be installed too far from your Wi-Fi router, or it may not have sufficient bandwidth.
If Your Camera Will Not Connect to Wi-Fi During Initial Setup
If you are having trouble connecting your camera to Wi-Fi during a first-time setup, we recommend making sure that your home network is configured to meet our system requirements.
Your Wi-Fi network must be broadcasting 2.4GHz
SimpliSafe® cannot connect to 5GHz networks
Your SSID and password cannot exceed more than 31 characters each
Your network must be configured as WPA2 or WPA3/2 Mixed Mode
WPA3 only networks are not compatible with SimplISafe® at this time
If Your Camera Will Not Connect After Its Setup
If your camera had previously been set up but is now failing to connect to your Wi-Fi network, the Connection Check tool in the SimpliSafe® mobile app will tell you if there are any issues between your network and camera.
How to Run a Connection Check:
Open the SimpliSafe® Mobile App
Tap on the Cameras tab on the bottom of the screen
Select the gear icon in the upper right corner
Choose your camera
Select Connection Check and follow the on-screen instructions to test your signal strength and upload speeds
Using your results, you can improve your camera’s connection with the tips below.
Camera Wi-Fi Requirements:
Signal strength should be above -55dBm. A lower number means a weaker connection between your camera and Wi-Fi router
If you have a low signal strength, try troubleshooting your Wi-Fi network
Upload speeds need to be above 2Mbps
If your upload speed is below 2Mbps, you may need to contact your internet service provider to upgrade your internet package.
If your upload speed is exactly 2Mbps, you should take these steps to improve your upload speed.
Help Center Article
•
Cameras
Maximise the Battery Life of your Smart Alarm Wireless Indoor Security Camera
The battery within the Smart Alarm Wireless Indoor Security Camera can last up to 3 months on a single charge, depending on placement and usage. To charge your camera, we recommend plugging it into power for 6 hours with a 5V, 7.5W USB power adapter that provides 1.5A of current. You will know the battery is fully charged when the LED on the camera turns solid white.
You can maximise your camera’s battery life through its location and various camera settings. The information below will help guide you through our recommendations to improve overall battery life and performance for your Smart Alarm Indoor Camera.
Camera Location
Your camera is activated by a motion sensor for accurate alerts. Because of this, we recommend the following for camera placement:
Place the camera in a room or area where subjects are likely to spend time in if there is an alarm
The motion detector is most sensitive to side-to-side motion with its 125-degree field of view
Do not position the camera so that only a doorway is in frame
Do not position the camera to look outside through a window or doorway
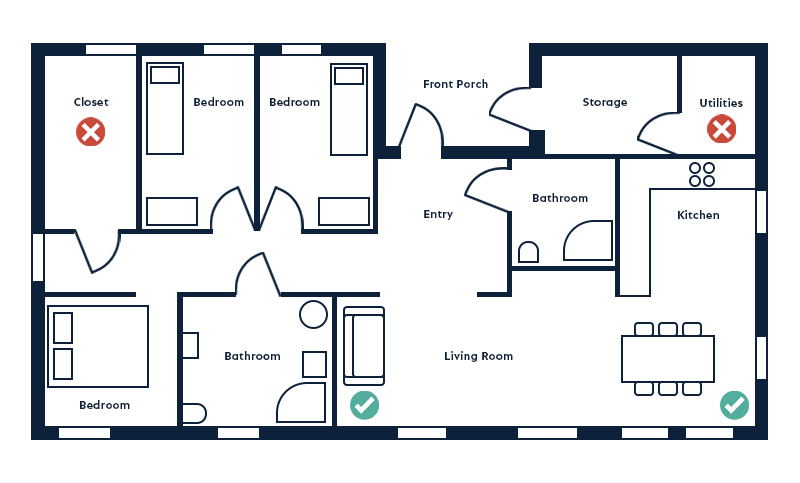
Using the recommendations above, we created a placement guide for the Smart Alarm Indoor Camera with a mock-up floor plan. This floor plan is inserted below and can help provide guidance as to where we’d place the Smart Alarm Indoor Camera in a home with this layout.
Camera Settings
There are many settings that can be adjusted to help extend the battery life of your Smart Alarm Indoor Camera. To access the settings in the SimpliSafe® Mobile App, navigate to:
Click the Cameras tab at the bottom of the navigation bar
Choose the gear icon for Camera Settings in the upper right corner
Select your Smart Alarm Indoor Camera
Adjust your camera’s settings, as needed
Once on the settings menu for your camera, you’ll have the option to change settings. To maximise your battery life, we recommend the following:
Under Motion Detection:
Lower your camera's motion sensitivity setting to low
This will impact how frequently your camera is triggered
Enable People Only detection to ensure your camera is only capturing humans, and is not unnecessarily triggered by other moving objects or animals
Set up Activity Zones for your camera to exclude zones that you don’t want to receive alerts for
Additional Battery Optimisation Tips
If you find that your Smart Alarm Indoor Camera’s battery drains quickly despite following the placement and settings tips above, we also recommend considering the number of times you view a live stream through your camera every day, or how often Secret Alerts are triggered.
Frequently viewing a live stream through your Smart Alarm Indoor Camera will cause its battery to drain faster, so if you use it to monitor babies, children, pets, or vacation homes, expect the battery to last fewer than 3 months. If you do use your Smart Alarm Indoor Camera to constantly monitor a room, we recommend keeping it plugged in with its power adapter mentioned below.
If you have any sensors set to Secret Alert and it is triggered, your camera(s) will record a 10-second clip. Over time, this can cause the Smart Alarm Indoor Camera’s battery to drain faster than expected. If you have a sensor that is constantly being triggered, and it does not need to be set to Secret Alert, we recommend turning off the setting for the sensor to preserve the Smart Alarm Indoor Camera’s battery life. If it does need to be set to Secret Alert, we recommend keeping the Smart Alarm Indoor Camera plugged in with its power adapter mentioned below.
Indoor Camera Power Adapter

The Smart Alarm Indoor Camera requires a 5V, 7.5W USB power adapter that supplies 1.5A of current. You may use any compatible power adapter, or you can purchase the Indoor Camera Power Adapter from our online store or through select retailers. The Indoor Camera Power Adapter is a power brick that will allow you to plug in your Smart Alarm Indoor Camera to provide continuous power to the camera.
Help Center Article
•
Smart Alarm Indoor Camera
How to Recharge the Battery in the Smart Alarm Wireless Indoor Security Camera
The battery inside the Smart Alarm Wireless Indoor Security Camera cannot be replaced.
The battery may take up to 6 hours to fully charge on a 5V, 7.5W USB power adapter with a 1.5A of current, and once charged should last up to 3 months depending on placement and usage. You will know the battery is fully charged when the LED on the camera turns to a solid white.
If you are having trouble charging your Smart Alarm Indoor Camera, please contact our customer support team for additional assistance.
Help Center Article
•
Smart Alarm Indoor Camera
Camera Motion Detection by System Arming State
Overview
You can customise your SimpliSafe® cameras even further by changing the motion detection to coincide with your system’s arming state. This means you can now adjust when your camera records as it is directly tied to your system’s arming state.
For example, if you don’t want your camera to record when the system is set to OFF, but do want it to record when it is in AWAY mode, you can now control these settings.
Motion notifications are determined by your monitoring subscription. You can learn more about which service plans include push or SMS notifications on our Help Centre.
Supported Cameras
The following cameras are compatible with motion detection set by arming state:
Wireless Outdoor Security Camera
Outdoor Camera Series 2
Smart Alarm Indoor Camera
How to Change These Settings
To change your motion detection based on the arming state:
Open the SimpliSafe® Mobile App on your phone or tablet
Choose My System from the bottom navigation bar
Select Camera Settings
Tap on the camera you wish to manage
Under Camera Behavior, tap on your arming state to adjust the settings
Toggle ON or OFF Motion Detection, as needed
Choose SAVE in the upper right corner of the app to save your selections
NOTE: your camera will not record unless motion is detected in any arming state when the arming state is configured to detect motion.
Help Center Article
•
Cameras
Activity Zones for Cameras
Activity Zones are a great way to limit the number of motion detection alerts you receive from your camera inside and outside of your home. You’ll simply tap on the squares within your Motion Detection settings to exclude zones from triggering a motion event.

Supported Cameras
The following cameras support this functionality:
Outdoor Camera Series 2
Outdoor Camera
Smart Alarm Wireless Indoor Security Camera
Video Doorbell Pro
Setting Up Activity Zones
Activity Zones are managed under the Motion Detection menu, within the Camera Settings page of the SimpliSafe® Mobile App. You can follow these exact steps to navigate to that menu:
Open the SimpliSafe® App on your phone or tablet
Choose My System
Select Camera Settings
Tap on the supported camera from the list of available cameras
Choose Motion Detection
Scroll down to Activity Zone
Tap on the squares you wish to exclude from motion detection. The diagonal lines that appear over the square mean that motion will no longer be detected in that zone
Note: you can tap on the squares again to remove the exclusion
Choose SAVE in the upper right corner of the app to save your selections
Note: Video Doorbell Pro will ignore Activity Zones when All Motion is selected on the Motion Detection settings. You will need to choose People Only for Video Doorbell Pro in order for it to respect your Activity Zone exclusions.
Turning Off Activity Zones
If you ever need to turn off the Activity Zone exclusions, you can do so at any time from within the SimpliSafe® Mobile App.
Open the SimpliSafe® App on your phone or tablet
Choose My System
Select Camera Settings
Tap on the camera you wish to manage Activity Zones for
Select Motion Detection
Tap on the squares you wish to include in motion detection. The diagonal lines will disappear indicating that motion detection is now on for that zone
Choose SAVE in the upper right corner of the app to save your selections
Help Center Article
•
Cameras
How to Find the Serial Number for Your SimpliSafe® Device or Camera
During troubleshooting or for account verification purposes, you may be required to identify the serial number for a product within your system. You can easily find the serial number for your devices or cameras within the SimpliSafe® Mobile App.
Locating the Serial Number for your Base Station in the SimpliSafe® App
Open the SimpliSafe® Mobile App on your phone or tablet
Tap on the three-bar menu (hamburger menu) in the upper left corner of the app screen
Choose Help & Support
At the top of the menu you’ll see an Account Number
This is the serial number for your Base Station
Locating the Serial Number for your Devices or Cameras in the SimpliSafe® App
Open the SimpliSafe® Mobile App on your phone or tablet
Choose My System from the bottom navigation bar
Tap on the Device or Camera you wish to manage
Scroll down to Basic Info
Your device or camera’s Serial Number will be listed here
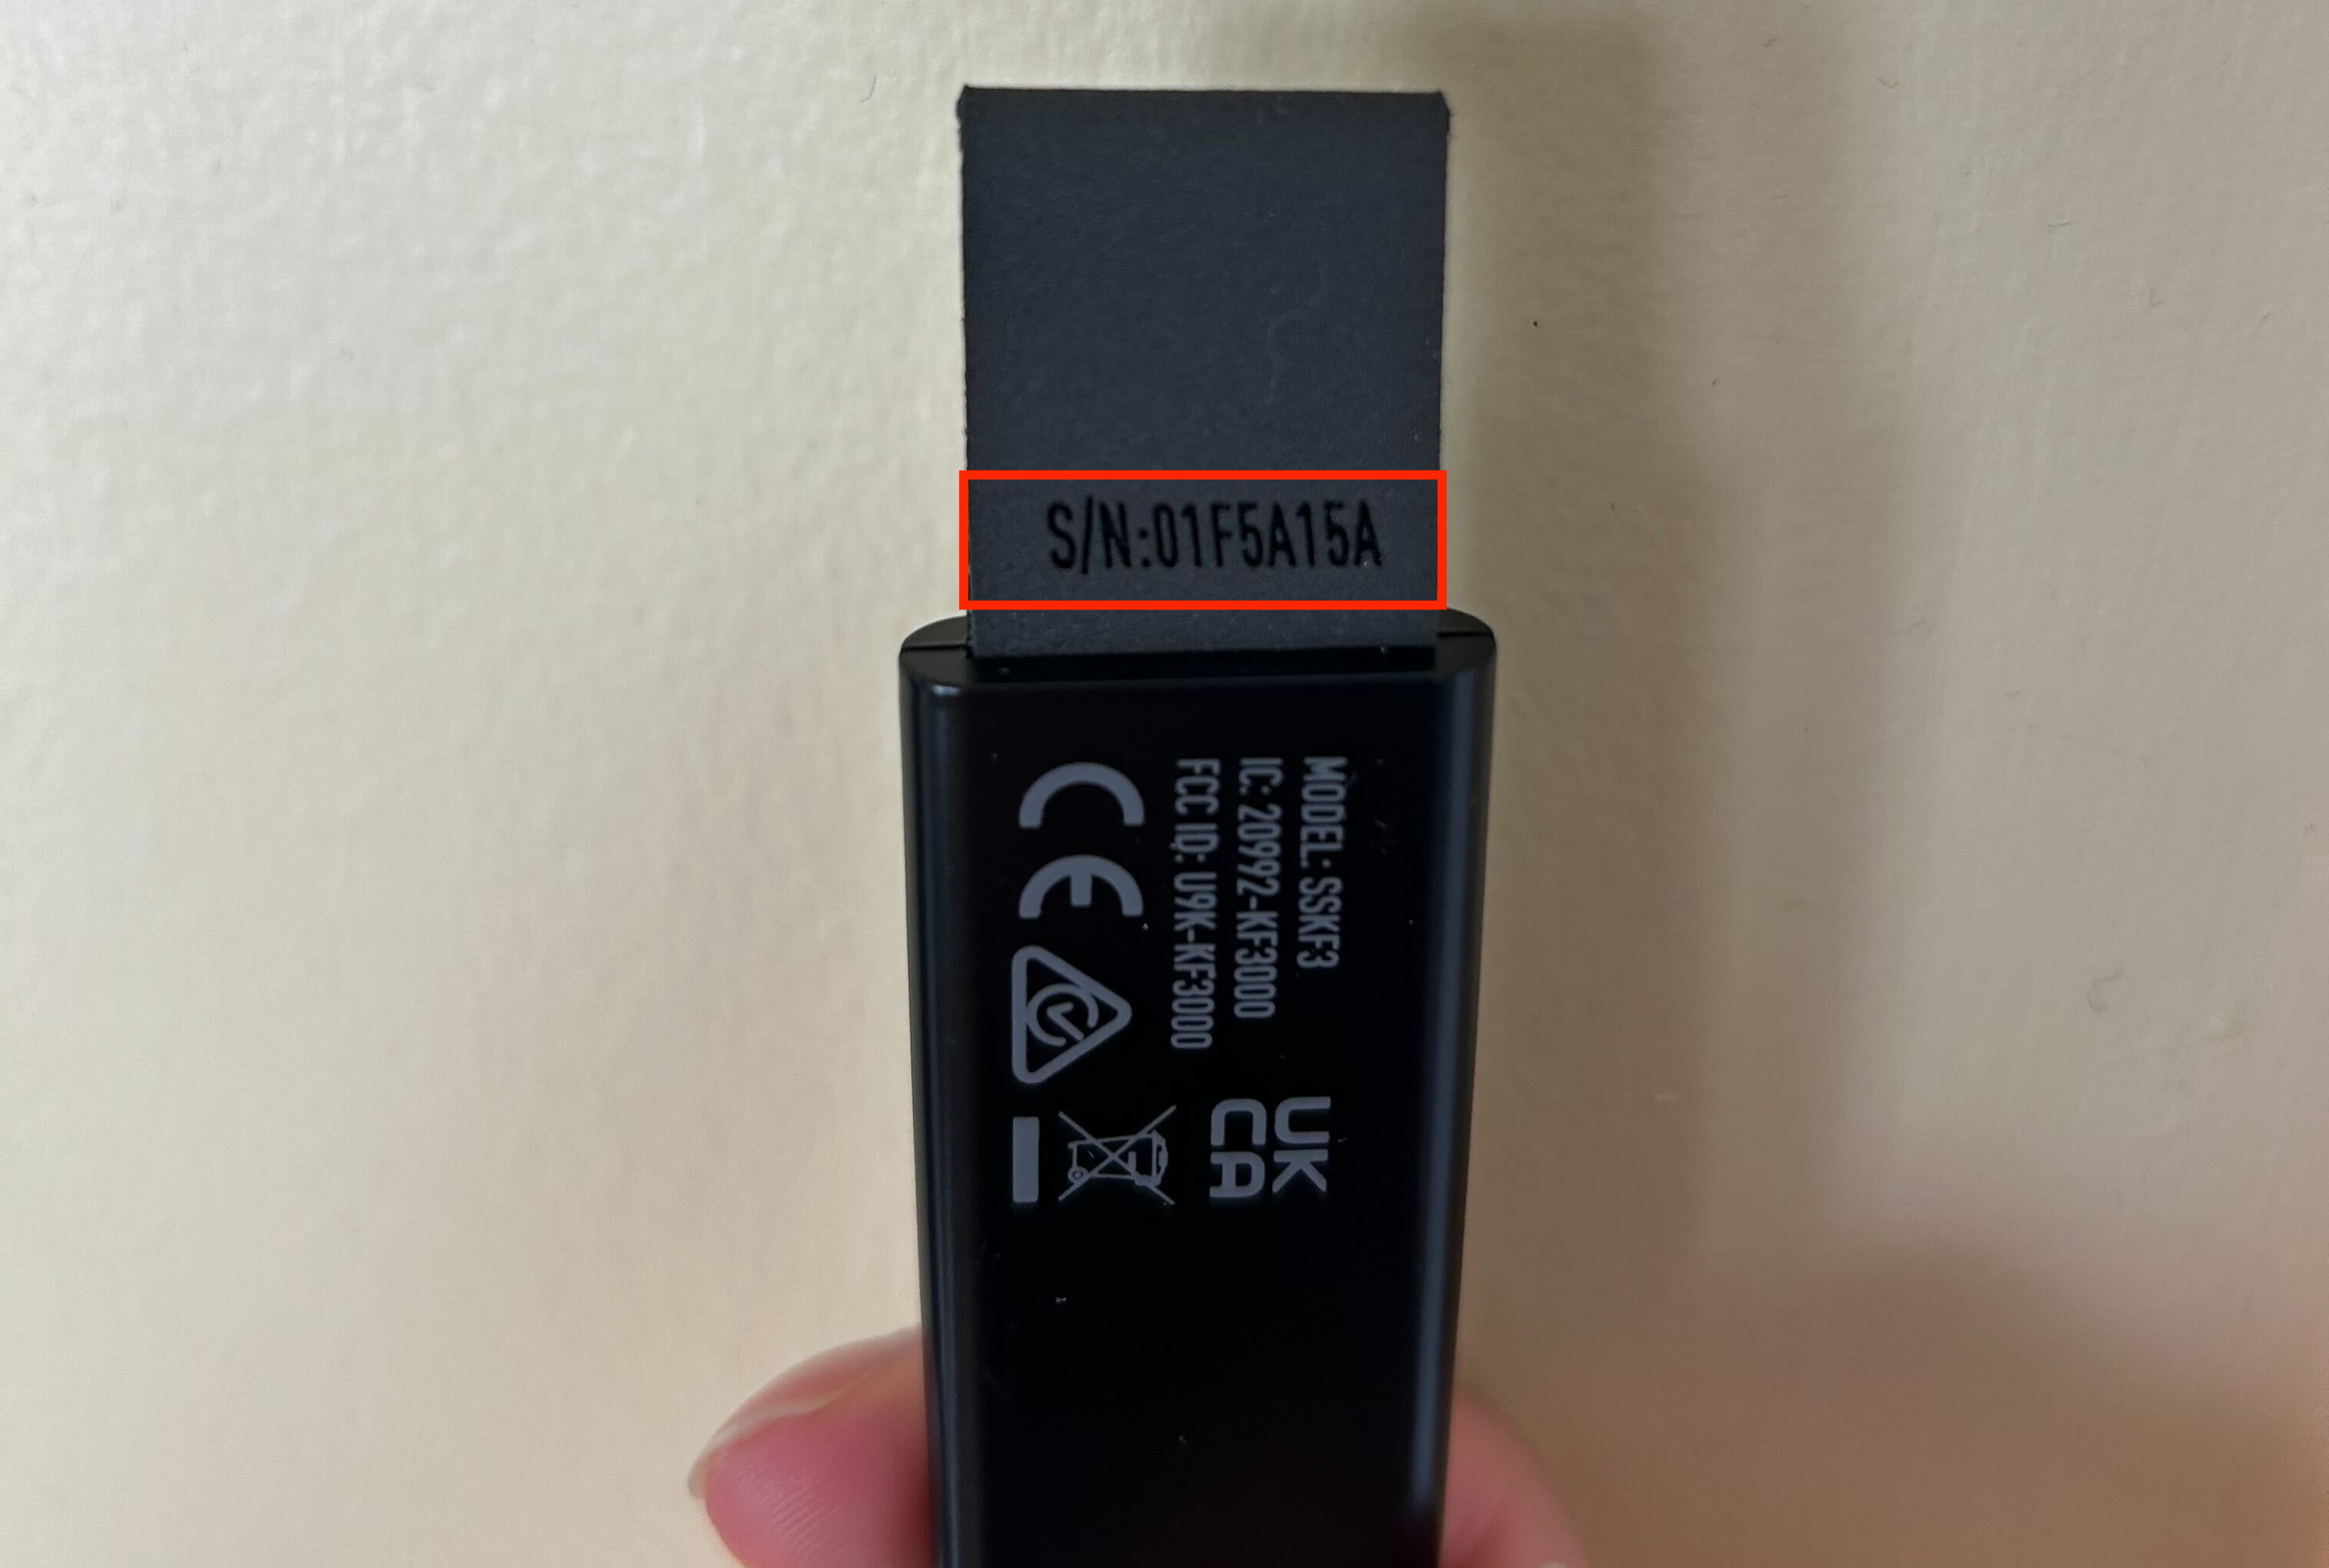
There may be a point where you need to find the serial number on the physical device itself. The rest of the article will guide you through finding the serial number for each product. Click to expand the collapsible section for the product type you wish to learn more about.
Help Center Article
•
Product Support