Conversation List
How to Replace Motion Sensor Gen 2 Battery
Are you receiving a low battery warning on your Motion Sensor Gen 2 shortly after installing the sensor?
If so, this may be related to a firmware issue rather than a low battery within the device.
The Motion Sensor Gen 2 takes a single CR-123A Lithium 3V battery and has a life expectancy of up to 4 years depending on placement and usage.
To change your Motion Sensor Gen 2 battery, slide the sensor up and off its bracket. Then, replace the battery and slide it back onto its bracket.
If your sensor is still offline after taking these steps, skip to the section below for troubleshooting steps.
Is your Motion Sensor Gen 2 offline after replacing the battery?
If the sensor does not come back online after changing the battery, it’s possible that your sensor has been offline for too long. The best step would be to remove the sensor from the SimpliSafe® Mobile App and then add it back to your system.
To remove your Motion Sensor Gen 2:
Open the SimpliSafe® Mobile App on your phone or tablet
Choose My System from the bottom navigation bar
Select Device Settings
Tap on the sensor you wish to remove
Choose ‘Remove Device’
Once you have removed your sensor, you can add it back using our Installation Guide.
Help Center Article
•
Motion Sensor Gen 2
Motion Sensor Gen 2 Not Responding
If your Motion Sensor Gen 2 reports a ‘Not Responding’ error through the SimpliSafe® Mobile App, there are 3 quick steps you can take to resolve this. The following article will walk you through the steps needed to solve the issue and clear the error from your app.
Step 1: Updating Your Base Station Firmware
It’s always a best practice to keep your system updated with the latest firmware. If you are on version 2.15 or higher, your Base Station will do this automatically. However, you can also manually check for updates at any time using the SimpliSafe® Mobile App:
Open the SimpliSafe® Mobile App on your phone or tablet
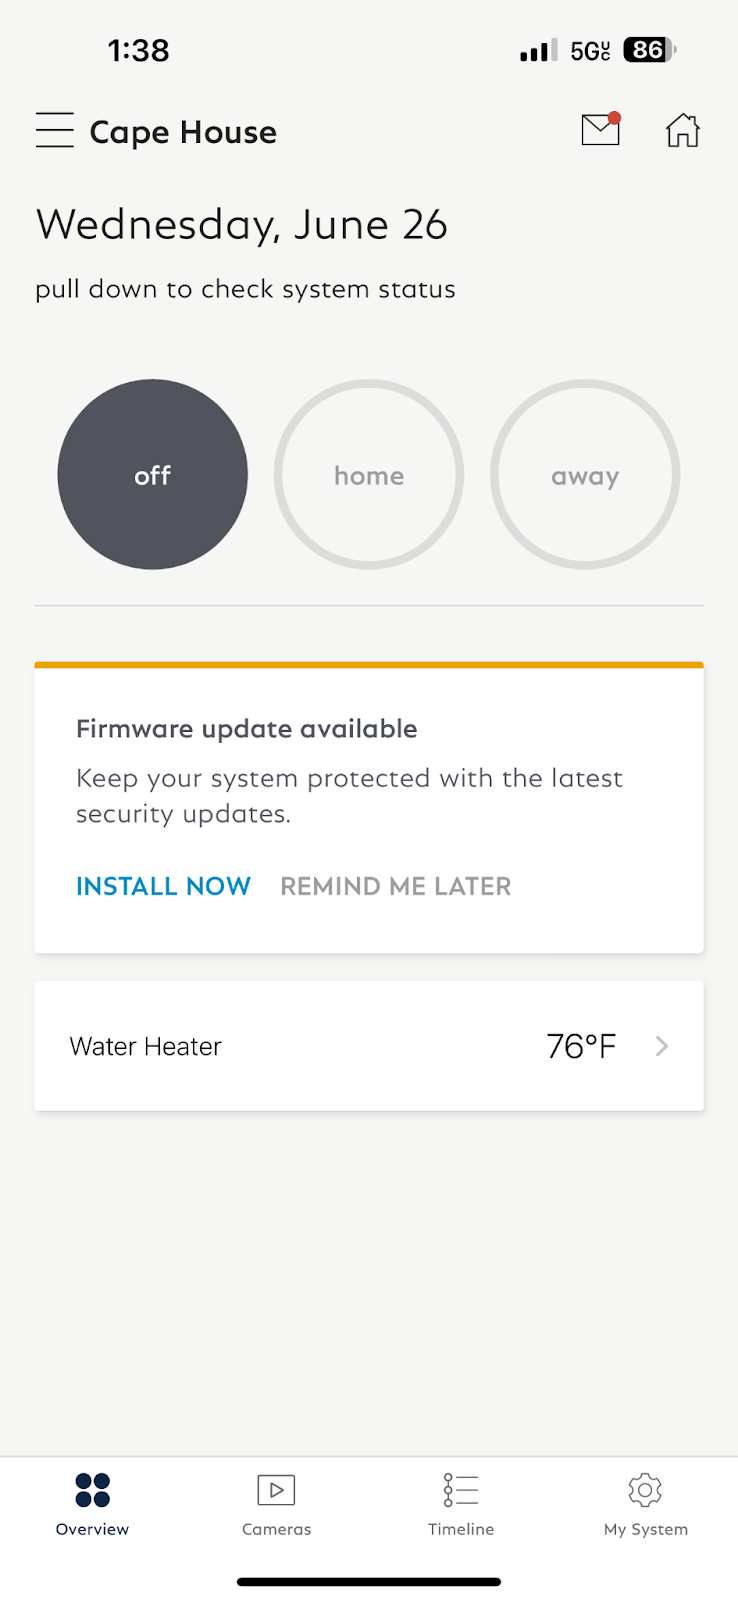
You should see a tile on the Overview tab detailing there’s an “Update Available”
You may also manually check for updates using the following steps:
Choose My System from the bottom navigation bar
Select Base Station Settings
If an update is available, it will say so to the right of “Firmware”
You’ll also be notified of updates through the Message Center, which is an inbox in the app labeled with an envelope and a red dot on it.
Step 2: Power Cycle Your Sensor
As a next step, you’ll want to power cycle the Motion Sensor Gen 2. Follow the steps below to do this:
Slide the sensor up and off its bracket. This may require some light force to add leverage to, especially if you did not wall mount the sensor
Remove the battery from the sensor and leave it out for at least 10 seconds
Place the battery back in the sensor
Slide the sensor back onto its bracket
This step should clear out the error within the SimpliSafe® App. However, if you are still running into any issues after taking these steps, feel free to contact our support team for additional troubleshooting.
Related Articles
Help Center Article
•
Motion Sensor Gen 2
How to Find the Serial Number for Your SimpliSafe® Device or Camera
During troubleshooting or for account verification purposes, you may be required to identify the serial number for a product within your system. You can easily find the serial number for your devices or cameras within the SimpliSafe® Mobile App.
Locating the Serial Number for your Base Station in the SimpliSafe® App
Open the SimpliSafe® Mobile App on your phone or tablet
Tap on the three-bar menu (hamburger menu) in the upper left corner of the app screen
Choose Help & Support
At the top of the menu you’ll see an Account Number
This is the serial number for your Base Station
Locating the Serial Number for your Devices or Cameras in the SimpliSafe® App
Open the SimpliSafe® Mobile App on your phone or tablet
Choose My System from the bottom navigation bar
Tap on the Device or Camera you wish to manage
Scroll down to Basic Info
Your device or camera’s Serial Number will be listed here
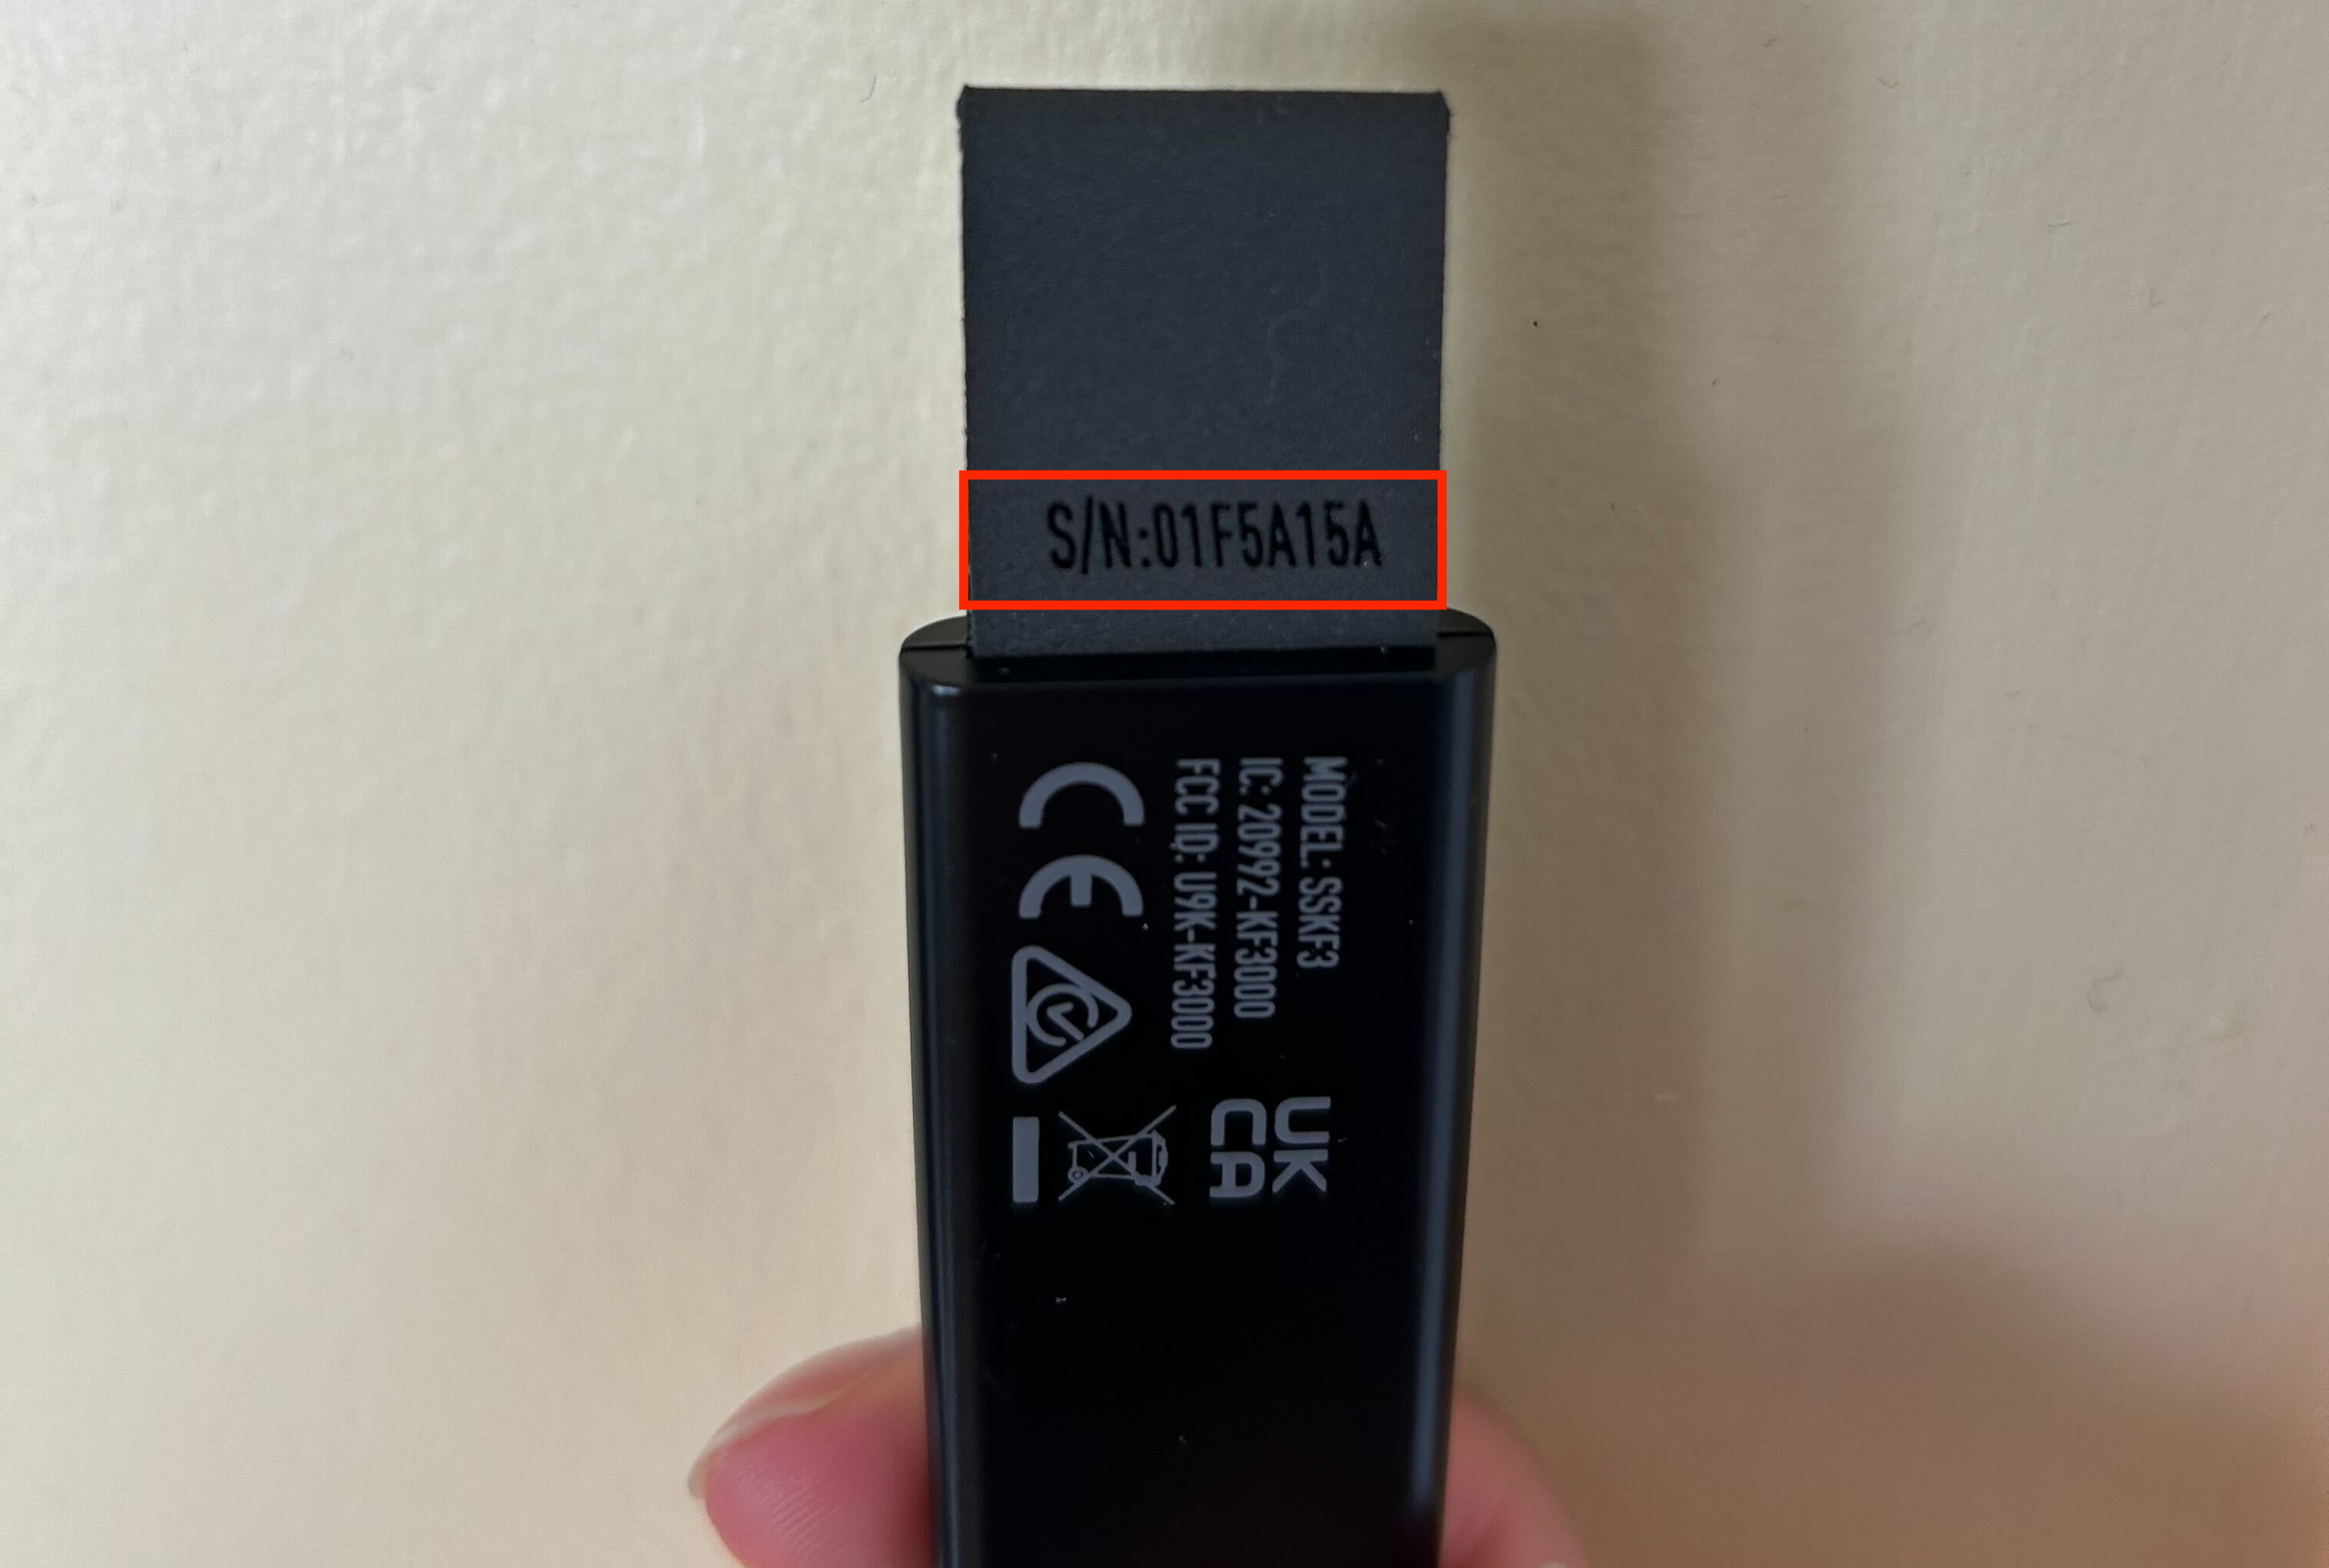
There may be a point where you need to find the serial number on the physical device itself. The rest of the article will guide you through finding the serial number for each product. Click to expand the collapsible section for the product type you wish to learn more about.
Help Center Article
•
Product Support
How To Replace Glassbreak Sensor Battery
The Glassbreak Sensor takes a single CR-123A Lithium 3V battery and has a life expectancy of up to 3 years depending on placement and usage.
To change your Glassbreak Sensor battery, slide the sensor up and off its bracket. Then, replace the lithium battery and put the device back in place.
If your sensor is still offline after replacing the battery, skip to the section below for troubleshooting steps.
Is your Glassbreak Sensor still offline after replacing the battery?
If the sensor does not come back online after changing the battery, it’s possible that your sensor has been offline for too long. The best step would be to remove the sensor from the SimpliSafe® Mobile App and then add it back to your system.
To remove your Glassbreak Sensor:
Open the SimpliSafe® Mobile App on your phone or tablet
Choose My System from the bottom navigation bar
Select Device Settings
Tap on the sensor you wish to remove
Choose ‘Remove Device’
Once you have removed your sensor, you can add it back using our Installation Guide.
Help Center Article
•
Glassbreak Sensor
Testing the Motion Sensor Gen 1
Test Mode is a great way to test the connection between your Base Station and other sensors. We recommend periodically placing your system into Test Mode to ensure that your sensors are still communicating with the Base Station without any errors.
Placing Your System Into Test Mode
Disarm your system by pressing OFF on the Keypad
Press the Menu button on your Keypad
Enter your Primary PIN
Scroll until Test Mode is highlighted
Use the right arrow key to enter Test Mode
You’ll know you are in Test Mode when you see a circle on the Keypad appear with the text, “Test each device by pressing its button”.
Note: If you subscribe to monitoring, you will receive a robo call from the monitoring centre asking you to confirm you placed your system into Test Mode. If you do not answer – no worries! A voicemail will be left to alert you to the system test, and it will not result in a request for dispatch.
Testing the Motion Sensor Gen 1
To test the Motion Sensor Gen 1, first, press the button on the top of the Motion Sensor Gen 1. You’ll hear the Base Station announce, “Motion Sensor” confirming that the test was successful.
To test the motion aspect of the Motion Sensor Gen 1, press the button on the top of the Motion Sensor Gen 1 and then leave the room for at least 60 seconds. This will allow the Motion Sensor to scan the room during that time. After the time has lapsed, re-enter the room. You’ll hear the Base Station announce, “Motion Sensor” from your motion within the room.
Troubleshooting the Motion Sensor Gen 1
The Motion Sensor Gen 1 has a sensitivity slider on the back of the device underneath the battery tab to adjust its range of motion within a room. The first thing you’ll want to do is adjust the slider to a higher or lower setting, and see if that makes a difference with the sensor responding to motion.
If you are testing your Motion Sensor and do not hear the Base Station announce, “Motion Sensor”, the second thing you’ll want to do is confirm you can hear the Base Station from the location you’re testing in. You can adjust the Base Station’s volume under the Base Station Settings menu, by selecting Voice Prompts.
As a next step, you’ll want to confirm that the Motion Sensor Gen 1 battery is functioning. The Motion Sensor takes a single CR-123A Lithium 3V battery and has a life expectancy of up to 5 years depending on placement and usage.
If you are still unable to hear the Base Station announce, “Motion Sensor” it’s possible that there could be an issue with the location of the Base Station, or there is Radio Frequency (RF) interference at play.
Other electronic devices within your home may communicate on similar frequencies, resulting in wireless interferencebetween your SimpliSafe® devices. Because of this, we recommend keeping your Base Station and Motion Sensor at least 3-5 feet away from the following devices:
Wi-Fi Routers
Large TVs
Weather Stations
Large Appliances (especially in the kitchen and laundry rooms)
Baby monitors
Remote Controlled Garage Door Openers
LED Lights or Christmas Lights
This above list is to give you an idea of what devices may cause interference within your home, and is in no means an exhaustive list of all devices. There may be other devices that output RF or Wi-Fi signals that could impede the connection between your Base Station and SimpliSafe® devices.
Help Center Article
•
Motion Sensor Gen 1
Entry Sensor Offline
If your Entry Sensor is showing as offline on the SimpliSafe® Mobile App, this could be an indicator that the battery within the device needs to be replaced.
The Entry Sensor takes a single (1) CR-2032 Lithium 3V battery and has a life expectancy of up to 5 years depending on placement and usage.
To replace the battery, slide the sensor off the bracket towards the pairing button. Then replace the lithium battery and slide the sensor back onto its’ bracket. If your Entry Sensor has a cover over the battery, you’ll need to remove that first. You can refer to our Help Centre article for further instructions.
Please note that the error may take up to 24 hours to clear from the SimpliSafe® Mobile App after taking these steps, as the Base Station needs to check back in with the sensor. If you want to bypass that timeframe, you’ll need to follow the steps below to remove the sensor and re-add it to your system.
Help Center Article
•
Entry Sensor
Motion Sensor Gen 2 Not Detecting Motion
If your Motion Sensor Gen 2 is not detecting motion, it’s likely the result of the placement of the Sensor itself.
We recommend mounting the Motion Sensor Gen 2 in the corner of your room. For optimal performance, the sensor must be mounted 6 feet from the ground. This ensures proper coverage throughout the room. The Motion Sensor Gen 2 has a 90-degree field of view, and can see outwards 35 feet. You can also mount the Motion Sensor Gen 2 to a flat wall. If opting for this, note that the Sensor will only capture the 90 degrees out from its center, meaning that 45 degrees on either side will not be captured.

If you are placing the Motion Sensor Gen 2 on a flat surface rather than mounting it, we recommend having it as close to the edge of the surface as possible.
Once you have made any changes to your Motion Sensor Gen 2, you can then begin to test the sensor.
Use your Keypad to place the system into Test Mode
Tap the Menu Button
Enter your PIN
Use the arrow keys to scroll until Test Mode is highlighted
Arm your system to AWAY mode and leave the room during the exit delay
Pro-tip, bring your Keypad with you for the next steps
After the exit delay has counted down and the system is armed, wait 2-3 minutes and then enter the room
You should begin to hear your system count down for the entry delay. You can now disarm your system using your Keypad.
If you did not hear the entry delay trigger and waited 2-3 minutes before re-entering the room, please contact support for additional troubleshooting.
Help Center Article
•
Motion Sensor Gen 2