Conversation List
Video Doorbell Pro Requirements
The Video Doorbell Pro is designed to replace an existing wired doorbell with a mechanical chime. If your home does not have a wired doorbell, you will need to install wiring first in order to use the Video Doorbell Pro.
Below is a list of what is needed to install Video Doorbell Pro within your home or business:
Existing doorbell wiring
A mechanical chime. Not compatible with digital chimes.
A transformer with 8-24VAC, 10-30VA
In addition to the above, you’ll need to make sure that you have a 2.4GHz Wi-Fi connection, and an Android or iOS phone or tablet that meets our system requirements.
A monitoring subscription is not required to use the Video Doorbell Pro, however, with one you can take advantage of videos being recorded to your timeline, and features like Video Verification.
Shop Related Products
Help Center Article
•
Video Doorbell Pro
How Does the Alarm Trigger for the Smart Alarm Wireless Indoor Security Camera?
The Smart Alarm Wireless Indoor Security Camera is the first camera from SimpliSafe® that can trigger an alarm. By default, the alarm trigger is only on when the system is set to away and can trigger depending on the motion type that was selected in settings (People Only or All Motion).
When the camera detects motion and the alarm trigger is on, the camera will use AI to verify the motion type and then trigger the alarm if necessary. By default, the camera will enter the entry countdown before sounding the siren and notifying our monitoring center. You also have an option to bypass the entry countdown by turning on Instant Trigger located under Camera Behavior in settings. In this case, the camera and system will sound the siren immediately and notify our monitoring center.
When your camera is enrolled in Video Verification, as well as intruder intervention, the monitoring center will also be notified of the alarm at your location and an agent will use the camera’s audio feed to intervene. Intruder intervention is only available with residential or business Pro Plus, Pro, and Core monitoring plans.
Help Center Article
•
Smart Alarm Indoor Camera
How Do Recordings And Live Streams Work During An Intruder Intervention Alarm?
The Smart Alarm Wireless Indoor Security Camera introduces a new recording type to your timeline when using it with intruder intervention.* This recording event will capture what an agent saw, heard, and/or said (using 2-way audio) when an alarm event is triggered. This new recording will appear as part of a new “Agent Viewed Camera Live” event in your timeline.
Monitoring agents can only access the live feed from your Smart Alarm Indoor Camera when an alarm is triggered. If you try to access the feed while a monitoring agent is viewing it, you’ll receive an error that reads “Camera may be unavailable if in use by a monitoring agent”. This is to ensure the agent can act swiftly during the event of a real emergency.
If you receive this error during an alarm event and have intruder intervention enabled, please wait a few moments before trying to check the live stream again.
*Available with a residential or business subscription to Pro Plus, Pro, or Core monitoring, and when you opt-in to intruder intervention.
Help Center Article
•
Smart Alarm Indoor Camera
Chime Connector Overview and Installation Guide
Overview
The Chime Connector is a useful part of the Video Doorbell Pro’s setup. It helps to prevent the Video Doorbell Pro from producing a constant buzzing sound, or from not sounding at all when its button is pressed. If you do not have a Chime Connector, contact our Support team and they will send one to you free of charge.
Video Doorbell Pro Requirements
To ensure that your Video Doorbell Pro works as intended, it’s also important to make sure that its setup aligns with its requirements. The Video Doorbell Pro and Chime Connector require:
Existing doorbell wiring
A mechanical chime. The Video Doorbell Pro and Chime Connector are not compatible with digital chimes.
A transformer with 8-24VAC, 10-30VA.
Installing the Chime Connector
The steps below will walk you through the most common setup for the Chime Connector. If your chime’s setup does not match the steps below, please utilize the instructions in the SimpliSafe® app.
If you are installing a Video Doorbell Pro and Chime Connector together as a first time setup, please see the in-app
installation guide. If you already have an existing Video Doorbell Pro installed, find the Chime Connector install steps in the Video Doorbell Pro’s settings.
You can install your Chime Connector by taking the following steps:
Important: Use your circuit breaker to turn off the power to your existing doorbell. To locate the correct switch, try turning off each switch one at a time until your doorbell no longer rings
Find the doorbell chime and remove its cover
Some covers can be lifted off, others may need to be unscrewed
If your chime has batteries, the Chime Connector cannot support it
Locate the screw terminals on the chime. The terminals might be listed as Front/Trans/Rear, A/B/C, or 1/2/3. You will need to use the middle (“Trans”) and left or right (“Front”) terminal, which should have wiring attached to them
Loosen the screw to disconnect the “Front” wire and clip it into the Chime Connector’s blue wire connector
Note: Trim the “Front” wire to 1/4 inch before inserting it into the wire connector

Attach the other blue wire from the Chime Connector to the “Front” terminal

Loosen the screw to disconnect the “Trans” wire and clip it into the Chime Connector’s white wire connector
Note: Trim the “Trans” wire to 1/4 inch before inserting it into the wire connector

Attach the other white wire from the Chime Connector to the “Trans” terminal

Find a place to put your Chime Connector, then replace the cover. You can use the adhesive backing to stick the Chime Connector outside the box, or tuck it inside if there’s room. Make sure it won’t interfere with moving parts and muffle your chime
Turn the power back on and make sure your doorbell still rings. If it doesn’t, double check that the wire connections are tight
If you are still having trouble, please contact our Support team for additional help.
User Manual
Shop Related Products
Help Center Article
•
Video Doorbell Pro
Wireless Outdoor Security Camera Flashing Yellow During Setup
A flashing yellow light during the setup of your Outdoor Camera indicates that the camera has successfully connected to Wi-Fi, but is having trouble reaching the SimpliSafe® servers.
This issue can occur for a variety of reasons, such as:
A firewall setting on your router is blocking access to SimpliSafe®
You may have certain ports blocked on your network that SimpliSafe® uses
Outdoor Camera requires port 8890 to be open
A temporary connectivity issue with the SimpliSafe® servers
The best option would be to first diagnose the issue locally on your network, then try setting up your camera again. If you still run into the same problem during setup, first contact your Internet Service Provider (ISP) for additional troubleshooting. If you require additional support after working with your ISP, don’t hesitate to reach out to our support team directly.
Help Center Article
•
Outdoor Cameras
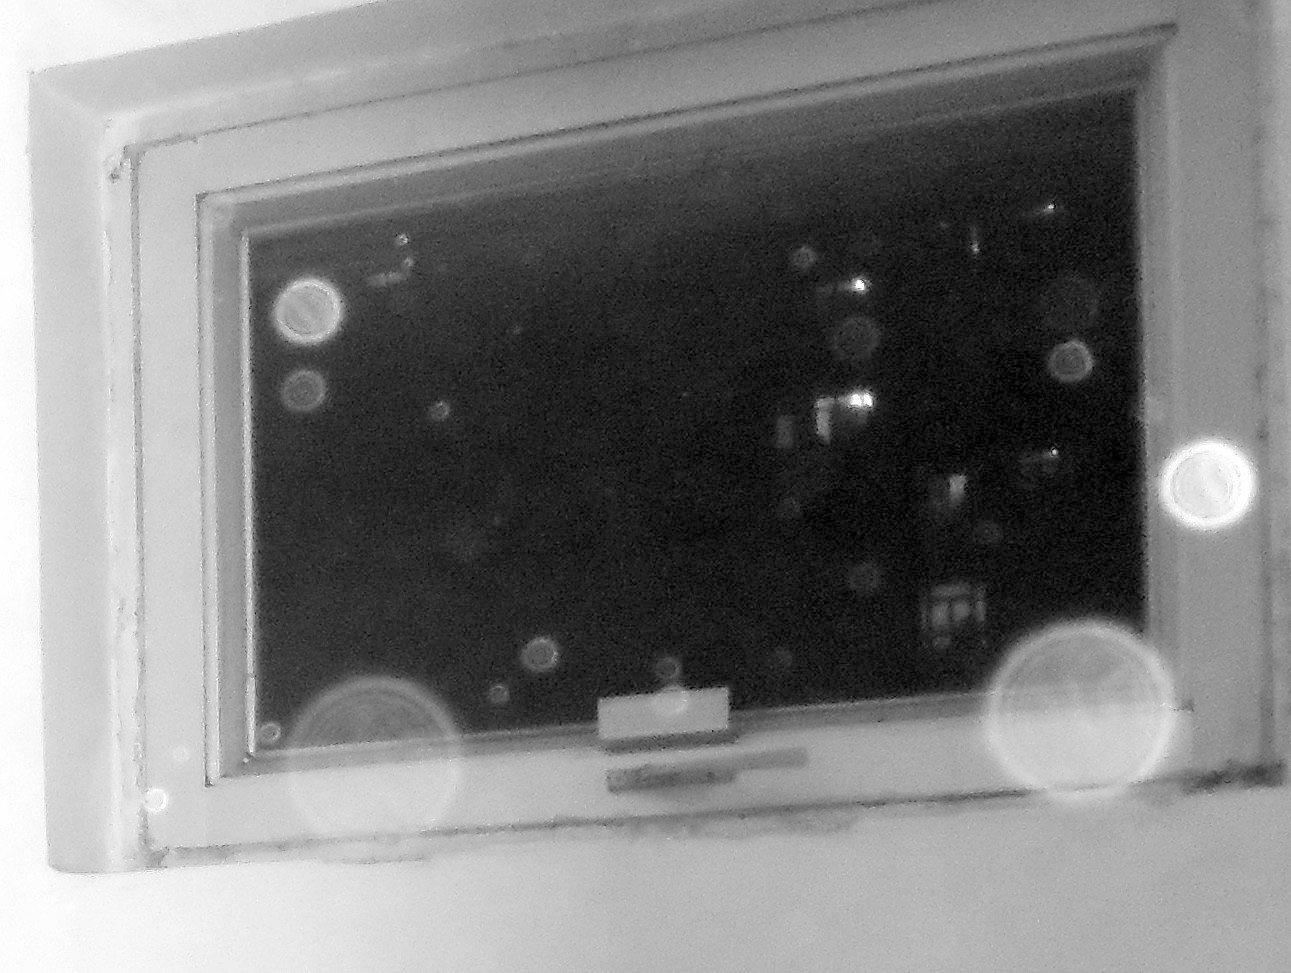
Why Do I See Orbs Or Bubbles When My Camera Is Using Night Vision?
What is it?
When in lowlight settings, your camera may pick up ghost-like "orbs" while recording. Don't worry—there's nothing supernatural going on. These orbs are called backscatter, or near-camera reflection. Backscatter happens when dust, water droplets, or other particles are present on or very close to the lens, causing light to reflect through the unfocused images.
Additionally, a camera facing out a window, using Night Vision, or with a persistent status light can result in lower image quality overall.
If the "orbs" appear to be moving, it is likely dust particles in the air floating by closely to the camera lens. This is a perfectly normal occurrence and there is no way to completely eliminate it. However, you can get rid of stationary or persistent particles by carefully cleaning your lens.
Location Issues
Other times, this interference may be due to issues with the location of the camera. If your camera is near or directed toward a bright light, such as a street light or flood light, this can also cause backscatter to occur in the recording or stream. In this case, you can move or adjust the position of your camera away from the bright lights to improve its view and reduce interference.
If the issue persists, try swapping the camera with another in a different location if you have more than one. Otherwise, please contact support and we'll be happy help!
Doorbell Backscatter
If dust or other particles in the air frequently trigger your Doorbell, you can adjust its motion sensitivity. However, it does have built-in Day and Night Modes based on the light level outside, which will set the motion sensitivity to a lower setting when there is low light (and therefore a greater possibility of detecting those pesky airborne particles).
Help Center Article
•
Cameras
How much internet speed do I need for my camera?
Why does internet speed matter?
The speed required to operate the cameras depends on the resolution quality that the camera is sending. Higher resolutions require faster speeds. This is especially important to consider during alarms when all cameras will record simultaneously and therefore require more speed.
We also have an interactive guide that can walk you through improving upload speeds on our Help Center.
Recommended Speeds
Below is a list of recommended upload speeds per camera. If you have multiple cameras streaming at once, the speed requirements go up accordingly.
Video Resolution
Recommended Upload Speed Minimum
1080p
2 mbps per camera
720p
1.5 mbps per camera
480p
0.75 mbps per camera
Help Center Article
•
Cameras