Conversation List
Wireless Outdoor Security Camera Installation Guide
Overview
With the Wireless Outdoor Security Camera, enjoy advanced security from the outside, with 1080p HD video and a 140-degree ultra-wide field of view. Plus digital zoom and full-colour vision at night - so nothing slips by undetected.
Before Getting Started
Before you get started, let’s make sure you have everything you need to get up and running.
In order to successfully set up the Outdoor Camera, you will need the following:
A Base Station and Keypad with the updated firmware (check for firmware updates on your Keypad)
A screwdriver for mounting on wood or vinyl surfaces
A 7/64 drill bit for mounting on brick, stucco or tile surfaces
Compatible USB adapter ( 5V, 7.5W+, 1.5A+, not included)
A 2.4GHz network connection
Note: the Outdoor Camera’s optimal temperature threshold is 20°C to 50°C
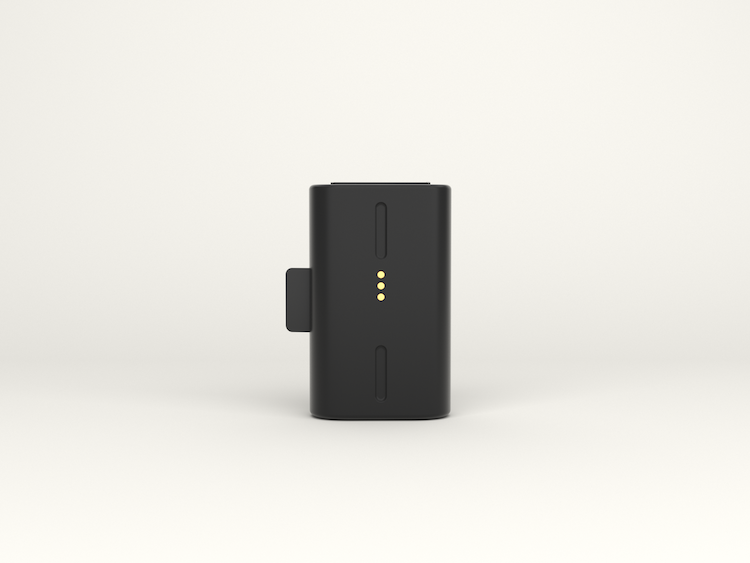
We also recommend fully charging the battery in your camera prior to beginning the installation process. It will take up to 6 hours for the battery to fully charge. You'll know it's charged when all 3 lights on the battery are illuminated, and not pulsing.
Watch the video below for a hands-on experience from our team of experts for the installation process
Troubleshooting
Related Articles
Help Center Article
•
Outdoor Cameras
What does “Camera Connection Dropped” mean?
A "Camera Connection Dropped" error means that during a live stream, SimpliSafe® stopped receiving video from the camera. This is often the result of poor internet connectivity between the camera and the router, causing the camera to be unable to upload video for viewing as fast as it is recording.
The video that your camera has already recorded but not yet been able to stream is stored in the camera's own internal memory. However, the camera’s memory is limited and may eventually be insufficient to hold the video backlog. If the camera's memory becomes full before it can upload the recordings, the video stream will end.
For more information on how to strengthen your camera's connection, please refer to the How to Improve Wi-Fi Signal Strength and How to Improve Upload Speed articles in the Help Centre.
Help Center Article
•
Cameras
Can't Connect Camera to Wi-Fi During Setup
If you are having trouble connecting your camera to Wi-Fi during a first-time setup, we recommend making sure that your home network is configured to meet our system requirements.
A short list of requirements can be found below:
Your Wi-Fi network must be broadcasting 2.4GHz
SimpliSafe® cannot connect to 5GHz networks
Your SSID and password cannot exceed more than 31 characters each
Your network must be configured as WPA2 or WPA3/2 Mixed Mode
WPA3 only networks are not compatible with SimpliSafe® at this time
We recommend that you have your 2.4GHz and 5GHz networks separated and not merged together. Most routers and Internet Service Providers (ISPs) by default will create a single network that broadcasts 2.4GHz and 5GHz at the same time. To separate the network, you may need to consult with your ISP or reach out to your router manufacturer for configuration assistance.
If your phone is currently connected to a 5GHz network and you have a 2.4GHz network available, please use your phone’s Wi-Fi settings to switch the network before trying to connect the camera to Wi-Fi again.
iPhone / iOS Wi-Fi Settings:
Go to Settings on your iOS device
Choose Wi-Fi
Select the 2.4GHz network from the list of available networks
Enter your password
Tap on Join in the upper right hand corner to connect to the Wi-Fi network
Android Wi-Fi Settings:
Go to Settings on your Android device
Navigate to Wi-Fi Network
Select your 2.4GHz network from the list of available networks
Enter your password
Save to connect to the Wi-Fi network
*These steps may vary depending on your Android device. Consult with your phone's manual for further directions.
Still having trouble connecting?
There are steps you can take if your camera keeps losing Wi-Fi Connection after setup. If you continue to have trouble after taking those steps, don’t hesitate to reach out to our Support Team for further assistance.
Help Center Article
•
Cameras
What is the Difference Between Battery Power and Performance Mode for the Outdoor Security Camera Series 2?
Your Outdoor Security Camera Series 2 comes with a rechargeable battery that lasts up to 3 months, depending on placement or usage. You may also purchase an outdoor power cable to allow your camera to stay awake and active, so that it may enter Performance Mode. This feature allows you to enjoy faster live streams and also begins recording the moment a motion event is observed while AI determines if the event was a person or another object (such as a passing car, a tree blowing in the wind, or an animal).
Battery Only Mode
Performance Mode
Power Source
Battery (Up to 3 months)
Wired
Motion Type
User Controlled
(Default: People Only)
User Controlled
(Default: People Only)
Motion Sensitivity
User Controlled
(Default: High)User Controlled
(Default: High)Night Vision
User Controlled
(Default: On)User Controlled
(Default: On)Spotlight
User Controlled
User Controlled
Video Quality
User Controlled
(Default: 1080p)User Controlled
(Default: 1080p)Siren
User Controlled
(Default: On)User Controlled
(Default: On)Mic & Audio
User Controlled
(Default: On)User Controlled
(Default: On)Status Light
User Controlled
(Default: On)User Controlled
(Default: On)Help Center Article
•
Outdoor Camera Series 2 UK
How to Rename a SimpliSafe® Camera
There may be a point where you need to rename a camera for your SimpliSafe® System. Renaming a camera can be done easily through the SimpliSafe® Mobile App, but you can also rename a camera using your Web App. You can select a name from the list of prepopulated names within the SimpliSafe® Mobile app, or choose your own custom name. If using a custom name, we recommend avoiding the use of apostrophes within the camera name - as this can impact the ability to download recordings.
The following article will walk you through these steps for each platform so you can pick whichever one is easiest for you.
SimpliSafe® Mobile App:
Open the SimpliSafe® Mobile App on your phone or tablet
Navigate to the Cameras tab
Click on the Gear Icon in the upper right corner for Camera Settings
Tap on the Camera you wish to edit
Press the pencil icon next to your Camera to enter the editor
Choose from the list of preset names or select Custom Name to type in your own name
Depending on your device, you may also need to tap SAVE before exiting to save your selections
Web App:
Log in to the Web App using the browser of your choice on a computer
Select your property from the list on the Account Overview page, if applicable
Choose Devices from the left-hand navigation menu
Click on the Camera you wish to edit
A pop-up will appear to the right of your browser
Select the pencil icon next to your Camera’s name
Enter the new name you wish to use in the field
Select the check mark when done
Be sure to click on Save Changes from the bottom of the pop-up before exiting to save your selection
Help Center Article
•
Cameras
Maximising Battery Life of the Wireless Outdoor Security Camera
One of the most exciting features of the Outdoor Camera is its wireless power capability and long-lasting battery life. When fully charged, the battery is designed to last for up to 3 months. And since the life of the battery is completely dependent on usage and settings, there are several methods that can be used to maximise the battery of your camera and keep your home protected 24/7.
Camera Location
Your camera is activated by a motion sensor for accurate alerts. If your camera is in the vicinity of a high-traffic area, like a busy road or sidewalk, the motion sensor will be triggered more frequently for unnecessary movement, which can cause the battery to drain.
If your camera is in a high-traffic area:
Reposition the camera so that its field of view does not include the busy road or sidewalk. You can also set up Activity Zones to avoid monitoring these areas.
Make sure there are no tree branches or large plants obstructing the camera's view.
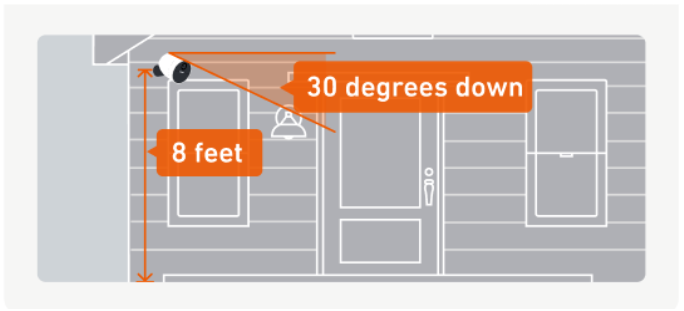
Be sure to mount your camera 6 – 8 feet above the ground, with the lens facing downward at a 30-degree angle.
Camera Settings
There are multiple settings that can be adjusted to help extend the battery life of your camera. To access these settings in the SimpliSafe® Mobile App:
Choose the Camera tab from the bottom navigation bar
Select the gear icon for Camera Settings in the upper right corner
Tap on your Outdoor Camera
Battery-saving settings:
Lower your camera’s motion sensitivity setting to Default or Low. This will impact how frequently the camera is triggered.
Enable People-Only Detection to ensure your camera is only capturing humans, and is not unnecessarily triggered by other moving objects or animals.
Set up Activity Zones to control the areas that the camera will monitor. This is helpful if there is a high-traffic zone in the view that you do not need to monitor.
Use Standard Night Vision mode instead of the Spotlight feature.
Charge the Camera’s Battery Fully
Charge it Completely
If the Outdoor Camera’s battery is not completely charged, it will give the appearance of draining quickly. The Outdoor Camera’s battery takes up to 6 hours to charge completely. When the battery is charging, you will see a blinking white light. You’ll know the battery is fully charged once all 3 lights are illuminated and no longer blinking.
Use the Correct Power Adapter
The Outdoor Camera’s battery requires a USB power adapter with an output of 5.0V, 1.5A+. Failure to use the correct power adapter can result in the battery not charging completely.
A list of power adapters that fit this requirement are:
The SimpliCam® Wired Indoor Security Camera’s adapter
The Smart Alarm Wireless Indoor Security Camera’s adapter
Most iPhone (Apple) adapters
Most Android adapters
If you don’t know the output of your power adapter, most models will have it printed on the device itself, as seen in the image below.

If you are using the correct power adapter, make sure that you are plugging it into an outlet directly in a wall. Using a USB power strip or USB power hub may not supply efficient power to charge the battery.
Help Center Article
•
Outdoor Cameras
Can’t Connect Camera to Wi-Fi After Setup
If your camera had previously been set up but is now failing to connect to your Wi-Fi network, the Connection Check tool in the SimpliSafe® mobile app will tell you if there are any issues between your network and camera.
How to Run a Connection Check:
Open the SimpliSafe® mobile app
Tap on the Cameras tab on the bottom of the screen
Select the gear icon in the upper right corner
Choose your camera
Select Connection Check and follow the on-screen instructions to test your signal strength and upload speeds
Using your results, you can improve your camera’s connection with the tips below.
Camera Wi-Fi Requirements:
Signal strength should be above -55dBm. A lower number means a weaker connection between your camera and Wi-Fi router.
If you have a low signal strength, try troubleshooting your Wi-Fi network
Upload speeds need to be above 2Mpbs
If your upload speed is below 2Mbps, you may need to contact your Internet Service Provider (ISP) to upgrade your Internet package.
If your upload speed is exactly 2Mbps, you should take these steps to improve your upload speed.
Help Center Article
•
Cameras